How to Choose the Right Lining for Your Bagging Jacket for Ultimate Comfort
For superior results, consider layering materials that enhance durability and comfort. Selecting a high-thread-count cotton lining, for instance, yields temperature regulation while maintaining breathability. This choice ensures that the garment not only feels pleasant against the skin but also withstands wear over time.
Incorporate lightweight insulation such as Thinsulate or similar synthetics to add warmth without bulk. This approach preserves the sleek silhouette of your outerwear while providing the warmth necessary for colder climates.
Exploring options for moisture-wicking properties can significantly mitigate discomfort during wear. Fabrics treated with advanced moisture management technology actively draw perspiration away from the body, ensuring freshness throughout the day. Pair these materials with an appropriate outer layer to achieve a harmonious blend of function and style.
Additionally, consider integrating anti-static and stain-resistant treatments to maintain the pristine condition of the pieces. These features not only enhance performance but also elevate the overall user experience by reducing maintenance needs. With these strategies, you can significantly improve the quality and functionality of your garments.
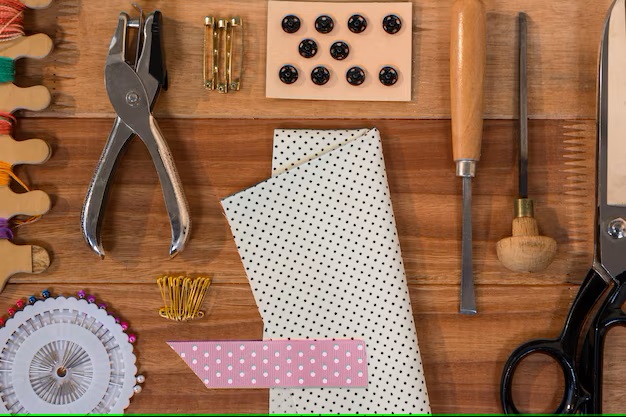
Identifying Suitable Fabrics for Jacket Linings
Select lightweight and breathable materials such as silk and polyester to enhance comfort and mobility. Silk offers a luxurious feel and impeccable drape, while polyester provides durability and ease of care. Both can retain shape and resist wrinkling, ideal for inner layers.
Moisture Management
Incorporate moisture-wicking fabrics like rayon or nylon blends to improve moisture management. These options help regulate body temperature and enhance wearer comfort by reducing humidity buildup inside the outer garment. Fabrics treated with moisture-repellent finishes can also add extra protection against dampness.
Insulation Properties
For cooler climates, consider thermal materials such as fleece or quilted linings. These fabrics provide insulation while remaining lightweight. Look for materials with a high loft to trap air pockets, enhancing warmth without bulk. Choose versions that remain breathable to prevent overheating during activity.
Step-by-Step Guide to Layering Materials in Bagging
Begin with selecting the primary substrate that offers desired strength and durability. Ensure it meets specific requirements for weight and texture.
Next, layer a moisture barrier material directly atop the primary substrate. This prevents water intrusion and enhances longevity.
Incorporate an insulating layer to improve thermal resistance. Choose materials like fleece or quilted batting to provide warmth without adding excessive bulk.
For aesthetic value, add an outer decorative layer. Select a fabric that complements the overall design while ensuring compatibility with the inner layers.
Utilize high-quality adhesives or stitching methods for securing each layer together. This will prevent separation during usage and maintain structural integrity.
After assembling the layers, allow ample time for adhesives to cure or stitches to settle before any further processing. This ensures durability and prevents any shifts in the arrangement.
Conduct a thorough inspection of the completed assembly to identify any inconsistencies in layering. Make necessary adjustments or reinforcements where needed.
Lastly, test the layered combination under various conditions to evaluate performance. This allows for any modifications to be made before final application.
Optimizing Stitch Techniques for Durable Lining
Utilize a triple stitch to enhance strength and longevity. This method provides added security, reducing the risk of unraveling over time.
Incorporate reinforced stitching at stress points, such as corners and edges, to withstand wear. This can be achieved by doubling the thread in these areas, ensuring increased support.
Experiment with varied thread types. For instance, poly-cotton blends offer a balance of flexibility and resilience, while nylon threads can provide higher abrasion resistance.
Consider using a lock stitch, which prevents the threads from slipping. This type of stitch is particularly beneficial in high-movement areas, maintaining structural integrity.
- Employ a zigzag pattern for seam allowances to prevent fraying.
- Ensure even tension during stitching to avoid puckering, which can compromise durability.
- Test stitch length; longer stitches can flex better, while shorter stitches are typically stronger but less flexible.
Regularly inspect and maintain sewing machines to ensure consistent stitch quality. A well-maintained machine reduces the risk of skipped stitches and irregular tension.
Incorporate a pre-wash process for your materials. This minimizes future shrinkage and helps threads settle, which enhances durability.
Lastly, educate the handling and care instructions for end-users to maintain the integrity of the constructed pieces.
How to Select the Right Insulation for Temperature Control
Choose insulation materials with excellent thermal resistance (R-value). Aim for a high R-value to minimize heat transfer, which directly impacts comfort and energy efficiency.
Consider Material Types
Evaluate options such as down, synthetic fibers, or certain advanced composites. Down provides superior warmth but requires careful maintenance. Synthetic fibers are easier to care for and perform well in humid conditions.
Assess Weight and Bulk
Opt for lightweight insulation for mobility and ease of layering. Bulkier materials may offer higher warmth but can restrict movement. Strive for a balance between warmth and freedom of motion.
Check moisture-wicking properties to ensure insulation stays dry, as damp insulation loses its protective qualities. Breathability is also important to prevent overheating.
Prioritize insulation that matches activity levels; high-output activities call for lighter, more breathable materials, while lower activity levels may benefit from heavier insulation for enhanced warmth.
Customizing Lining Patterns for Enhanced Comfort and Fit
Selecting the right fabric choice significantly influences the overall experience. Opt for breathable materials like cotton or silk blends to improve moisture-wicking properties. This ensures temperature regulation during wear, making garments more comfortable.
Implement adjustable inner layers. Including elements like drawstrings or elastic trims allows the wearer to tailor the fit, enhancing comfort while maintaining an elegant appearance. This customization also accommodates various body shapes and preferences.
Incorporating Textures and Patterns
Add visual and tactile interest with textures. Incorporating subtle patterns or embossed designs can enhance the aesthetic appeal without overwhelming the garment. Consider using contrasting colors or tonal shades to create depth, ensuring they resonate with the exterior design.
Personalized Measurements
Taking accurate measurements is pivotal. Use a variety of points on the body to establish a well-fitted pattern. Custom measurements accommodate differences in sizing, ensuring that the inner layer adapts seamlessly to the wearer’s physique.
| Material | Features | Recommendation |
|---|---|---|
| Cotton | Breathable, absorbent | Best for casual climates |
| Silk | Luxurious, smooth | Ideal for formal occasions |
| Polyester Blend | Durable, wrinkle-resistant | Great for everyday use |
Overall, the integration of custom patterns and materials significantly boosts functionality and wearability. Prioritizing user experience results in greater satisfaction and a refined wardrobe.
Maintenance Tips for Prolonging the Life of Bagged Linings
Clean regularly with a soft, damp cloth to prevent dirt buildup. Use a gentle detergent for deeper stains but always spot test before full application.
Storage Practices
Store in a cool, dry place away from direct sunlight. Avoid folding to prevent creases; instead, use padded hangers or roll items to maintain shape.
Inspection Routine
Conduct regular checks for signs of wear, such as fraying or discoloration. Address any issues promptly by repairing minor damages before they escalate.
Q&A: Bagging jacket lining
How does the bagging technique help achieve a clean finish when sewing a lined jacket, especially at the bottom hem and sleeve cuff?
The bagging technique allows you to sew the jacket and lining together almost entirely by machine, resulting in a clean finish with no visible raw edges. After attaching the lining to the jacket at the neckline, front edge, and bottom hem, the lining sleeve is inserted into the sleeve of the outer jacket. Once the lining and jacket are joined, you turn the jacket right side out through an opening in the sleeve lining. This method creates smooth sleeve hems and a neat bottom hem without hand stitching the outer edges.
What steps are included in a tutorial for bagging a lining when constructing a jacket with a facing and sleeve lining?
A tutorial for bagging a lining begins with sewing the facing to the lining, matching the neckline and front edge. Right sides together, the lining is sewn to the jacket shell at the front facing, neckline, and along the hem of the sleeve. Then, the jacket and lining are stitched along the bottom hem and front edge, leaving an opening in the sleeve lining. Once all seams are secure, you turn the jacket inside out through the sleeve opening, creating a professional finish with enclosed raw edges.
How do you attach the sleeve lining when using the bagging method to line a jacket, ensuring the sleeve hem is smooth?
To attach the sleeve lining using the bagging method, begin by placing the jacket sleeve and lining sleeve right sides together. Match the underarm seam and pin in place, aligning the sleeve hem. Sew all around the sleeve opening, then pull the lining into the sleeve of the jacket. After the lining is sewn, the seam sits cleanly on the inside, and once the jacket is turned right side out, the sleeve hem appears smooth and finished.
What is the correct way to hand sew the opening in the sleeve lining after completing bagging the lining in a lined jacket?
Once you turn the jacket right side out through the sleeve opening, locate the gap in the lining sleeve used for turning. Fold the raw edges of the lining inward, wrong side facing, and pin in place. Using a ladder stitch or other hand stitch, close the opening carefully along the seam. This final step secures the lining completely and ensures the finished embroidery and construction of the jacket remain neat and professionally done.
How do you sew the lining in a new jacket using a jacket pattern that includes pleats and a lining hem?
To sew the lining in a new jacket, begin by assembling the lining pieces according to the pattern instructions, including any pleat at the center back for ease. Sew the shoulder seams and side seam of the lining fabric first. Attach the lining hem by folding the bottom edge and pressing it in place. Then, pin the lining to the jacket with right sides facing, and stitch the lining along the jacket front, neckline, and jacket hem. The pleat allows the lining to move with the jacket, preventing strain during wear.
What is the correct method to pin the lining and jacket together before you start sewing along the edges for a clean finish?
To pin the lining and jacket together, lay both with right sides facing. Align all edges together, matching the shoulder seams, sleeve seam, and side seam precisely. Use sewing patterns as a reference to line up each pattern piece, especially at the jacket front and bottom hem. Pin carefully along the lining seam and edges, and baste if needed for accuracy. This ensures the lining stays in place when you start sewing and results in a smooth, professional finish.
How does a pleat in the lining fabric affect how you stitch the lining to the coat hem using free patterns or standard sewing patterns?
A pleat in the lining fabric adds extra room for movement, especially useful in structured garments like coats. When using free patterns or commercial sewing patterns, the pleat is usually sewn into the back lining piece before assembly. When you stitch the lining to the coat hem, make sure the pleat remains flat and centered. This prevents the lining from pulling or tearing at the hem, especially with frequent wear of the finished jacket.
What steps are included in sewing tutorials when you need to baste and then sew the hem of the lining to the jacket hem?
Sewing tutorials typically recommend first basting the folded edge of the lining hem to hold it in place. Align the folded edge of the lining along the jacket hem with right sides facing. Pin thoroughly, especially at curved or angled seams. Start sewing from one side seam and continue around the hem until you stop sewing at the opposite seam. After stitching, turn the jacket right side out and press the hem for a crisp edge. This step ensures the lining hem stays neatly enclosed inside the jacket.