How to Sew a Square Neckline: Step by Step Guide in 2025
Begin by selecting a pattern that features a modern silhouette accentuating the collar area. Choose a fabric that drapes well, such as cotton or linen, to ensure a polished finish. Consider using a muslin mock-up to practice cuts and adjustments without compromising your final piece.
Measure accurately to achieve the desired fit. Start with your bust and waist dimensions, then draft the neckline shape according to your preference. Ensure that your measurements account for seam allowances, which are crucial for proper assembly.
Next, mark the fabric precisely. Using tailor’s chalk, outline the neckline shape, ensuring symmetry and proportional design. Take your time with this step; a well-marked fabric leads to cleaner results when cutting and joining pieces.
Prepare the edges with fusible interfacing to maintain structure. This step is particularly beneficial for lighter materials, preventing stretching and distortion during wear. Secure the interfacing to the neckline area and trim any excess for a clean finish.
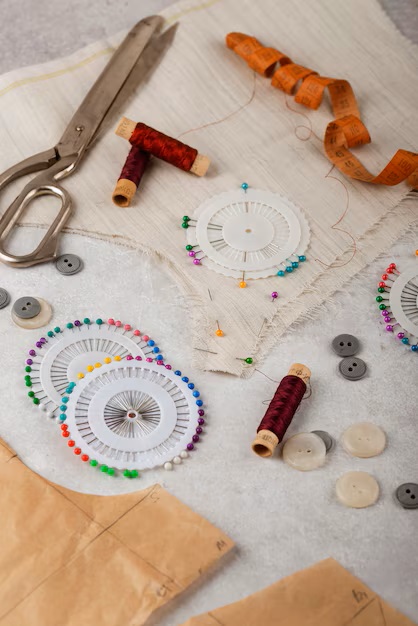
Once your fabric is cut, focus on the joining process. Pin the pieces together, aligning raw edges, and proceed with a straight stitch. After stitching, carefully trim any bulk to create a sleek and tailored appearance.
Finally, finish by pressing the neckline gently. Use a steam iron to smooth out seams and shape the fabric as needed. This attention to detail will enhance the final look and elevate your design beyond basic standards.
Choosing the Right Fabric for Your Square Neckline
Selecting the appropriate material significantly influences the appearance and comfort of your garment. Consider the following options:
- Cotton: Ideal for casual outfits, it offers breathability and easy handling. Lightweight cotton is best for a soft drape.
- Linen: Excellent for warm weather, it provides a relaxed look with natural texture. Choose medium weight for structure.
- Satin: Works beautifully for dressy occasions, offering a glossy finish. Opt for heavier satin to maintain shape.
- Stretch Fabrics: Blends with spandex offer comfort and ease of movement. Suitable for fitted designs.
- Silk: Luxurious and elegant, ideal for special occasions, but requires careful handling due to its delicate nature.
For more structured designs:
- Taffeta: Adds stiffness and maintains form, perfect for formal dresses.
- Canvas: Durable and sturdy, great for structured styles that need more support.
Consider the weight, drape, and breathability of the fabric to ensure a flattering fit. Test small pieces before committing to larger cuts to see how they respond to your techniques and designs.
Preparing Your Pattern for a Square Neckline
Modify your existing pattern by marking a straight line across the bodice’s top section, ensuring it is level. Determine the desired depth and width, typically ranging from 2 to 4 inches for depth and 3 to 6 inches for width. Use a ruler to create right angles at the corners, ensuring the shape is symmetrical.
Cutting the Material
Once the pattern is adjusted, cut the fabric according to the new lines. Include seam allowances; a ¼ to ½ inch allowance is standard. This additional fabric is crucial for hems and finishing touches.
Creating a Muslin Version
Before cutting the final material, sew a test version with muslin. This approach allows for adjustments in fit and design. Check for comfort and appearance, modifying the pattern if necessary to achieve the desired look.
Measuring and Cutting Fabric Accurately
For precise fabric preparation, use a measuring tape to take accurate dimensions of your desired pieces. Ensure the tape is flat against the fabric, avoiding any twists. Always measure twice to confirm your numbers, especially for complex shapes.
Pattern Placement: When laying out your pattern, consider the orientation of any fabric design. Align the pattern pieces with the grain of the fabric to maintain structure and prevent distortion. Pin or weight the pattern in place to avoid shifting during cutting.
Cutting Technique: Utilize sharp fabric scissors or a rotary cutter for clean edges. Cut with steady, even pressure, following your marked lines closely. If using a rotary cutter, a cutting mat will protect your workspace and provide a smooth surface.
Seam Allowances: Pay attention to the seam allowances specified in your pattern. Mark these clearly on your fabric using tailor’s chalk or a fabric marker, ensuring consistency across all pieces. Lack of accuracy here can lead to misaligned seams.
After cutting, inspect each piece for errors or frayed edges. This last check will save time during assembly and enhance the final result of your project.
Techniques for Sewing the Neckline Seam
Begin with precise pattern adjustments to ensure an accurate fit. Trim the seam allowance to about a quarter inch; this prevents bulk and helps with clean finishing. Pin the fabric carefully along the edge, ensuring each section aligns perfectly before making any stitches.
Stay Stitching
Implement stay stitching along the curved edges to prevent stretching. Set your machine to a straight stitch, using a shorter length for durability. This technique maintains the integrity of the fabric as you work with it further.
Finishing Techniques
For a polished finish, apply bias tape or interfacing along the inner edge. This adds structure and prevents fraying. Consider topstitching or understitching as a final touch; it not only secures the facing but also creates a professional look by keeping the facing in place.
Finishing the Edges of a Square Neckline
Use bias tape to neatly finish the edges. Cut bias strips from the same or contrasting fabric, ensuring they are wide enough to cover the raw edges with a little extra for folding. Attach the bias tape to the neckline by aligning its raw edge with the neckline’s edge, pinning securely before stitching.
For a clean finish, fold the bias tape over the raw edges and pin it in place again. Sew along the inner edge of the tape, ensuring a straight line. This method not only provides a polished look but also adds durability.
If opting for a facing, cut facing pieces matching the shape of the neckline. Sew the facings to the neckline, right sides together. Trim any excess fabric, then turn the facing inward, pressing it flat. Finish the outer edge of the facing with a straight or zigzag stitch to prevent fraying.
An alternative is to use a serger for a professional finish. Run the serger along the raw edges for a clean, overlocked finish. This technique works well with stretchy fabrics, preventing distortion when worn.
Finally, consider topstitching around the neck area after finishing to secure the facing or bias tape. It not only adds style but also reinforces the edges, ensuring they lay flat and look crisp.
Adding Decorative Elements to Your Square Neckline
Consider incorporating lace trim along the edges to create an elegant touch. Choose a lace that complements the fabric color. Pin the lace in place and stitch it down carefully to achieve a clean finish.
Another approach is to use piping to outline the edges. This adds dimension and a polished look. Select a contrasting or matching color for the piping, and ensure it is evenly spaced along the neckline for uniformity.
Embellishments to Consider
Beads and sequins can enhance the visual appeal. Sew them onto the fabric to create patterns or scatter them for a more casual effect. Utilize embroidery techniques to add floral designs or geometric shapes for added texture.
Using Fabric Paint
Experiment with fabric paint for custom designs. Use a stencil to apply paint around the neckline or freehand a unique pattern. Allow sufficient drying time and set the paint according to manufacturer instructions to maintain durability.
| Decoration | Method | Effect |
|---|---|---|
| Lace Trim | Pin and stitch | Elegant finish |
| Piping | Attach evenly | Defined edges |
| Beads/Sequins | Sew in patterns | Textured appearance |
| Fabric Paint | Stencil or freehand | Custom artwork |
Q&A: How to sew a square neckline
How can a square neck tutorial help when sewing a square neck top or dress, and what are the key steps for getting clean lines at the corners?
A square neck tutorial helps guide the sewing process by showing how to handle sharp pivot points at the neckline corners for a clean, professional finish. To make a square neck top or square neck dress, you typically begin by stitching the front and back facing to the neckline, clipping into the corners before turning the facing to the wrong side. Understitching helps the neckline lay flat, and pressing carefully at the pivot points sharpens the edges. This technique is essential whether you’re using a sewing pattern or doing a simple DIY hack.
What adjustments should be made to the bodice when creating a square neck hack from a tank or round-neck sewing pattern, and how do you maintain the shape across the shoulder seams?
When creating a square neck hack from a tank or round-neck sewing pattern, the neckline on both the front bodice and back bodice must be redrafted to a squared shape, ensuring the angle at the shoulder seams aligns properly. You’ll need to trace the new neckline shape, then adjust the front facing and back facing accordingly. Reinforcing the corners with a short stay stitch before clipping ensures stability, and maintaining an even width along the neckline and shoulders helps preserve the clean, squared look once turned and pressed.
Why is understitching important when finishing a square neck dress or top, and how does it affect the final neckline shape?
Understitching is important when finishing a square neck dress or top because it secures the facing to the seam allowance, preventing it from rolling to the outside and disrupting the clean lines of the neckline. This sewing technique enhances the structure of the neckline, particularly at the center front and pivoted corners, which are prone to shifting. By using a sewing machine to carefully understitch along the neckline edges—especially around the front and back bodice—the square neck remains stylish and crisp after each wear.
How do you attach the sleeve and finish the side seam when sewing a square neck top or dress, and what makes this style easy to make for a DIY project?
To attach the sleeve and finish the side seam of a square neck top or dress, first sew the shoulder seams to join the front and back bodice pieces, then insert the sleeves flat before closing the side seam in one continuous line from armhole to hem. This construction method is often shown in a square neck tutorial or video tutorial, making it easy to make even for those new to sewing. The style is trendy and flattering, and with simple steps like pivoting at corners and pressing the back facing cleanly, it becomes a manageable DIY project.
How do dress sewing patterns for knits handle strap construction and neckline shaping, and why is binding often preferred over facings?
Dress sewing patterns for knits typically include straps that are either cut as part of the bodice or attached separately, depending on the design. Because knits stretch and mold to the body, neckline shaping is often minimal and finished with binding instead of facings to reduce bulk and maintain flexibility. Binding allows for a clean edge that stretches with the fabric, especially around curved necklines, and helps reinforce the area where the strap meets the bodice, ensuring durability in wear.
What role does topstitching play when finishing the skirt and neckline on knit dress sewing patterns, and how does it affect the final appearance?
Topstitching plays a key role in finishing both the skirt hem and neckline on knit dress sewing patterns by flattening seams and preventing the edges from rolling. Around the neckline, topstitching secures the binding in place and enhances the garment’s structure without compromising stretch. On the skirt, it gives a professional finish that complements the drape of the knit. This technique not only strengthens high-stress areas like strap joins but also contributes to the polished appearance of the completed dress.