Practical Tips for Mastering the Art of Machine Quilting Techniques
Adjust the tension settings on your quilting device according to the fabric you are using. A balanced tension is key for preventing unwanted puckering or loose stitches, ensuring a smooth finish. Test on a fabric scrap before starting your project to fine-tune the tension.
Utilize a walking foot attachment to keep multiple layers of fabric aligned while stitching. This accessory helps evenly distribute pressure across the quilt sandwich, reducing the likelihood of shifting and ensuring even quilting lines. Experiment with different feet for varied textures and effects.
Maintain an organized workspace. Clear clutter from your table to facilitate free movement of your quilt as you work. Designate a specific area for fabrics, threads, and tools, so everything is within reach, minimizing distractions and maximizing productivity.
Regularly clean and oil your quilting machine according to the manufacturer’s guidelines. Accumulated lint and dust can affect performance and stitch quality. Consistent maintenance extends the lifespan of your machine and ensures optimal operation.
Experiment with different thread types. Choosing the right thread not only influences the visual appeal but also the durability of the quilting. For instance, cotton threads offer a matte finish while polyester provides sheen and strength. Match the thread to your fabric choice for a cohesive look.
Selecting the Right Fabric for Quilting
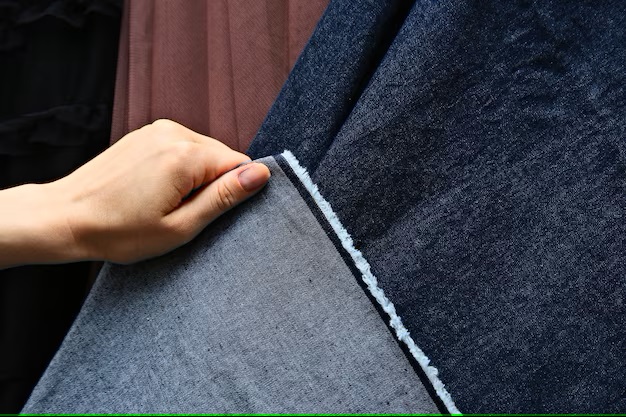
Choose 100% cotton fabric for best results. This material provides durability and ease of handling during stitching. Avoid blends, as they can distort and cause complications during the process.
Examine the weight of the fabric; a medium-weight cotton is ideal, offering stability without being overly bulky. Fabrics that are too thin can lead to issues with fraying, while excessively thick options may complicate the layering.
Consider the thread count. Higher thread counts often indicate finer quality, leading to smoother finishes. A thread count of 200 to 400 is optimal for comfort and resilience.
It’s essential to wash and pre-shrink fabric prior to cutting. This step prevents future shrinkage and helps in maintaining the quilt’s dimensions. Be sure to iron the fabric afterward to remove wrinkles.
Choose colors and patterns that complement each other. Utilize a color wheel to identify harmonious combinations. This enhances the visual appeal, creating a cohesive design.
Test-fabric swatches by sewing a few seams before committing to larger cuts. This trial can reveal how well a fabric works with your chosen batting and thread.
Also, pay attention to the finish of the fabric. Opt for fabrics with a tight weave, as they resist fraying and provide a smoother experience during quilting.
Lastly, consider the end use of the quilt. For instance, if it’s meant for daily use, prioritize durability over intricate designs. Conversely, decorative quilts can afford to use lighter or more elaborate fabrics.
Choosing the Appropriate Thread and Needle
Select a thread that matches the weight of your fabric. For quilting cotton, a 40wt polyester or cotton thread works best, while heavier materials may require a 30wt thread. Consider polyester blends for durability and cotton for warmth and texture.
The needle should complement the thread. Use a size 90/14 or 80/12 needle for most quilting. If using thicker thread, opt for a 100/16 needle. Always match the needle type to your thread; a larger needle is necessary for specialty threads.
Keep in mind the needle’s point type. A universal point is suitable for most fabrics, while a walking foot needle aids in preventing shifting of layers. If working with delicate fabrics, a microtex needle is ideal for precise stitching.
Regularly change your needle to avoid skipped stitches and fabric damage. A new needle will improve the overall stitch quality and ensure clean results.
Test your thread and needle combination on a scrap piece before starting the actual quilting. This allows you to adjust tension settings and identify any issues early in the process.
Setting Up Your Sewing Machine for Quilting
Begin with a fresh needle; a 90/14 or 100/16 quilting needle works best for most layers. Change the needle after every large project.
Use high-quality thread designed for quilting. Avoid cheaper options that may fray or break, causing frustration mid-project.
Decrease stitch length to around 2.0 to 2.5 mm for better control and accuracy on layered fabrics.
Clear the workspace around the sewing machine. Having sufficient space helps manage large quilts more efficiently.
Select a walking foot or a free-motion foot, depending on your preferred technique. Ensure it is properly attached and functioning.
Adjust tension settings; typically, a balanced tension is ideal. Test on scrap fabric to fine-tune before beginning the actual quilt.
Utilize a quilting extension table if available. This provides additional support for larger projects and prevents distortion of the fabric layers.
Keep rotary cutters, rulers, and cutting mats nearby for fabric preparation. Precise cutting contributes to better alignment and finished results.
Stabilizers can be beneficial; consider using a fabric stabilizer if your quilt top is made from lightweight materials that may shift.
Ensure your sewing machine is clean and well-lubricated. Dust and debris can affect performance and smooth operation.
Finally, practice on scrap pieces. Experimenting with different techniques can boost confidence and enhance skills.
Understanding Quilting Patterns and Techniques
Choose a pattern that matches your skill level. Beginners should select simple designs like straight lines or basic geometric shapes, while more advanced quilters can explore intricate motifs such as feathers or curves.
Types of Patterns
Patterns fall into several categories, including traditional, modern, and art quilts. Traditional patterns like Log Cabin or Nine-Patch reinforce foundational skills, while modern quilts introduce asymmetry and negative space. Art quilts offer freedom to express creativity and experimentation.
Techniques Overview
Familiarize yourself with key methods such as free motion, stitch-in-the-ditch, and walking foot quilting. Free motion allows fluid design, creating unique visuals. Stitch-in-the-ditch is perfect for enhancing pieced blocks, while the walking foot aids in evenly feeding multiple layers.
| Technique | Description |
|---|---|
| Free Motion | Allows intricate, non-linear designs; requires practice for control. |
| Stitch-in-the-Ditch | Stitches along seams, providing subtle texture without detracting from overall design. |
| Walking Foot | Helps evenly guide fabric layers, ideal for straight lines and even spacing. |
Experiment with layering techniques by utilizing templates or tracing. This provides a structured approach while allowing for creative interpretation. Use contrasting thread colors to highlight patterns and add depth to your project.
Practice and patience are key components. Allocate time to refine your skills and troubleshoot potential issues, leading to improved outcomes in every creation.
Maintaining Consistent Stitching While Quilting
Set the stitch length to a uniform measurement, ideally around 2.5 to 3.0 mm, to achieve even results throughout your project. This serves as a foundation for consistency.
Regularly clean your sewing machine, focusing on the feed dogs and bobbin area. Accumulated lint can disrupt the flow and lead to uneven stitches.
Use high-quality thread compatible with your fabric. Inferior thread may break or produce uneven tension, affecting stitch quality significantly.
Check the tension settings before starting. Thread tension should be balanced; if it’s too tight or too loose, it will manifest in stitch irregularities.
Keep an eye on the fabric feed. Maintain an even pace while guiding the material; pushing or pulling can result in inconsistent stitching.
Experiment with an experienced quilter’s walking foot. This can help regulate the fabric movement under the needle, providing steadiness and precision.
Practice with scrap fabric to fine-tune your technique and settings. This allows for adjustments without the risk of damaging your main project.
Consider using a stitch regulator if available on your machine. This allows for automatic adjustments to the stitch length, maintaining uniformity as you sew.
Maintain a comfortable posture while quilting. A stable and relaxed position will promote smoother movements and even stitching.
Finally, always inspect your work periodically. Recognizing and addressing issues promptly prevents larger discrepancies from developing over time.
Properly Finishing and Caring for Your Quilt
To secure the integrity of your quilt, use a quality binding technique. Cut strips of fabric at least 2.5 inches wide, aligning them on the bias for more flexibility around corners. Sew the binding to the quilt’s edge, then fold it over and hand-stitch to the back, ensuring a snug fit.
After completing the binding, wash your quilt with a gentle detergent in cold water. Use a front-loading washer to avoid agitation that can distort the fabric. Avoid fabric softeners; instead, add a cup of white vinegar to the rinse cycle to help set colors and reduce any static.
To dry, lay the quilt flat on a clean surface, away from direct sunlight, which can fade the fabrics. If using a dryer, select a low heat setting, and place a few clean tennis balls inside to help fluff the batting.
Store your quilt in a cool, dry place. Avoid hanging it for long periods, as this can cause stretching. Instead, fold it loosely and place it in a breathable cotton bag or pillowcase to prevent dust accumulation.
Periodically check for signs of wear or damage. Patch any small tears promptly to maintain longevity. For spot cleaning, use mild soap and a damp cloth. Test any cleaning method on a hidden area first to prevent discoloration.
Lastly, maintain a consistent temperature and humidity level in the storage area to prevent mold or mildew growth. Regular upkeep will preserve the beauty and functionality of your creation for years to come.
Q&A: Machine quilting tips
What are some essential tips for quilting a large quilt on a domestic sewing machine?
Quilting a large quilt on a domestic sewing machine requires planning and space management. Use quilting gloves to grip and move the quilt, reduce bulk by rolling or folding the sides, and baste well to keep layers of a quilt secure. Adjust the pressure of your walking foot to help glide the quilt sandwich together smoothly without puckering.
How does free motion quilting differ from straight line quilting when quilting on your home sewing machine?
Free motion quilting allows the quilter to stitch in any direction by lowering the feed dogs and using a free-motion foot, offering creative freedom for complex quilting designs. In contrast, straight line quilting with a walking foot provides more control, making it ideal for beginners who are quilting on a domestic sewing machine and want even, parallel lines.
Why is “stitch in the ditch” a helpful technique for those new to quilting with a home machine?
“Stitch in the ditch” involves quilting directly in the seams of quilt blocks, making it an effective and subtle method for securing layers of a quilt without altering the top’s appearance. This technique is especially useful when quilting a baby quilt or first quilt, as it’s easier to control and requires minimal marking or planning.
What are some tips for machine quilting to improve your quilting experience on a home machine?
Great tips for machine quilting on a domestic machine include creating a detailed quilting plan, practicing on scrap quilt sandwiches, and adjusting the top thread tension for clean stitches. Use a walking foot for straight-line quilting, manage the weight of the quilt by supporting it on your sewing table, and always test your settings before starting a new quilting project.
How can free-motion quilting tips help improve your quilting skills when working on a big quilt in a small sewing room?
Free-motion quilting tips such as breaking the quilt into manageable sections, using quilting gloves, and working from the center toward the edge of the quilt can significantly improve control and stitch quality. These tips help quilters quilt through the machine more comfortably, even when space is limited, and result in smoother quilting across the entire quilt.
What are the advantages of using the quilt as you go method when you’re ready to quilt your next quilt?
The quilt as you go method allows you to piece and quilt smaller sections individually before joining them together, which reduces the bulk under the machine. This is especially helpful when working with larger quilts or if you’re new to quilting on a domestic machine, making it easier to manage layers and achieve a finished quilt more efficiently.
Why is understanding the structure of the quilt backing important before starting to quilt straight lines?
The quilt backing must be smooth, flat, and securely basted to avoid puckers or shifting during straight-line quilting. Whether using hand quilting or machine quilting tips and tricks, ensuring the back of the quilt is properly prepared helps maintain alignment and contributes to a professional finish on the whole quilt.
How can participating in a quilt along with a local quilt shop support your quilting journey and boost confidence in your skills?
Joining a quilt along hosted by a local quilt shop provides structure, community, and shared learning. You’ll receive guidance on how to start quilting, learn tips and tricks for both hand and free-motion quilting, and gain the motivation to complete your first or next quilt while improving your technique through regular practice.