Key Safety Guidelines for Your Sewing Room to Prevent Accidents and Injuries
Ensure that your workspace is well-lit. Poor illumination can lead to accidents, especially when handling sharp tools. Invest in bright, adjustable lighting to illuminate your sewing area without shadows.
Regularly clean your workspace. Clutter can pose hazards; remove any unnecessary items that may obstruct movement or create tripping risks. Designate a specific space for each tool to keep everything organized.
Invest in appropriate personal protective equipment. Wearing safety glasses can protect your eyes from flying debris, while thimbles can safeguard your fingers from pricks. Consider gloves if working with chemicals or materials that irritate the skin.
Keep all tools in good condition. Dull blades and frayed threads not only hinder productivity but also increase the likelihood of accidents. Regularly inspect your equipment for wear and replace items as needed.
Establish clear procedures for operating machinery. Familiarize yourself with the manual and understand all safety features. Never operate machines while fatigued or distracted to minimize the risk of injuries.
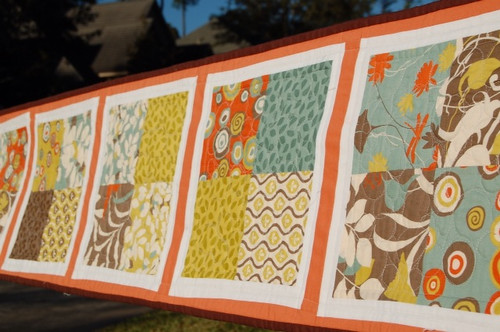
Organizing Tools and Materials to Prevent Accidents
Maintain a clean and organized space by utilizing containers and shelving units. Group similar items together to minimize hazards. For instance, keep sharp tools in dedicated holders away from other materials.
Labeling System
Implement a clear labeling system for each container. This will enable quick identification and access while ensuring items are returned to their designated places after use.
- Use color-coded labels for various categories (e.g., threads, fabrics, tools).
- Include images for visual reference, especially for complex tools.
Tool Storage Solutions
Adopt the following strategies for storing tools effectively:
- Magnetic strips for holding metal items like scissors and needles.
- Toolboxes with compartments to prevent rolling and mixing of small tools.
- Wall-mounted pegboards for frequently used items to keep surfaces clear.
Regularly check and discard damaged or unnecessary items. This keeps the area efficient and reduces the risk of injury from unreliable tools.
Arrange materials based on frequency of use. Place commonly used supplies within arm’s reach while storing less frequently required items higher or farther away.
Establish a clear cleanup routine after each session. This encourages tidiness and helps spot potential safety concerns early.
Implementing Proper Lighting for Enhanced Visibility
Install bright LED lights that mimic natural daylight. This type of lighting reduces eye strain and enhances color accuracy, allowing for precise work. Aim for a color temperature of around 5000K to 6500K.
Types of Lighting to Consider
| Type of Lighting | Description | Benefits |
|---|---|---|
| Task Lighting | Focused illumination on specific areas. | Reduces shadows and highlights details. |
| Ambient Lighting | General illumination for the entire area. | Creates a comfortable and inviting atmosphere. |
| Accent Lighting | Highlights particular spots or items. | Enhances aesthetics and visual interest. |
Installation Recommendations
Position task lights directly over work surfaces to minimize shadows. Use adjustable arm lamps to direct light exactly where needed. Avoid fluorescent bulbs as they can flicker and lead to fatigue.
Establishing a First Aid Kit for Sewing Mishaps
Include adhesive bandages in various sizes to protect small cuts and abrasions. Sterile gauze pads and adhesive tape should also be added for larger injuries.
Antiseptic wipes will help cleanse wounds to prevent infection. A small bottle of antiseptic solution is beneficial for treating deeper cuts.
Essential Medications
Collect over-the-counter pain relievers such as ibuprofen or acetaminophen to alleviate discomfort from minor injuries. Antihistamines are useful for allergic reactions, especially to fabrics or materials.
Additional Supplies
Include a pair of scissors for cutting tape or gauze. A tweezers set is important for removing splinters or fabric threads embedded in the skin.
Finally, ensure the kit is housed in a sturdy, easily accessible container and check it regularly to replace expired items.
Using Electrical Appliances Safely in Your Sewing Space
Ensure all cords are neatly organized, avoiding tripping hazards. Use cord organizers or clips to keep them in check.
Regularly inspect electrical devices for frayed wires or damaged plugs. Replace any faulty items immediately to prevent shocks or fires.
Proper Ventilation
When using items that generate heat, maintain adequate airflow. Avoid placing them near flammable materials, and be cautious of lint accumulation.
Power Source Awareness
Connect machines to a grounded outlet. Avoid using extension cords unless absolutely necessary; if used, ensure they are rated for the appliance’s wattage to avoid overheating.
Maintaining a Clean Workspace to Avoid Hazards
Regularly declutter surfaces and keep tools organized. Use labeled containers for smaller items to prevent tripping and tangling.
Clean up spills immediately to avoid slips and falls. Keep a mop or paper towels handy to address accidents without delay.
Store sharp objects in a designated area with protective covers. This minimizes the risk of accidental cuts and injuries.
Designate a specific location for fabric scraps and waste materials. Empty bins regularly to maintain a tidy environment and reduce fire hazards.
Ensure proper lighting in all areas. Well-lit spaces help prevent accidents and allow for precise work, reducing frustration and missteps.
Implement a cleaning schedule to maintain order. Regular check-ins can identify potential hazards before they become issues.
Purchase non-skid mats for areas where you stand for long periods. This provides stability and minimizes the risk of falls over time.
Educate on proper disposal methods for hazardous materials, such as battery remnants or solvents, to prevent contamination and accidents.
Creating an Emergency Plan for Your Sewing Area
Identify exit routes and ensure they are unobstructed. Mark them clearly, so you can locate them quickly in an emergency.
Emergency Contacts
Compile a list of local emergency numbers and keep it visible. Include contacts for fire services, medical assistance, and poison control. Ensure everyone who uses the area is aware of this list.
First Aid Kit
Equip your space with a well-stocked first aid kit. Regularly check supplies and replace any expired items. Include:
- Adhesive bandages
- Antiseptic wipes
- Gauze pads
- Medical tape
- Scissors
Fire Safety
Install a fire extinguisher near your crafting zone. Familiarize yourself with its use. Practice evacuation plans regularly with all participants.
Handling Materials
Store sharp implements and hazardous substances securely. Consider a designated cabinet or box with a lock to prevent accidental access.
Regular Drills
Conduct drills simulating emergency scenarios to ensure all users know how to respond effectively. Evaluate and modify your plan based on these exercises.
Q&A: Sewing room safety
Why is it important for beginners to follow essential sewing safety tips when working on a sewing project?
Following essential sewing safety tips helps a beginner avoid injury when using sewing tools like the rotary cutter, seam ripper, or hot iron. Practicing sewing safety by keeping fingers away from the sewing machine needle and using a pincushion instead of placing pins in your mouth ensures a safer and more enjoyable sewing project.
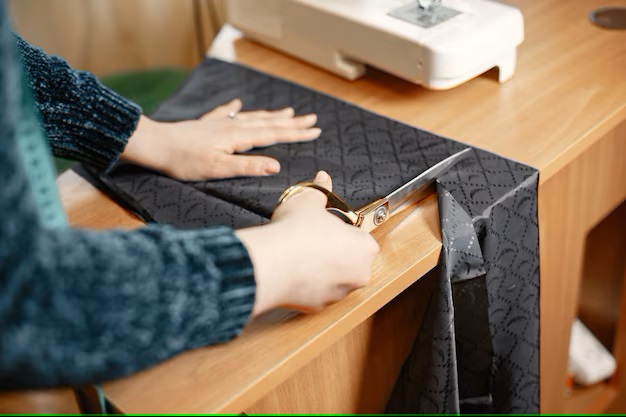
How can a rotary cutter be used safely to avoid injuries during fabric cutting?
To use a rotary cutter safely, always engage the blade guard when not in use and keep fingers away from the rotary cutter blade while cutting on a proper cutting table. Maintaining safety in the sewing room means treating this potentially dangerous tool with care, just like any other power tool, and using it only on a cutting mat.
Why should you never hold pins in your mouth while sewing or working with sharp objects?
Holding pins in your mouth while you’re sewing is a major violation of sewing safety rules, as it poses a risk of accidental swallow or choking. Instead, keep a pin cushion or magnet nearby to store pins and needles, promoting good habits and keeping your sewing studio a safer place.
What are some important safety tips for using a sewing machine that every sewer should know?
Important safety measures include turning off or unplugging your sewing machine when changing the machine needle or performing maintenance. Always sit up straight, maintain good posture, and wear shoes to protect your feet from dropped shears or broken needles. These sewing safety tips help you stay safe and keep sewing with confidence.
Why is it important to keep your fingers away from the presser foot during machine sewing?
During machine sewing, keeping your fingers away from the presser foot and presser area is essential to avoid accidental needle injuries. This is one of the most important safety tips for beginners, as the stitch speed and sharp needle can quickly cause harm if your hands are too close while guiding the fabric.
How can having an ironing board set up properly contribute to safer garment construction?
A well-positioned ironing board allows for stable and secure pressing during garment making, which helps prevent burns and fabric mishandling. With safety in mind, always ensure the sewing supplies like irons are placed securely, and the board is away from foot traffic, especially in homes with small children.
Why should sewing rules include storing supplies safely when working around small children?
Basic sewing rules recommend keeping all sewing supplies, including needles, pins, scissors, and sharp tools, out of reach of small children. Storing items securely and not leaving projects unattended ensures safety in mind for everyone in the space, especially in shared family areas.
What are the most important safety tips for beginners to follow when learning to stitch garments?
Safety tips for beginners include learning to properly stitch using a machine sewing setup with attention to hand placement, avoiding distractions, and maintaining a clutter-free workspace. Beginners should also learn to lift the presser foot before adjusting fabric and to never force the material, helping them stay safe while building confidence.