Step by Step Guide to Sewing Double Fold Bias Tape for Your Sewing Projects
If you’re looking to enhance the finish of your fabric projects, using a well-prepared strip can make a significant difference in the overall look. Begin with a strip of fabric cut on the grain, typically 2.5 inches wide, which allows for a clean and neat finish. When preparing the fabric, ensure that your edges are pressed to avoid any unwanted fraying during use.
Next, fold the strip in half lengthwise, aligning the raw edges. Press this fold to create a crease, which serves as a guide for achieving an even application later. Once you have established the center crease, open the strip back up, and introduce a fold on each raw edge toward the center line. Press these folds well to maintain their shape, as this will set the stage for smooth application on your chosen project.
After preparing the strip, it’s time to attach it to your fabric. Pin the folded strip along the edge of your project, ensuring that the raw edge of the strip aligns perfectly with the edge of your fabric. As you sew, it’s beneficial to maintain a consistent seam allowance, typically about 1/4 inch, to ensure a clean and professional finish. Keep your stitches straight and secure, as this enhances durability and appearance.
Understanding the Types and Uses of Bias Tape
Before selecting a trim for your project, identify the type that aligns with your fabric needs. Various options exist:
Types of Tape
- Single-Fold: This variant is folded in half and pressed, perfect for finishing edges. It creates a clean, narrow seam.
- Double-Fold: This type is folded twice, resulting in a more durable edge. Ideal for heavy fabrics.
- Pre-Cut: Available in various colors and widths, this option saves time on cutting and prepares for immediate application.
- Homemade: Craft your own using fabric remnants, providing customization for color or texture.
Common Uses
- Edge Finishing: Prevents fraying, resulting in a polished finish on garments and home décor.
- Necklines and Armholes: Enhances stability and adds a decorative element.
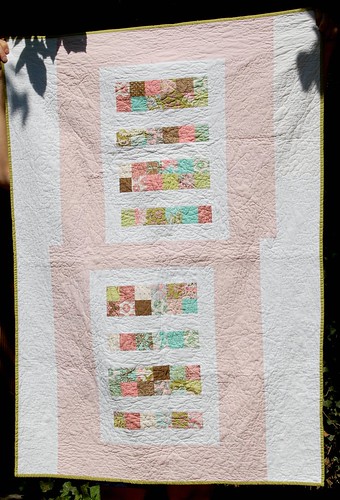
- Quilting: Used for binding quilt edges, creating a cohesive look.
- Craft Projects: Adds color and texture to bags, cushions, and accessories.
Select the appropriate variety to match fabric weight and project requirements. Understanding these factors streamlines the crafting process and elevates the final product.
How to Choose the Right Fabric for Your Bias Tape Project
Select lightweight cotton or cotton blends for regular use, as they are easy to handle and mold around curves. For projects requiring added durability, consider using canvas or denim. If a softer drape is needed, opt for silky fabrics like rayon or polyester.
Fabric Types and Their Uses
Understanding fabric types enhances the quality of your trims. Here are some fabrics paired with their ideal applications:
| Fabric Type | Recommended Use |
|---|---|
| Cotton | General use in apparel and crafts |
| Canvas | Heavy-duty projects such as bags and upholstery |
| Rayon | Soft garments with a flowy finish |
| Polyester | Wrinkle-resistant and durable applications |
| Silk | Luxurious accents or formal wear |
| Linen | Breathable options for warm weather |
Tips for Fabric Selection
Always prewash fabric to prevent shrinkage. Test compatibility with your main material to ensure that the colors and textures blend harmoniously. Consider the width of your trims; for narrow trims, thinner fabrics work best. For wider trims, heavier materials may provide better structure.
Preparing Your Fabric and Cutting Bias Strips Accurately
Choose a fabric that drapes well, such as cotton, silk, or rayon. Pre-wash the material to eliminate any shrinkage. Iron the fabric to remove creases, ensuring a smooth surface for cutting.
Determining Fabric Grain
Identify the grain line of your fabric; it typically runs parallel to the selvage. For accurate strips, cut at a 45-degree angle to the grain line. This orientation allows for flexibility and proper stretching.
Cutting Technique
Use a rotary cutter for clean edges or sharp scissors for accuracy. Measure and mark strips using a ruler or quilting mat, typically 1.5 to 2 inches wide. Use tailor’s chalk or a fabric marker for visibility. Cut slowly along the marked lines to avoid fraying.
Keep the fabric taut while cutting, ensuring even strips. Adjust the length based on your project’s requirements; longer strips are best for larger areas or curves.
Store cut strips neatly to prevent tangling or misalignment. This organization aids in quick assembly later in the process.
Mastering the Folding Technique for Double Fold Bias Tape
For flawless results, begin by cutting your fabric into strips that are 2 inches in width. This width accommodates the necessary folding and stitching for a clean finish. Ensure the strips are cut on the bias for flexibility and ease of use.
Precision in the First Fold
Create the initial crease by folding one side of the strip inward towards the center. Use a hot iron to set this fold firmly, adjusting the temperature based on the fabric type to prevent scorching. Press along the entire length to achieve an even crease.
Finalizing the Formation
How to Attach Double Fold Bias Tape to Different Fabric Edges
For a clean finish on curved or straight edges, place the creased edge of the binding against the fabric edge, ensuring it aligns properly. Pin or clip the binding in place to hold it steady while you work. Choose a coordinating thread to match your fabric for a seamless appearance.
Attaching to Straight Edges
On straight edges, sew along the inner fold of the binding with a consistent seam allowance, typically 1/4 inch from the edge. This will secure the binding while allowing the outer fold to cover the raw edge neatly. Press the seam to ensure everything lays flat before proceeding to the next step.
Attaching to Curved Edges
For rounded edges, apply bias binding in smaller sections. Start at one end and gently stretch the binding to hug the curve. Pin frequently to maintain its shape throughout. Sew using a smaller seam allowance as needed, adjusting for the curve to avoid puckering, ensuring that the fabric remains smooth and flat.
Finishing Touches: Tips for Neat and Professional Bias Tape Applications
Press the edges of the finished piece for a crisp, polished look. A hot iron can help set the folds and ensure the fabric lies flat.
Choose a thread color that closely matches the fabric for a seamless appearance. This small detail can significantly enhance the overall aesthetic.
Use a pins or clips to secure the trim before stitching. This prevents shifting and ensures accurate placement while working on curves or corners.
For corners, trim the excess fabric diagonally to reduce bulk, making it easier to fold and stitch neatly. This technique contributes to a clean finish.
Consider using a walking foot if working with multiple layers or thicker materials. It evenly feeds the layers through the machine, minimizing puckering.
After stitching, take the time to check for any missed spots. Hand stitching can be employed for areas that are difficult to access with a machine for added precision.
If adding a decorative element, such as a contrasting thread or decorative stitch, test on a scrap piece first to ensure the effect meets your expectation.
Finish by trimming away any excess threads and ensuring the edges are neatly aligned. A meticulous final check ensures your craftsmanship stands out.
Q&A: How to sew double fold bias tape
What is the difference between single fold and double-fold bias tape when sewing the edge of the fabric?
Single fold bias tape has only one folded edge and is used when you plan to fold it again yourself, while double-fold bias tape has both sides folded toward the center and is ready to sew bias tape directly around the raw edge of the fabric or for quilt binding.
How can a bias tape maker help you make your own bias tape for sewing projects?
A bias tape maker helps by folding the fabric cut on the bias into perfect bias tape strips, creating consistent folds along the edge of the bias tape for easy to sew applications like hemming, seam binding, or binding a quilt.
What steps should you follow to pin the bias tape in place before sewing the bias tape along the neckline?
First, place the right sides together, align the raw edge of the bias tape with the edge of the garment, pin the bias tape in place, and ensure the folded edge of the bias tape is aligned neatly before you sew bias tape along the curve of the neckline.
Why is fabric cut on the bias important when trying to make double fold bias tape for wide double fold seam binding?
Fabric cut on the bias provides stretch and flexibility, which is crucial to make double fold bias tape that can easily wrap around curves, corners, and edges of the garment, ensuring the tape edges lie flat and look professional after sewing the bias tape along the side of the fabric.
How does a sewing tutorial show you how to sew bias tape together correctly, especially when working with wide bias or making mitered corners?
A sewing tutorial will show you how to sew bias tape together by aligning the strips at a right angle, sewing diagonally across the intersection, and then trimming the seam to reduce bulk. This technique is especially useful when working with wide bias tape for projects that require smooth mitered corners. Tutorials also explain how to fold tape properly and how bias tape is cut on the diagonal to maintain stretch and flexibility around curves.
Why is it important to fold the bias tape accurately when preparing single and double fold bias for finishing the side of the garment?
Folding the bias tape accurately ensures a clean, professional edge when sewing it along the side of the garment. In single fold and double fold bias, precise folding maintains consistent width and makes it easier to wrap the bias around the raw edge. This is particularly important for achieving even topstitching and smooth corners. Whether you are working with seam binding tape or standard bias, neat folding directly affects the final appearance of the garment.
How do you make bias tape in a 1 inch double fold bias tape size, and why is it commonly used for seam finishing?
To make bias tape for a 1 inch double fold bias tape, you first cut strips 2 inches wide on the bias of the fabric. After cutting, you fold the bias tape in half lengthwise, wrong side together, and then fold each raw edge toward the center crease. This creates a strong, flexible binding. Double fold bias binding is commonly used for seam finishing because it completely encloses raw edges, adding durability and a polished look to both the wrong side and right side of the garment.
Why is seam binding tape or homemade bias tape a great choice when you need to wrap the bias around tricky curves or edges?
Seam binding tape or homemade bias tape is a great choice because the fabric is cut on the bias, allowing it to stretch and conform smoothly around curves and edges. When you wrap the bias around the edge of the tape or along the side of the garment, the natural stretch from cutting on the bias prevents puckering. Using either single fold or double fold bias, sewists can achieve a professional finish even on challenging shapes like armholes, necklines, or mitered corners.