Exploring the Versatility and Craftsmanship of Sienna Maker Jacket
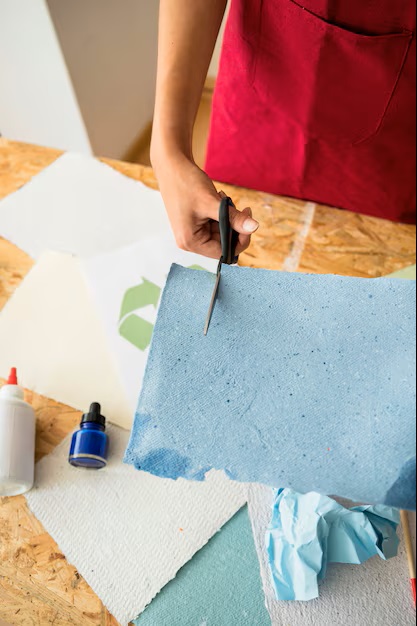
The ideal approach to obtain clean edges involves mastering the art of accurate trimming. Prioritize sharp scissors for precise cuts, as they minimize fraying and ensure an immaculate appearance. A rotary cutter, paired with a cutting mat, can significantly enhance your accuracy, especially for larger fabric pieces. Always press fabric edges before sewing to achieve crisp folds.
For a polished result, consider experimenting with various stitch styles. A double-stitched hem adds durability and prevents unraveling over time. If you seek a more decorative touch, a rolled hem can elevate your project while showcasing your craftsmanship. Use the right type of thread; polyester blends are sturdy and come in an array of colors to match your fabric.
Don’t overlook the significance of using a stabilizer when working with delicate materials. It provides much-needed support to keep the shape intact and avoids puckering. Be mindful of the seam allowance and incorporate additional fabric where necessary to prevent tightness. Completing these steps with care leads to a professional finish every time.
Choosing the Right Fabric for Hems
Opt for fabrics with a bit of stretch, such as cotton blends or lightweight spandex. These materials allow for flexibility and maintain shape after washing.
Consider using lightweight fabrics like rayon or chiffon for delicate garments. Their soft drape enhances the overall look and helps minimize bulk at the edges.
For structured pieces, heavier fabrics like denim or canvas provide stability and can hold a crisp edge. Ensure that the weight matches the garment’s overall design.
Test the transparency of sheer fabrics with a light source. If the material is see-through, use a lining or a matching fabric to maintain integrity in the hem area.
Pre-wash all fabrics to prevent shrinking post-construction. This step ensures the finished product retains its intended dimensions.
Evaluate the fabric’s fraying tendencies. Fabrics like silk may require binding or finishing to avoid unraveling, whereas other materials might not need additional treatment.
Always consider the garment’s intended use. For items subjected to frequent movement or wear, durable options like twill or polyester blends are advisable.
Step-by-Step Guide to Measuring Hem Length
Use a flexible measuring tape for accurate results. Begin by putting on the garment or hanging it on a dress form. This ensures you can see how it falls on the body or the stand.
Identify the desired length for your edge. Consider the intended style and occasion. For example, a casual look might require a different drop than a formal piece.
Place one end of the measuring tape at the highest point of the garment, typically at the waist or hip, depending on design. Pull the tape down to the chosen length point, ensuring it is straight and follows the natural line of the fabric.
Mark the measurement with a fabric chalk or a pin at the point where the tape meets the hemline. This allows for easy reference as you proceed with alterations or finishing work.
Double-check your measurement, verifying it against the opposite side of the garment to ensure symmetry. Adjust if necessary, then record the final length for consistency during the cutting or pinning process.
If you plan to create a double hem, account for the additional fabric. Add the required width to your initial measurement to maintain uniformity and prevent miscalculations.
Tools You Need for Professional Hemming
Secure a high-quality sewing machine with adjustable stitch lengths for precision work. Choose a model that allows for a variety of stitches and has a reliable feed system to ensure even fabric movement.
Must-Have Accessories
Gather the following tools to enhance your hemming process:
| Tool | Purpose |
|---|---|
| Cloth Scissors | Cut fabric cleanly and accurately. |
| Measuring Tape | Ensure precise measurements for hems. |
| Seam Ripper | Easily remove stitches if adjustments are needed. |
| Iron | Press fabric for crisp hems and eliminate wrinkles. |
| Tailor’s Chalk or Marking Pens | Make temporary marks to indicate hem lines. |
Additional Recommendations
Invest in a walking foot attachment for your sewing machine, which helps to maintain alignment of multiple layers. Keep a variety of thread types on hand to match fabric textures and colors for seamless blending. Lastly, ensure your pins are sharp and of good quality to hold fabric securely while working.
Common Hemming Techniques Explained
For a clean finish, consider the double-fold method. This involves folding the fabric edge twice to encase the raw edge securely. Start by folding over about 1/4 inch, pressing, then folding another 1/4 inch. This approach prevents fraying and creates a polished look.
Blind Hem Stitch
The blind hem stitch is a popular choice for garments requiring an invisible finish. Use a sewing machine with the blind hem foot. Set the stitch width to accommodate your fabric thickness. This technique employs a combination of straight stitches and zigzag patterns to hold the hem in place discreetly.
Rolled Hem
A rolled hem adds a delicate touch, suitable for lightweight fabrics. Fold the edge once, then roll it inward and stitch. This method creates a narrow hem that enhances the garment’s elegance while minimizing bulk. Use a serger for an even nicer finish, especially on sheer materials.
How to Fix Mistakes in Hem Finishing
If the stitching appears uneven, rip out the faulty section using a seam ripper. Reposition the fabric carefully, ensuring the edges align evenly. Utilize a ruler or measuring tape to verify distance from the edge is consistent.
For puckering, check the tension settings on your sewing machine. Reducing tension can help create a smoother seam. If puckering persists, consider using a lighter fabric stabilizer or interfacing to stabilize the area.
If the hem is too short, assess the fabric leftover. If sufficient, unpick the hem and extend it as needed. Attach visual markers at desired length before re-sewing to ensure uniformity.
Should the thread color clash with the fabric, remove the offending thread with a seam ripper. Replace it with a matching shade to achieve a cohesive look. Always test a small swatch before committing to the entire piece.
In cases of fraying, use a rolled hem or a zigzag stitch to prevent further damage. Additionally, applying a fray check solution can enhance durability.
If an adhesive or tape method was used and left residue, carefully peel it away. Clean the fabric with appropriate solvents, ensuring it doesn’t harm the material.
Maintaining Hems for Long-Lasting Wear
Choose high-quality threads that match the fabric’s strength and fiber composition. This ensures durability and prevents unraveling over time.
Washing and Care
- Follow specific washing instructions on garment labels to prevent shrinkage or distortion.
- Utilize cold water settings and gentle cycles to maintain fabric integrity.
- Avoid bleach or harsh chemicals that could weaken fibers and affect the finish.
Storage Techniques
- Store garments in a cool, dry place away from direct sunlight to prevent color fading and degradation.
- Use padded hangers for delicate items to avoid stretching or misshaping the ends.
- Fold heavier pieces to avoid stressing the fabric and causing wear on the edges.
Inspect seams and edges regularly for loose threads or fraying. Address these issues promptly with a needle and thread to maintain appearance and strength.
Consider reinforcing areas prone to wear, such as corners or underarms, using additional stitching to prolong garment life.
Q&A: Sienna Maker hems
How does the Closet Core Sienna Maker Jacket pattern incorporate finishing details like a back vent and Hong Kong seams, and what makes it a standout outerwear sewing pattern?
The Closet Core Sienna Maker Jacket pattern incorporates thoughtful finishing details such as a back vent for ease of movement and optional Hong Kong seams for a clean, professional interior. These techniques, often highlighted in the Sienna Maker Jacket sewalong, elevate the construction of this utility jacket, making it not only functional but also stylish. The pattern’s clear instructions guide sewists through these steps, resulting in a jacket that feels high-end and is perfect for anyone seeking to expand their sewing experience with outerwear.
What makes view C of the Sienna Maker Jacket by Closet Core Patterns different from other versions, and how does it suit lightweight fabrics like linen?
View C of the Sienna Maker Jacket by Closet Core Patterns is the cropped version of the chore jacket, featuring a more casual silhouette without a back button placket or vent. This version is especially well-suited for lightweight fabrics like linen or cotton twill, making it ideal for transitional weather or layering. The shorter length and simplified construction also make it a great choice for those who want a quicker sew or who are testing fit adjustments in a toile before committing to a longer view.
Why is bias binding a key detail in the Sienna Maker Jacket from Closet Core, and how does it enhance the construction process?
Bias binding is a key detail in the Sienna Maker Jacket from Closet Core because it’s used to finish seam allowances cleanly, particularly when applying a Hong Kong finish. Whether made bias binding from matching fabric or store-bought, it provides both durability and a polished interior. This method is especially appreciated in sewing pattern reviews for adding refinement to a utilitarian silhouette, and it reinforces the jacket’s status as a versatile pattern for both casual and tailored outerwear.
How does the Sienna Maker Jacket by Closet Case accommodate features like sleeve pockets and a button placket, and what should sewists keep in mind when topstitching?
The Sienna Maker Jacket by Closet Case accommodates practical details like sleeve pockets, a front button placket, and large patch pockets, reflecting its workwear roots. When topstitching these elements, sewists should mark their stitch lines carefully, maintain even spacing, and use topstitching thread or a slightly longer stitch length for definition. These finishing touches, often discussed in the Sienna Maker Jacket sewalong, contribute to the professional look of the finished jacket and make it a rewarding project for intermediate makers aiming to refine their sewing journey.
How does View B of the Sienna Jacket from Closet Core Patterns differ from other versions, and what design elements make it a stylish jacket for layering?
View B of the Sienna Jacket from Closet Core Patterns is a mid-length version with a notched collar, breast pocket, and button closure, offering a refined silhouette that bridges the gap between a casual jacket and a lightweight blazer. It features clean lines and subtle tailoring, making it ideal for layering over tees or turtlenecks. With the option to sew in corduroy, canvas, or even a quilted jacket fabric, this version delivers a stylish jacket that’s both practical and polished.
What role do the facing and lapel pattern pieces play in the construction of the Sienna Maker Jacket, and how can sewists achieve crisp results along the shoulder seam?
The facing and lapel pattern pieces in the Sienna Maker Jacket are key to forming the jacket’s structured front and notched collar. These pieces are carefully joined to the shoulder seam and sewn in with precision, which helps define the clean fold of the lapel. To achieve crisp results, sewists are encouraged to understitch the facing, grade the seams, and press thoroughly at each stage—especially around the notch. These steps are emphasized in the Sienna Maker Jacket sew along available through the Closet Core website.
How can the pattern be adjusted to lengthen the Sienna Jacket, and what factors should be considered when changing the length of the jacket?
To lengthen the Sienna Jacket, sewists should use the provided lengthen/shorten lines on the pattern piece and adjust evenly across both front and back pieces to maintain balance at the side seam. When modifying the length of the jacket, it’s important to consider proportions, pocket placement, and fabric requirements. Adding length is popular for those wanting a more blazer-style jacket or a new coat alternative while keeping the polished details like the topstitched lapel and optional breast pocket.
Why do sewists often start with a muslin when making a version of the Sienna Maker Jacket, and how does it help when sewing a casual jacket or bomber jacket variation?
Sewists often start with a muslin when making a version of the Sienna Maker Jacket to test the fit through the shoulder seam, sleeve, and lapel area—especially if they’re planning to customize it into a casual jacket or bomber jacket variation. A muslin helps reveal any needed adjustments in length, sleeve width, or back ease before cutting into final fabric like corduroy or canvas. This step is essential when using the pdf pattern or experimenting with new styles inspired by the original jacket from Closet Core Patterns.
How does the Closet Core Patterns Sienna Maker Jacket compare to a traditional jean jacket, and what makes the short chore jacket version a modern alternative?
The Closet Core Patterns Sienna Maker Jacket offers a more tailored, workwear-inspired silhouette compared to a traditional jean jacket, with details like a notched collar, deep patch pockets, and optional topstitching for a refined finish. The short chore jacket version is a modern alternative thanks to its cropped length and utility-inspired design, making it ideal for casual wear in durable fabrics like canvas or denim. Its versatile structure and customizable features make it appealing for sewists looking to create a stylish yet functional outer layer.
Why do sewists who bought the pattern often choose to add an optional snap button or topstitch details, and how does this elevate the core patterns Sienna Maker Jacket?
Sewists who bought the pattern often choose to add an optional snap button or topstitch details to personalize their Closet Core Patterns Sienna Maker Jacket and give it a more polished, ready-to-wear look. These additions enhance durability and reinforce seams—especially when using heavyweight fabrics like those in a canvas jacket. Topstitching also outlines design lines and creates a visual link to classic workwear, allowing the finished jacket to reflect the “jacket inspired” style it was designed around, while still feeling uniquely handmade.