tutorial: scrappy stars
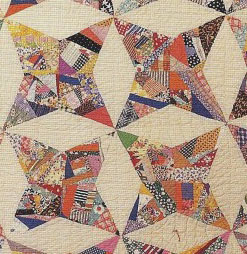
This scrappy 1930s quilt from the book Quilted Planet is the inspiration for my tutorial. I loved the scrappiness of this quilt, and I’ve spent quite a bit of time searching the internet for a similar block. The closest thing I could find is “Rocky Road to Kansas” which uses strips of fabric instead of scraps (a tutorial for that block can be found here).
This project is perfect for all of those odd-sized scraps that you have laying around. (Your pieces need to be at least 1″x1″ to hold a seam.)
This tutorial is for a 12.5″ (unfinished) block. All seams are 1/4″.
To make a lap-sized quilt of 25 blocks, you will need:
- Many assorted scraps (this is hard to estimate, but you probably need about 1 quart sized Ziploc of scraps for each 12.5″ block)
- 3 yards of background fabric
- Templates (download here)
- Tools: rotary cutter, iron, ruler, fabric scissors
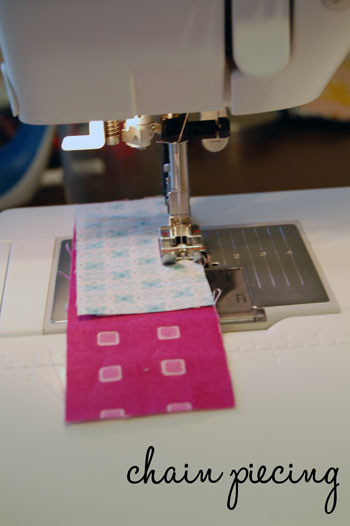
- Piecing the stars. Turn on your iron and get ready to chain piece. Start with two pieces at a time and sew until you have a decent chain of 10 or 15 sets. Trim the threads and press your seams open. Since you’re working with a variety of scraps you will need to do some trimming so that you have straight edges to attach your next scrap. This is where your sharp fabric scissors come in handy.
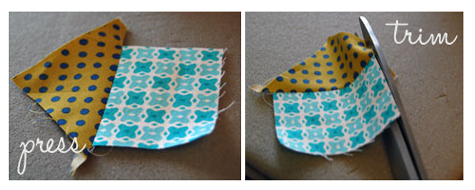 Continue adding to scraps and pressing until you’ve created a piece that covers the template A piece.
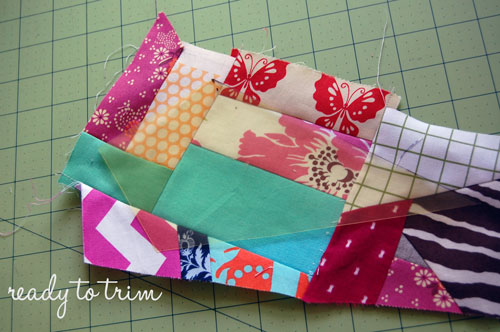
- Trimming the Stars. Get out that rotary cutter and ruler and go to town. The template pieces include seam allowances so you can use them as a cutting guide. If the parts you trim off are large enough to hold a seam, throw them back in your scrap bin to use for the next block. After all of that piecing, pressing, and trimming, you will need 100 “A” pieces for the quilt.
- Cutting the Background Fabric. You are going to be cutting your background fabric from selvage to selvage. Unless you have a giant cutting mat, you’ll probably want to fold it in half. For each 12.5″ block you will need 1 piece of fabric measuring 4″ wide and 44″ long. This is how you will lay your B template on the fabric to use as a cutting guide.
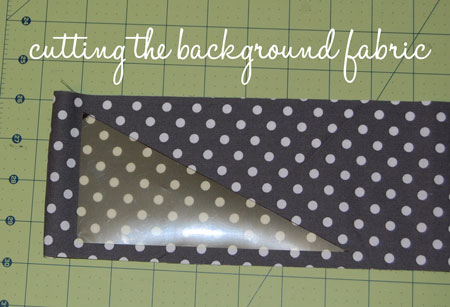 Cut your first piece and then flip the template to cut the next piece (you can also keep your fabric folded in half and cut two at a time.) You will cut 8 pieces from each 4″ wide strip (for a total of 200 “B” pieces).
 - Putting Together the Block. Here is the fun part! Each block is made of four smaller blocks so you will need four completed A pieces before you’re ready to put a block together. This part is simple but be gentle because you are sewing on the bias. Don’t abuse your fabric! Use scissors to snip your thread ends instead of that handy little cutter at the side of your machine. That kind of force can make delicate bias seams go wonky.
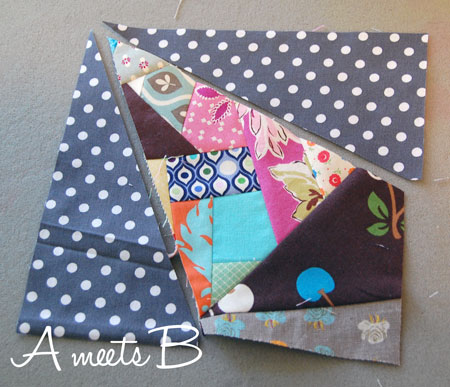 Grab two B pieces and one A piece and let’s get started! To make sure your pieces line up perfectly (or as close to it as humanly possible), fold your As and Bs in half and use your hot iron to press the fold.
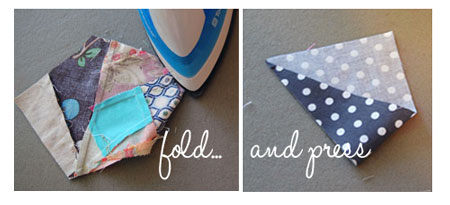 Match up your press marks and pin. Sew along the pinned edge. Press open. Repeat for the other B piece. Now you should have something that looks like this:
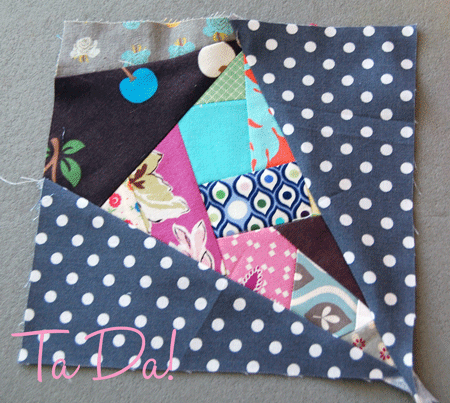 This is only 1/4 of your block, but it’s still worth a Ta Da! moment. Repeat 3 more times and you have your first scrappy star block!
Questions?


