How to Install Overall Buckles Hardware for a Perfect Fit
Achieving an impeccable adjustment in your attire involves embracing the nuances of fasteners that ensure both comfort and functionality. The right selection and positioning of these components play a crucial role in enhancing the overall aesthetic and practicality of your wardrobe choices. By understanding the myriad of options available, you can elevate your style while ensuring optimal ease of movement.
Delving into the intricacies of fixing these pivotal elements requires a careful approach and attention to detail. Each piece serves not only as a connector but also as a statement of individuality. Navigating the process necessitates an awareness of the various types and their respective applications, ensuring that your garments not only look great but also feel great.
With the right techniques at your disposal, the journey towards achieving a flawless appearance transforms into an enjoyable experience. By mastering the essentials of secure attachments, you can foster a deeper connection with your clothing, embodying both confidence and poise. Embrace the art of crafting attire that truly resonates with your personal style.
Choosing the Right Buckles for Overalls
Selecting suitable fasteners is essential for achieving both functionality and aesthetic appeal in your garments. The right components not only enhance comfort but also ensure durability and ease of use. With a variety of types, materials, and designs available, understanding the options can elevate your apparel-making process.
Types of Fasteners
- Plastic: Lightweight and versatile, ideal for casual wear.
- Metal: Offers strength and a classic look, suitable for workwear.
- Slide: Provides adjustability and ease of wear.
- Quick-release: Perfect for those who need a fast and secure way to detach.
Material Considerations
- Weight: Choose lightweight materials for everyday wear.
- Durability: Select robust options for rugged environments.
- Corrosion resistance: Opt for materials that withstand harsh conditions.
- Aesthetic: Consider how the material complements the overall design.
By carefully evaluating these aspects, you’ll ensure that your selected closures meet both functional and stylistic requirements, contributing to a well-designed garment.
Essential Tools for Installation Process
When embarking on a task that requires precision and attention to detail, having the right set of instruments at your disposal is crucial. Properly selected tools not only streamline the entire procedure but also enhance the final result, ensuring that everything operates smoothly and efficiently.
Below is a list of indispensable tools to consider:
- Screwdriver Set: A variety of screwdrivers will help tackle different types of screws you may encounter.
- Measuring Tape: Accurate measurements are essential for achieving proper alignment.
- Pliers: Useful for gripping and manipulating small parts, especially in tight spaces.
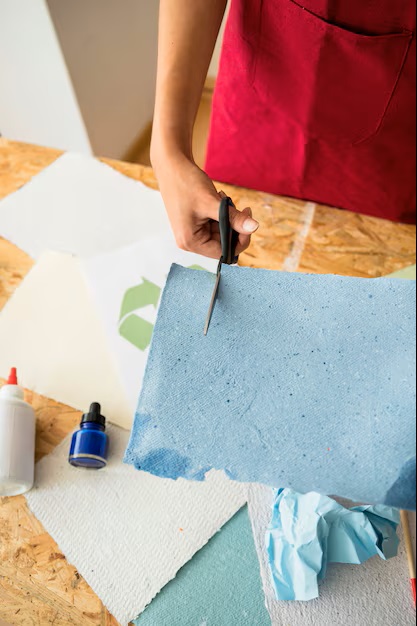
- Scissors: For cutting straps or other materials to the required lengths.
- Drill: An electric or manual drill can simplify making holes for fastening purposes.
- Marker or Chalk: Ideal for marking specific spots for clarity during assembly.
- Level: Ensures everything is perfectly aligned and balanced.
- Safety Gear: Don’t forget gloves and goggles to protect yourself during the process.
Equipped with these tools, you’ll be well on your way to achieving success in your undertaking.
Step-by-Step Guide to Installation
This section provides a detailed roadmap to ensure that your connection components are secured properly and adjusted for optimal comfort. Following a systematic approach will help achieve the desired outcome efficiently.
- Gather all necessary materials and tools for the task. This includes:
- Adjustment pieces
- Screws or clips
- Screwdriver or pliers
- Measuring tape
- Marker or chalk
- Begin by measuring the designated areas where the components will be attached. Mark the spots with a marker for accuracy.
- Next, prepare each connection point by ensuring no debris or old components interfere with the new fittings.
- Align the components with the markings made earlier. Ensure they are positioned correctly before proceeding.
- Using the screwdriver or pliers, secure the components in place cautiously, making sure not to overtighten and risk damage.
- Once everything is fastened, conduct a thorough check to ensure all pieces are secure and functioning as intended.
- Finally, test the adjustments to ensure they allow for the desired movement and comfort without any restrictions.
Adjusting Straps for Optimal Comfort
Achieving the ideal balance between snugness and freedom involves careful modification of the straps. The right adjustments ensure ease of movement while maintaining security. It’s essential to focus on both ends of the strap to create a uniform tension that supports without constricting.
- Begin by assessing the current length of each strap. Determine if they are too loose or excessively tight.
- Adjust the straps evenly on both sides to promote stability.
- Take into account your body shape and any additional layers of clothing that may affect comfort.
Pay attention to pressure points, especially around shoulders and hips. Discomfort at these areas can significantly impact overall wearability.
- Loosen the straps slightly and test the fit while moving.
- Gradually tighten until you find the suitable level of security that feels natural.
- Make adjustments as needed based on feedback from your movements.
This iterative process ensures that all aspects of comfort and support are addressed, leading to a more enjoyable experience.
Common Mistakes to Avoid During Setup
Ensuring a secure and comfortable experience requires careful attention to detail during the assembling process. There are several common pitfalls that individuals may encounter, which can lead to discomfort or malfunctions. Being aware of these errors can help achieve a reliable outcome.
- Neglecting to Read Instructions: Skipping over the guidelines can result in misunderstanding critical steps.
- Inadequate Measurements: Failing to measure accurately can prevent optimal adjustment and comfort.
- Forgetting to Test Before Use: Not performing a preliminary check can lead to unexpected issues later on.
- Using Incorrect Tools: Utilizing inappropriate or substandard equipment may not provide the necessary support.
- Forgetting to Secure All Components: Omitting to properly fasten parts can cause instability during use.
By avoiding these common errors, individuals can enhance their experience and ensure longevity in use.
Maintaining Buckles for Long-Lasting Use
Ensuring the durability and functionality of fastening mechanisms relies on regular upkeep and mindful handling. As these components endure wear and tear, a proactive approach can extend their lifespan significantly.
Routine Cleaning is essential to preventing dirt and debris buildup. Utilize a soft cloth or brush to remove any particles that may hinder movement. If necessary, a mild soap solution can help in getting rid of stubborn grime. Always ensure that the mechanisms are thoroughly dried after cleaning to avoid rust or corrosion.
Additionally, Lubrication plays a crucial role in maintaining smooth operation. Applying a light silicone spray or a specialized lubricant at pivot points can minimize friction and prevent jamming. Avoid over-lubricating, as excess grease can attract more dirt and lead to further complications.
Lastly, Inspection should become a habitual practice. Regularly check for any signs of wear, such as cracks or deformities in the fasteners. Addressing minor issues before they escalate can save both time and money, ensuring that your fastening mechanisms remain reliable and functional.
Q&A: Install overall buckles hardware
What tools do I need to install overall buckles hardware?
To install overall buckles hardware, you will typically need a few essential tools. These include a screwdriver (either flat-head or Phillips, depending on the type of screws you are using), scissors to trim the strap to the desired length, a measuring tape for accurate sizing, and possibly a drilling tool if you need to create new holes for the buckle attachment. Additionally, having a fabric adhesive or sewing kit on hand can be helpful if you need to reinforce your installation or make adjustments to the fabric.
How do I determine the correct length for my overall straps before attaching the buckles?
To determine the correct length for your overall straps, first, put on the overall without adjusting the straps. Allow the straps to naturally fall to a comfortable position on your shoulders. Use a measuring tape to measure the excess strap length that hangs down. It’s best to measure each side separately, as one side may require a different length due to fabric draping or your body shape. Once you have the measurements, trim the straps to the desired length before proceeding to attach the buckle hardware. Always leave some extra length to accommodate any future adjustments.
Can I use different types of buckles for my overalls, and how do I choose the right one?
Yes, you can use different types of buckles for your overalls, and choosing the right one depends on both functionality and style. Common types of buckles include flat buckles, traditional metal or plastic clips, and adjustable sliders. When selecting a buckle, consider the weight of the overall fabric, the intended use (e.g., workwear vs. casual), and your personal aesthetics. Additionally, make sure that the buckle is compatible with the width of your straps. For a more secure fit, adjustable buckles are often recommended, as they allow for easy adjustments without the need for sewing or extensive alterations.
What is the best method for securing the buckles to my overalls?
The best method for securing the buckles to your overalls involves a combination of sewing and/or using strong adhesive, depending on the type of hardware you have chosen. Begin by marking the desired position of the buckles on the straps and making any necessary holes for attachment. For most metal buckles, it’s best to sew the buckle down using a sewing machine, employing a zig-zag stitch for added durability. If you’re using plastic buckles, a fabric adhesive can work well, especially for light-duty overalls. Whichever method you choose, ensure that the buckles are securely attached and that all parts are aligned properly for a neat and functional finish.
What maintenance should I perform on my overall buckles to ensure a perfect fit over time?
Maintaining your overall buckles is essential for ensuring a perfect fit over time. Regularly inspect the buckles for any signs of wear or damage, such as cracks or bends, especially if they are made of plastic. Periodically check that the straps are properly secured, as they may loosen with wear. If you notice any fraying or deterioration of the straps, consider reinforcing or replacing them promptly. Additionally, clean the buckles with a damp cloth to remove any dirt or grime that may affect their functionality. If your buckles are adjustable and it becomes hard to slide them, apply a small amount of lubricant to keep them moving smoothly. By performing these maintenance tasks, you can prolong the life of your overall buckles and maintain a comfortable fit.
What tools do I need to install overall buckles hardware for a perfect fit?
To install overall buckles hardware effectively, you’ll typically need the following tools: a pair of scissors or a rotary cutter for trimming any excess fabric; a ruler or measuring tape for precise measurements; a fabric marker or chalk for marking positions; a sewing machine or hand sewing needle and thread for securing the buckles in place; and a screwdriver if your hardware requires screws for installation. Additionally, having an iron handy can help you smooth out any wrinkles in the straps before you begin your installation, ensuring a neat and professional finish.
How do you attach jeans buttons to denim?
To attach jeans buttons, first mark where the button will go on the waistband. Use an awl to create a small hole, then push the button through from the front and secure it by hammering the back piece in place.
What hardware is needed for dungarees or overalls?
For dungarees or overalls, you’ll need overalls hardware, which includes buckles, buttons, and possibly snaps or clasps for the bib. A hardware kit usually comes with everything you need for these closures.
Where can I find a tutorial on how to install overalls hardware?
You can find helpful tutorials on how to install overalls hardware on YouTube. Simply search for “attach overall buckles” or “dungaree hardware tutorial” for step-by-step instructions.
How do I replace the buckles on my denim overalls?
To replace buckles on denim overalls, remove the old buckle from the strap and thread the new buckle through the strap’s loop. Make sure the middle bar is properly positioned for the buckle to function correctly.
What is included in a typical overalls hardware kit?
A typical overalls hardware kit includes buckles, buttons, and snaps, all made from high-quality materials like brass or metal. Some kits may also include instructions for attaching the hardware to your denim overalls.
How can I find replacement buckles for dungarees?
You can find replacement buckles for dungarees online or at fabric stores. Look for high-quality metal buckles that match the original hardware and are durable enough to withstand daily wear.
What tool do I need to install snaps on the bib of overalls?
An awl or small punch is necessary to create a hole for the snaps. After that, a hammer can be used to secure the snaps in place, making the bib functional.
How do I attach overall buckles to denim overalls?
To attach overall buckles to denim overalls, first insert the strap through the loop on the buckle. Adjust the strap’s length and ensure the middle bar is in the correct position to allow easy fastening and unfastening.
Where can I find high-quality overalls hardware kits?
High-quality overalls hardware kits can be found at fabric stores or online through sewing and crafting suppliers. Closet Core Patterns also offers hardware kits specifically designed for their Jenny overalls pattern.
What sewing patterns are available for making denim overalls?
Closet Core Patterns offers the Jenny overalls pattern, which includes instructions on how to sew denim overalls, including how to attach buckles, snaps, and other hardware.
How do I install a jean button on a waistband?
To install a jean button on a waistband, use an awl to create a hole, place the button in the hole from the front, and secure it by hammering the back piece onto the button. Make sure to hammer on a hard surface for stability.
What should I do if my overall buttons or buckles come loose?
If your overall buttons or buckles come loose, you can replace them using an overalls hardware kit. Ensure that the replacement hardware fits the existing loops and holes, and use high-quality materials for durability.
How do I prevent hardware from damaging my denim during installation?
To prevent hardware from damaging your denim during installation, place a piece of scrap fabric between the hammer and the button or snap while securing the hardware. This adds a layer of protection and ensures smooth installation.
What are some helpful YouTube channels for learning to install overalls hardware?
You can search for videos on world on YouTube by creators like Closet Core Patterns or independent DIY channels that focus on jean-making and sewing projects. They often provide detailed transcripts and step-by-step tutorials.