Transform Your Old File Cabinet with These Creative DIY Makeover Ideas
Consider using peel-and-stick wallpaper to revitalize worn-out storage furniture. This affordable option adds texture and personality without the mess of traditional wallpaper. Choose a bold pattern to create a focal point in your workspace or opt for subtle designs for a more classic look.
Paint is another simple yet dramatic way to change the appearance of your organizational units. Select high-quality furniture paint that adheres well and provides durability. A light coat of chalk paint can lend a rustic vibe, while a high-gloss finish offers a modern touch. Don’t forget to sand the surface lightly for better adhesion.
Hardware upgrades can transform the functionality and aesthetic of any storage unit. Swap out standard knobs and handles for unique vintage or contemporary options. Look for pieces made from materials such as ceramic, metal, or wood to add a distinct touch that reflects your personality while ensuring ease of access.
Adding texture through fabric can also enhance your pieces. Upholster drawer fronts or the sides of your unit with patterned or solid fabric for a visual update. Use a staple gun for a tight fit and finish with a layer of protective spray to maintain the integrity of the fabric over time.
Finally, consider incorporating organizational accessories. Custom drawer dividers made from wood or acrylic can optimize space and improve the functionality of your furniture. This not only enhances the look but also contributes to a more organized and efficient environment.
Choosing the Right Paint for Your File Cabinet
Select a high-quality spray paint or acrylic paint specifically designed for metal or wood surfaces, depending on your piece. Brands like Rust-Oleum and Krylon offer excellent options that provide durable coverage and a smooth finish. Check for formulation that includes a built-in primer to ensure better adhesion and longevity.
If opting for a brush-on paint, consider using enamel for a hard, glossy finish. Look for low-VOC or zero-VOC options to minimize harmful emissions, especially if the item will be used in a home or office environment.
Testing colors is vital; purchase sample sizes and apply patches on an inconspicuous area. Different lighting conditions may change the appearance, so evaluate colors at various times of the day.
Consider the final finish: matte, satin, or glossy can drastically alter the look. Glossy finishes are more resistant to wear and easier to clean, while matte offers a more subtle, modern appearance.
Lastly, think about texture. Adding a textured finish can enhance the visual interest of the furniture. Textured spray paints or a sponge technique with acrylics can provide depth and character.
Unique Fabric Applications for a Stylish Finish
Consider using contact adhesive to attach fabric to surfaces, creating a distinctive look. Choose a bold print that suits your aesthetic. Measure carefully, cut the fabric slightly larger than the area, apply adhesive, and smooth down to eliminate air bubbles.
Fabric Wrap Techniques
Wrapping sections of the furniture with fabric can transform the entire piece. Use a staple gun to secure fabric over the edges. Opt for a textured material like velvet or linen for added depth. This technique works well for larger areas or as an accent on drawers.
Patchwork Patterns
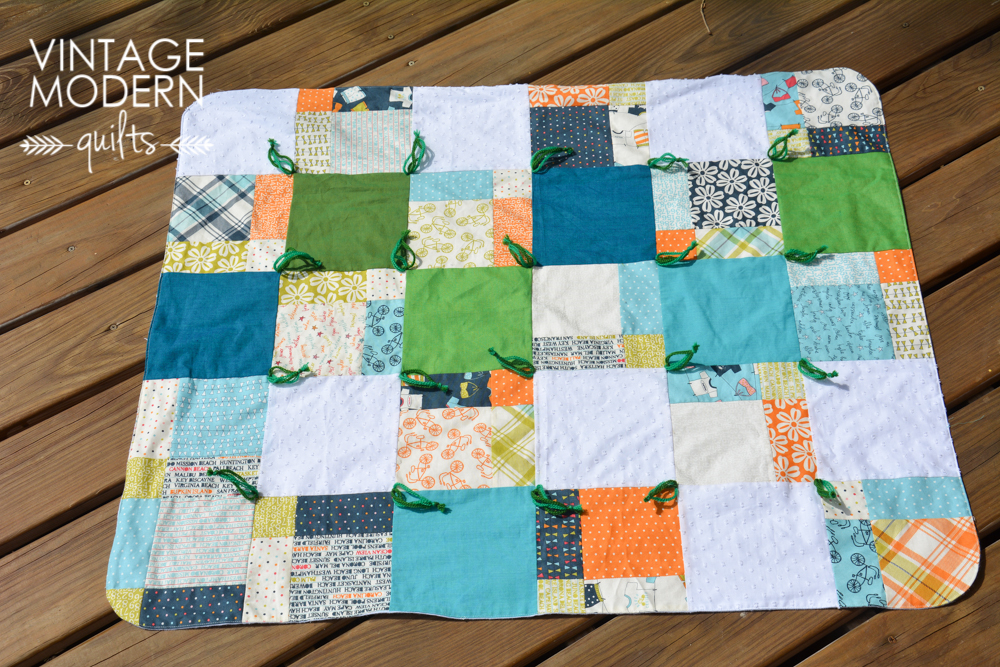
Incorporate patchwork designs by stitching together different fabric pieces. Apply these patches on selected sections for a unique visual effect. Consider color blocking or contrast in textures to enhance appeal. Secure patches with fabric glue, making sure to cover any unsealed edges.
| Fabric Type | Application Method | Best For |
|---|---|---|
| Cotton | Adhesive or Stapling | Durable surfaces |
| Silk | Sewing | Accent pieces |
| Canvas | Wrapping | High-traffic areas |
| Leather | Stapling or Glue | Elegant finishes |
Transforming File Cabinets with Decorative Hardware
Consider replacing standard knobs and handles with unique pieces like vintage hardware or artisan-crafted pulls. This simple adjustment can significantly change the appearance of your storage unit and add a personalized touch.
Choosing the Right Pieces
Select hardware that complements the existing color scheme and overall style of your space. For a modern look, opt for sleek, minimalistic designs in matte black or brushed nickel. For a more rustic feel, distressed finishes or antique brass can work wonders.
Installation Tips
When adding new hardware, ensure that the holes align properly. If converting from larger to smaller pulls, fill existing holes with wood filler and repaint for a seamless finish. Use a level to accurately position the new pieces for a polished appearance.
Incorporating Wallpaper for a Bold Statement
Choose wallpaper with striking patterns or colors to instantly transform the appearance of your storage unit. Here are practical tips:
- Select the Right Pattern: Opt for bold motifs like geometric shapes, florals, or abstract designs. Large patterns can make a dramatic impact.
- Coordinate Color Schemes: Match the wallpaper with the color palette of your room. Complementary tones can tie the entire space together.
- Focus on Texture: Textured wallpaper adds depth. Consider materials like grasscloth or fabric for a tactile experience.
- Accent Areas: Apply wallpaper to the inside doors or as a back panel. This creates a surprise element when opened.
- Easy Removal: Choose peel-and-stick options for simpler updates. This allows for experimenting with patterns without long-term commitment.
Measure your surfaces accurately before purchasing wallpaper to avoid waste. Pair your choice with sleek hardware to enhance overall style and functionality.
Using Stencils and Vinyl Decals for Personalization
Choose high-quality stencils or vinyl decals that reflect your taste. Look for designs that fit the scale and shape of the surfaces you will be applying them to. Remember to test the adhesive on a small, inconspicuous area to avoid damage when you want to remove or reposition them.
Applying Stencils
For stencils, use a low-tack adhesive spray to keep them in place during application. This prevents the paint from bleeding underneath. Use acrylic paint or spray paint for a durable finish. Apply in thin layers for better control and less mess. Once dry, carefully peel away the stencil at a sharp angle for cleaner edges.
Utilizing Vinyl Decals
Vinyl decals offer versatility and ease of use. Select a design that complements your style–choose between quotes, patterns, or graphics. Clean the surface thoroughly before application to ensure strong adhesion. When applying, use a squeegee to smooth out air bubbles. If repositioning is needed, gently pull the decal back and press it down again. These decals are easy to remove or change as your preferences evolve.
Both methods enhance aesthetic appeal while offering functional benefits. Personalizing your storage solutions can make your workspace more inviting and organized.
Organizational Hacks to Enhance Functionality
Utilize vertical space by installing tiered shelves or stacking trays inside. This allows for easy access to frequently used materials while maximizing available height.
Incorporate labeled bins to categorize documents or supplies. Clear labels prevent confusion and help locate items rapidly. Consider color-coding these bins for a visually appealing and systematic approach.
Employ drawer dividers to keep similar items together. Adjustable dividers allow flexibility for different item sizes, ensuring that everything stays in its designated place.
Magnetic strips can be attached to the sides for holding metallic items like scissors, rulers, or clips. This keeps tools within reach while freeing up drawer or table space.
Implement a pull-out file system for easier retrieval. Extendable trays or files that slide out simplify access to documents without disturbing the entire setup.
Add a bulletin board or corkboard to the interior door or side. This space can display reminders, to-do lists, or important notes, enhancing visibility and organization.
Utilize clear containers for small items, allowing instant visibility. Seeing contents at a glance eliminates time spent searching for supplies buried in opaque boxes.
Attach hooks or small baskets under shelves for additional storage. These can hold miscellaneous items such as chargers or pens, clearing clutter from flat surfaces.
Designate a ‘home’ for each item. Consistency in storage locations helps in returning items to their designated spots, promoting a tidy environment.
Q&A: DIY File Cabinet Makeover
How can you transform a boring file cabinet into a stylish piece of furniture for your home office using an easy diy method?
To transform a boring file cabinet into a functional and stylish piece of furniture, start by cleaning the entire cabinet and using painter’s tape to protect any hardware or areas you don’t want painted. Apply a coat of paint, preferably chalk paint for better adhesion on metal, to the cabinet drawers and top of the file cabinet. Let it dry fully before adding new drawer pulls for a fresh touch. This easy diy file cabinet makeover instantly upgrades your home office with minimal cost and effort.
What materials are useful for a metal file cabinet makeover using scrapbook paper and mod podge?
For a creative metal file cabinet makeover, gather scrapbook paper, mod podge, painter’s tape, and a brush. After cleaning the surface of the cabinet, use painter’s tape to mask areas around the front of the file cabinet and top of the cabinet. Cut scrapbook paper to fit the front of the drawer and apply mod podge to stick to the metal. Once dry, seal with another coat of mod podge for durability. This cabinet diy is a fun way to upcycle an old cabinet and match it with your home decor.
How do you upcycle an old metal cabinet from a thrift store into a customized cabinet for your office space?
To upcycle an old metal cabinet from a thrift store, first sand and clean the surface to remove grime and prep it for a paint job. Choose a paint color that complements your office design and apply a coat of paint using even strokes for full coverage. Replace the drawer pulls with something modern or vintage to enhance the cabinet look. This diy project is one of the most rewarding cabinet makeover ideas and can completely change the feel of your office space with minimal cost and some elbow grease.
What are some easy diy projects to make a wood file cabinet or metal cabinet fit your home design?
Easy diy projects for a wood file cabinet or metal cabinet include painting, adding contact paper, or changing hardware. Use chalk paint for a smooth, matte finish, and stick to the metal or wood using mod podge or appropriate adhesive. For the front of the drawer or base of the cabinet, apply contact paper or scrapbook paper to create texture and pattern. Swap out the drawer pulls and repaint the top of the cabinet to complete the cabinet project. These small changes can make it look like a brand new file drawer and enhance your overall home design.
How can a basic file cabinet from a local thrift store be turned into a stylish piece of office furniture?
Start by finding a basic file cabinet at a local thrift store or thrift shop. Clean it thoroughly and use painter’s tape to mask off any hardware or areas you don’t want to paint. Choose a paint color that fits your office makeover theme and apply even coats to the entire surface. If the cabinet has drawer metal, consider lightly sanding for better adhesion. Replace the handles for an updated look. This simple transformation turns old furniture into a functional and attractive addition to your office.
What are the benefits of using black metal in a new file cabinet for modern office furniture design?
Black metal in a new file cabinet adds a sleek, modern aesthetic that pairs well with various office furniture styles. It’s durable, easy to clean, and gives a professional appearance suitable for any office makeover. When paired with wood accents or a piece of wood on the top, it softens the industrial look while maintaining functionality. Black metal also complements most color schemes, making it a versatile choice for upgrading your office space.
How can painter’s tape be used during the process of turning a painted file cabinet into a clean and polished office feature?
Painter’s tape is essential when transforming a painted file cabinet, as it helps create clean lines and prevents paint from bleeding onto unwanted areas. Apply the tape around the edges of drawer fronts, handles, or any section you want to keep unpainted. This ensures a neat finish and professional look, especially when using bold or contrasting paint colors during an office makeover. Once the paint dries, remove the tape slowly to reveal crisp edges and give your cabinet a flawless new look.
What kind of cabinet to make if you want to repurpose a piece of wood and update old furniture from a thrift shop?
To update old furniture from a thrift shop using a piece of wood, consider making a hybrid cabinet by attaching the wood to the top of a metal or painted file cabinet. This adds warmth and texture to otherwise industrial-style furniture. Secure the wood using strong adhesive or screws, depending on the weight. Sand and stain the wood to match your office décor. This approach gives a new look to a thrifted piece, combining practicality with modern style for a custom office furniture upgrade.


