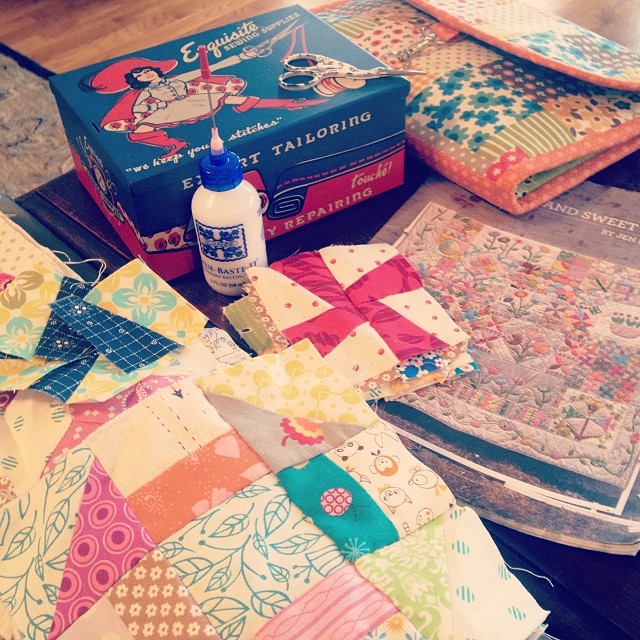
Hand Stitches you Should Know for Your Sewing Projects
To achieve polished results, focus on mastering the running technique. This foundational method allows for quick assembly and reinforcement of seams, making it indispensable for both simple and complex designs. Ensure stitches are evenly spaced for a clean appearance, which enhances durability while maintaining aesthetic appeal.
Another valuable method to incorporate is the whip application. Ideal for finishing raw edges, it prevents fraying and adds a decorative touch. Experiment with varied spacing to create unique visual effects on fabric boundaries.
For a polished finish, consider the slip technique. This approach is optimal for hemming and closing linings without visible stitching on the outside. Practice this technique to refine your precision, resulting in refined craftsmanship that elevates any garment.
Lastly, the backstitch technique provides strength and stability. Particularly useful for areas under stress, this method creates a solid seam that endures wear and tear. Combining this with the other methods will significantly enhance the longevity of your creations.
Basic Running Stitch for Quick Repairs
To tackle small tears or hems, employ a running technique for swift fixes. This method is straightforward and can be executed without prior experience. Begin by threading a needle with an appropriate length of thread, securing a knot at one end. Position the fabric pieces to be joined together, ensuring edges align neatly.
Steps to Execute the Technique
- Insert the needle from the underside of the fabric to conceal the knot.
- Bring the needle up through the top layer, making a small stitch.
- Insert the needle back down in the same layer a short distance away, making a uniform stitch length.
- Continue this pattern across the area, alternating between the top and bottom layers.
Tips for Optimal Results
- Maintain consistent stitch lengths to ensure an even appearance.
- Use a thread color that closely matches the fabric for discreet repairs.
- Pull the thread gently to avoid puckering the fabric.
| Thread Type | Recommended Use |
|---|---|
| Cotton | Lightweight fabrics |
| Polyester | Stretchable materials |
| Silk | Delicate textiles |
Backstitch for Strong Seams in Garments
To create durable seams, employ the backstitch technique. This method provides remarkable strength, making it ideal for areas subject to stress, like armholes and waistlines.
Follow these steps:
- Thread the needle with a suitable fabric thread and secure at the start point.
- Insert the needle into the fabric about 1/4 inch from the starting point.
- Pull the thread through, leaving a small tail, then insert the needle back down into the fabric 1/8 inch ahead of the first entry point.
- Bring the needle up again 1/4 inch behind the last stitch, creating a backward movement.
- Repeat this process, ensuring even tension throughout for a neat finish.
When utilizing this technique, key points should be observed:
- Maintain consistent stitch length for uniformity.
- Use a suitable needle size corresponding to the fabric type to avoid damage.
- Check your thread choice; stronger threads will enhance durability.
This method not only strengthens seams but also offers a seamless appearance on the inside of the garment. Perfect for hand-sewn projects that require longevity and reliability.
Practice on scraps before applying to your final pieces to ensure proficiency. Regular use will lead to improved speed and results in superior seam quality.
Whip Stitch for Hemming and Finishing Edges
This technique is ideal for securely finishing edges without visible stitching on the front side. Use a needle and thread that matches the fabric for a seamless look.
To begin, fold the hem or edge under, usually by about 1/4 inch, and press it to create a crisp fold. Secure the folded edge with pins to prevent movement while working.
Insert the needle from the back side of the fabric, picking up a few threads from the hem and then a few threads from the main fabric. Pull the thread through completely without creating slack.
Repeat this process in small, consistent intervals to secure the edge. Maintain an even tension to ensure that the stitches are not visible on the front side. This produces a neat finish while keeping the edge secure.
For heavier fabrics, consider using a stronger thread or multiple strands to provide durability. Adjust the length of the stitches based on the fabric type; shorter stitches for delicate fabrics and longer for thicker ones.
This technique can also be used for appliqué projects, allowing for clean attachment of decorative elements to the main piece without bulk. Practice this method to enhance precision and stability in your fabric creations.
Slip Stitch for Invisible Hemming Techniques
Utilize a slip stitch technique to achieve a nearly undetectable hem. This method requires a fine needle and thread that matches the fabric closely. Begin by folding the hem allowance inward and pressing it in place. Ensure the fold aligns with the desired length.
Steps to Execute the Slip Stitch
1. Insert the needle through the folded fabric without piercing the front side. Pull it through until a small knot or a few inches of thread is secured.
2. Pick up a single thread from the garment’s main fabric, just enough to anchor the stitch. This keeps the hem invisible.
3. Proceed by taking another stitch in the fold, repeating this process regularly. Emphasize keeping stitches evenly spaced for a uniform look.
4. Complete the process by knotting the thread once you’ve reached the starting point, securing it discreetly within the hem.
Tips for Success
Choose appropriate tension for the thread; it should be tight enough to hold but not so snug that it puckers the fabric. Practice the technique on scrap fabric to gain confidence before working on the actual piece. Consider using a thread conditioner to reduce tangling and enhance smoothness during application.
Blind Stitch for Professional-Looking Edges
To achieve a clean, almost invisible finish on hems and seams, utilize the blind stitch technique. This method is ideal for application on garments where you want to maintain a polished appearance without visible thread on the outside.
Materials Needed
Gather a needle, matching thread, fabric clips or pins, and an iron. Choosing the right needle size and thread color is crucial to blending seamlessly with the fabric.
Technique Steps
1. Fold the hem up and press it with an iron to create a crease. This step provides a clear guide for stitching.
2. Align the fabric so the folded edge sits just above the hemmed section. Use clips or pins to secure the fabric in place.
3. Insert the needle into the fold, drawing it out through a small section of the exposed fabric below. This bite should only take a few threads to maintain that discreet appearance.
4. Repeat the process, working along the hem while keeping even, consistent spacing. Aim for small, discreet stitches that are uniform in size.
5. After completing the seam, press the finished edge with an iron to set the stitches and enhance the overall finish.
Employing this method ensures a refined look on various projects, from casual wear to formal attire. Mastery of this technique elevates the quality of handcrafted items significantly.
Creative Sashiko Stitching for Decorative Elements
Incorporate contrasting thread colors to highlight motifs. Use white thread on indigo fabric or vibrant hues on neutral backgrounds for striking designs. Explore traditional patterns such as seigaiha (waves) or asanoha (hemp leaves) to create visually engaging elements.
Layering Textures
Combine various fabrics such as cotton, linen, or denim to add depth. Layer different materials before stitching to enhance tactile interest. Since the technique is based on repetition, experiment with varied stitch lengths to achieve unique visual effects.
Personalized Patterns
Create custom motifs by drawing designs on paper, then transfer them onto fabric using tracing paper. Alter existing patterns to better suit personal aesthetics. Incorporate initials or symbols relevant to the wearer for a bespoke touch.
Q&A: Hand stitches you should know
How does a back stitch work when you hand sew two pieces of fabric together, and why is it considered one of the strongest hand sewing stitches?
A back stitch is made by inserting the needle backward into the previous stitch, creating a continuous, tight line of stitches that securely holds two pieces of fabric together. It is considered one of the strongest hand sewing stitches because it mimics the durability of machine stitches. When you use this stitch, the overlapping structure reinforces the seam, making it ideal for permanent stitches in projects that require strength, like garment seams or heavy fabric repair.
Why is a blanket stitch a good stitch to use along the edge of the fabric, and how does it differ from other basic hand sewing stitches?
A blanket stitch is used to bind the edge of the fabric, preventing fraying while adding a decorative finish. Unlike basic hand sewing stitches like a straight stitch or basting stitch, the blanket stitch creates visible loops along the edge, which both strengthen and decorate the seam. This stitch is a great choice when you want a functional and ornamental edge, especially on blankets, felt projects, or thicker fabrics where machine sewing may not be practical.
What makes the catch stitch (also known as a cross stitch) an excellent choice when you need a flexible yet strong stitch for hems or lining attachments?
The catch stitch, sometimes referred to as a cross stitch, involves taking diagonal stitches that cross over each other between two layers, allowing for slight fabric movement while holding hems or linings securely. This type of hand sewing is perfect for projects where flexibility is needed, such as a blind hem stitch on curved hems or attaching facings to the back of the fabric. It creates a strong yet slightly stretchy seam that moves naturally with the garment.
How do basic hand stitches like the ladder stitch and overcast stitch help when you’re sewing by hand to join two pieces of fabric invisibly or protect raw edges?
The ladder stitch is ideal for sewing two pieces of fabric together invisibly, especially in projects like closing pillows or stuffed toys, because it creates a hidden seam when you pull the stitches tight. In contrast, the overcast stitch is used to wrap around the edge of the fabric, preventing fraying much like a machine serger would. These basic hand sewing stitches are essential tools in a sewer’s toolkit for achieving professional results without a sewing machine.
How does a buttonhole stitch work in hand embroidery, and why is it considered an essential hand stitch for securing the edge on the right side of the fabric?
A buttonhole stitch loops around the edge of the fabric, anchoring each stitch firmly and creating a neat, reinforced border. In hand embroidery, this stitch is usually used to protect raw edges or add decorative detail along the right side of the fabric. It’s considered an essential hand stitch because it combines function and beauty, securing the fabric while forming a visible, textured line perfect for designs and practical sewing patterns alike.
Why is the chain stitch a great stitch for embroidery projects that require flexible lines, and how do you make this stitch correctly?
The chain stitch is a great stitch because it creates a linked, flexible row of stitches that can curve smoothly along patterns. To make this stitch, you pull the needle up through the fabric, form a small loop, and insert the needle back near the first stitch, pulling through the loop to form the chain. This embroidery stitch is perfect for outlining shapes, adding decorative details, and maintaining consistent tension when working with different types of sewing designs.
What makes the satin stitch one of the most common hand embroidery techniques for filling spaces, and how can you keep your stitches smooth?
The satin stitch is one of the most common hand embroidery stitches for filling shapes because it creates a solid block of color with tightly packed threads. This stitch is a simple but effective way to create bold designs by taking tiny stitches side by side across the area to be filled. To keep your stitches smooth, it’s important to take small stitches with even tension and to always work from the right side of the fabric, adjusting each next stitch carefully to maintain a uniform surface.
How do basic hand-sewing stitches like the herringbone stitch and invisible stitch show the versatility of different types of stitches when sewing or embroidering?
Basic hand-sewing stitches such as the herringbone stitch and invisible stitch demonstrate the versatility of different types of stitches because they can be adapted for both construction and decorative purposes. The herringbone stitch, with its crossed lines, is a great stitch for securing hems or adding texture in embroidery, while the invisible stitch is perfect for joining fabric edges discreetly. Using these stitches allows a sewer to work on a variety of projects, from mending to creating intricate hand embroidery pieces.
How does learning one stitch like the basic running stitch help build a foundation for mastering many stitches in basic sewing and hand sewing projects?
Learning one stitch such as the basic running stitch provides a solid foundation because it teaches control over stitch length, spacing, and fabric handling. This basic stitch for sewing is also the starting point for many stitches like basting, gathering, or even decorative embroidery. By mastering the running stitch with a hand sewing needle, sewists develop the precision needed to move confidently into different stitches used across a variety of free sewing projects.
Why is it important to understand that one stitch can be used in multiple ways and combined with other basic stitches to create different stitches for sewing and embroidery?
Understanding that one stitch can be used in multiple ways highlights the versatility in sewing and embroidery. A basic stitch like the straight stitch can be adapted into a basting line, a decorative element, or part of a pattern when combined with other basic sewing techniques. This flexibility shows how stitches every sewer learns early on are essential, making it easier to branch into free sewing styles and create new patterns by blending two or three stitches creatively.