Photo Transfer to a Pillow for Unique Home Decor
Begin with high-quality fabric that complements your chosen images. Cotton and linen are excellent options due to their durability and ability to absorb ink effectively. Consider pre-washing the material to ensure it is free from any finishes that could interfere with adhesion.
Choose the right printing method. Inkjet printing is widely favored for its accessibility and ease of use at home, allowing you to create custom designs effortlessly. For those seeking professional results, screen printing offers remarkable color vibrancy, though it may require more time and resources.
Prepare your images carefully. Use graphic design software to adjust resolution and sizes, ensuring they match the dimensions of your fabric. It’s critical to save files in appropriate formats, such as PNG or TIFF, to maintain quality during the process. Don’t forget to mirror images when necessary, especially if they contain text.
Finally, consider finishing touches. After applying your graphics, heat setting the material will help to lock in colors and prevent fading. Follow the manufacturer’s instructions for optimal results, ensuring your creations remain beautiful and vibrant over time.
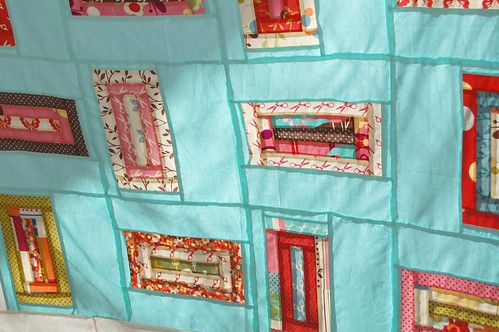
Selecting the Right Fabric for Photo Transfers
Choose cotton, as it absorbs ink effectively, resulting in clear and vivid imagery. Look for a high thread count for enhanced texture and durability. Polyester blends can also work well; they allow for bright colors but may require specific ink types.
Satin finishes provide a sleek appearance, which enhances the visual aspects of your designs. This fabric type can create a luxurious feel but may be less durable than cotton options. Consider canvas for a rustic look; it is thicker and can withstand wear and tear while still showcasing designs beautifully.
Test different samples before committing. Pre-wash fabrics to avoid surprises during application. Ensure compatibility with your printing method, as some materials may react poorly with specific inks. Using the right heat settings is critical, which varies by fabric type.
Assess how the chosen fabric will hold up after washing. Fabrics like cotton typically resist fading better than synthetic options. Using a fabric protective spray can enhance longevity, especially on items subject to frequent use.
For decorative cushions, blending style and practicality is key. Select fabrics that align with your design vision while ensuring they can handle the intended use without compromising quality.
Preparing Your Images for Pillow Printing
Select a resolution of at least 300 DPI to maintain clarity in the final product. Higher resolutions ensure finer details are retained during the printing process.
Use RGB color mode for your images. This mode is better suited for printing applications, as it provides a wider gamut of colors compared to CMYK, which may lead to variations in the final outcome.
Crop images to the appropriate dimensions for the cushion size you intend to create. Common measurements include:
| Cushion Size | Recommended Dimensions (inches) |
|---|---|
| Square 16” | 16 x 16 |
| Square 18” | 18 x 18 |
| Rectangle 20” x 12” | 20 x 12 |
| Rectangle 24” x 16” | 24 x 16 |
Adjust brightness and contrast to enhance image visibility. Poor lighting in the source image can result in dull and unattractive prints.
Remove any unwanted backgrounds or distracting elements using graphics editing software. This ensures the focal point of your design stands out prominently on the fabric.
Save your final design in a common format, such as PNG or TIFF. These formats preserve quality without compression artifacts that might distort the printed image.
Test print a smaller version of your design to evaluate color and clarity before committing to the full-sized print. This step allows for any necessary adjustments without wasting materials.
Choosing the Best Transfer Method: Iron-On vs. Sublimation
Opt for sublimation when seeking vibrant colors and durability. This approach bonds the ink with fabric fibers, ensuring a lasting finish that withstands washing without fading. Typically, it works best on polyester or polymer-coated surfaces.
If you prefer simplicity and accessibility, iron-on options offer a practical solution. They require a heat source to activate the adhesive and can be applied to a variety of materials. However, their longevity may be compromised compared to sublimation, especially after multiple washes.
Pros of Iron-On Method
- Easy to implement at home.
- Suitable for diverse fabrics.
- Lower initial costs for materials.
Cons of Iron-On Method
- Less durable; prone to peeling over time.
- Color quality may degrade with washes.
Pros of Sublimation Method
- Exceptional color vibrancy and detail.
- Highly durable; resistant to fading and cracking.
Cons of Sublimation Method
- Requires special equipment, such as a heat press and sublimation printer.
- Limited to synthetic fabrics for optimal results.
Consider your budget, desired fabric type, and the finishing quality you wish to achieve when selecting between these methods. For a long-lasting and professional-looking result, sublimation stands out, while iron-on is better for quick, low-cost projects. Assess your specific needs before proceeding.
Step-by-Step Guide to Iron-On Transfers
Choose high-quality fabric sheets designed for iron application. Ensure they are compatible with a home iron and can handle heat.
Prepare the artwork by resizing it to fit the fabric piece. Use graphic software to enhance clarity and ensure no pixelation occurs.
Print the design on the designated transfer sheets using an inkjet or laser printer, depending on the type of sheets used. Follow the sheet manufacturer’s instructions regarding printer settings.
Trim excess paper around your design to minimize visible edges once applied. Leave a small margin for alignment.
Preheat the iron to the recommended setting, usually high without steam. Iron the fabric surface without the transfer to eliminate moisture and wrinkles.
Position the trimmed design face down onto the fabric. Make sure it is centered and aligned correctly.
Firmly press the hot iron onto the transfer. Apply pressure evenly without moving the iron for 20-30 seconds, as specified in the instructions.
Lift the iron, and allow the fabric to cool for a few moments. Carefully peel off the backing paper, revealing your design on the fabric.
To enhance durability, cover the design with a thin cloth and press with the iron again for a few seconds. This protects the design during future washing.
Wait at least 24 hours before washing to ensure the design adheres properly. Follow washing instructions specific to the fabric and transfer type.
Using Sublimation for Vibrant and Lasting Prints
Sublimation offers an exceptional method for achieving high-quality imagery on fabric items. To start, ensure you have a polyester substrate, as this material is ideal for dye infusion. Fabrics with at least 70% polyester yield the best results, as the dye bonds directly with fibers, leading to brilliant colors.
Choose a reliable dye-sublimation printer and use sublimation ink specifically designed for this purpose. Regular ink will not work; it won’t adhere correctly or produce desired outcomes. Configure your printer settings for optimal resolution, aiming for at least 300 DPI to maintain sharpness.
Caring for Your Personalized Pillow After Transfer
Wash your customized cushion cover inside out to protect the design. Use cold water and a gentle cycle to prevent fading and damage. Avoid bleach and strong detergents, as they can deteriorate the colors and material.
Drying Techniques
Air dry the cover flat on a clean surface or hang it up, avoiding direct sunlight to prevent color loss. If using a dryer, select a low heat setting to minimize potential heat damage.
Store your cushion in a cool, dry place away from direct sunlight. Use a breathable bag or cover to prevent dust accumulation. Ensure it’s completely dry before storage to avoid mildew.
Q&A: Photo Transfer to a Pillow
How can you make a custom photo pillow using a mod podge photo transfer medium, and what materials are needed for this diy craft project?
To make a custom photo pillow using mod podge photo transfer medium, you’ll need a white fabric pillow cover, a laser-printed image, mod podge photo transfer medium, and a sponge or cloth. Start by applying the medium to the image, press it face-down onto the pillow cover, let it dry completely, then gently rub off the paper backing with a damp sponge to reveal the picture. This diy craft creates a personalized photo pillow that makes a beautiful keepsake or custom gift.
What steps are involved in creating a personalized photo pillow using transfer paper, and how does it differ from using sublimation or mod podge?
Creating a personalized photo pillow with transfer paper involves printing a mirrored image onto the paper, using a heat transfer method to apply it onto the white fabric of a pillow cover, and then removing the paper backing. Unlike sublimation or mod podge photo transfer, this method uses heat to directly bond the image, making it ideal for quick diy custom photo gifts like a pillow with photo or pet photo pillow.
How can a photo pillow be used as a meaningful personalized gift, and what occasions are ideal for giving a pillow personalized with a family photo or pet photo?
A photo pillow can be used as a meaningful personalized gift by incorporating a cherished family photo, pet photo, or custom photo collage to create a decorative and emotional keepsake. Occasions like Mother’s Day, birthdays, or memorials are ideal for giving a pillow personalized with special memories, making it a thoughtful addition to home décor and a lasting custom gift.
What are some creative pillow tutorial ideas for making a diy custom throw pillow or collage pillow using photo editing and image transfer techniques?
Creative pillow tutorial ideas include using Photoshop or other photo editing tools to design a personalized photo collage, then printing the final design for use with a heat transfer or mod podge method. These techniques can be used to make a pillow that features multiple images, text overlays, or themed designs, turning a simple square pillow or pillowcase into a custom throw pillow or memory pillow perfect for personalized décor.
How can a custom picture pillow be used as a birthday gift, and what makes it a meaningful keepsake?
A custom picture pillow makes a thoughtful birthday gift by featuring a cherished image, such as a family portrait, pet photo, or favorite memory, printed directly onto a pillow with picture quality clarity. This type of customized pillow becomes a meaningful keepsake because it blends comfort and sentiment, offering both décor and emotional value for the recipient.
What steps are needed to create a custom pet pillow using a sublimation pillow method, and how does it differ from other transfer techniques?
To create a custom pet pillow using a sublimation pillow method, you need a high-resolution pet photo, sublimation printer, special sublimation paper, and a heat press. The image is printed and transferred onto a white polyester pillow case using high heat, resulting in a vibrant, long-lasting design. This method differs from other transfer techniques by bonding the ink directly into the fabric, rather than layering it on top like in standard transfer pillow methods.
What design ideas work well for a face pillow or text pillow, and how can you personalize the back of the pillow for added detail?
Design ideas for a face pillow include enlarging and centering a single portrait for a humorous or sentimental effect, while a text pillow can display quotes, names, or special dates in stylish fonts. To personalize the back of the pillow, you can add a secondary image, matching text, or a pattern that complements the front, making it a fully customized pillow project.
How does making your own photo cushion or throw pillow covers enhance a diy pillow project, and what types of images transfer well onto the fabric?
Making your own photo cushion or throw pillow covers enhances a diy pillow project by allowing full creative control over the image, layout, and fabric used. High-contrast images like portraits, pet photos, or graphic designs transfer well onto the fabric, ensuring clarity and vibrancy. Adding a custom picture pillow or transfer onto a white base enhances visibility and creates a standout personalized piece.