Creative Techniques for Upcycled Quilting to Reduce Waste and Enhance Craftsmanship
Consider using old clothing and linen as a raw material for your next sewing project. Transforming worn-out garments into functional art pieces not only conserves resources but also breathes new life into fabrics that may otherwise end up in a landfill. For instance, you can cut vibrant cotton shirts into squares and stitch them into a cozy coverlet, bringing together various patterns and colors.
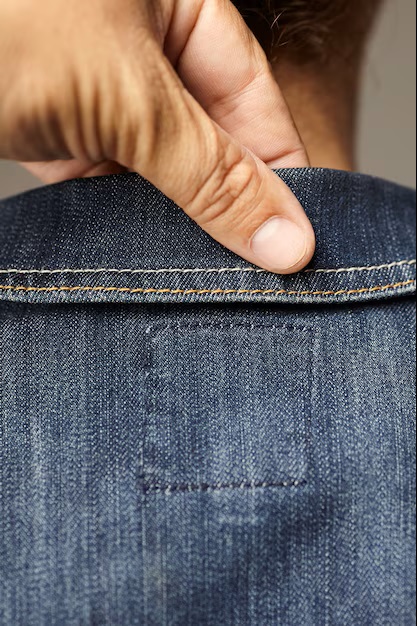
Explore the concept of mixing textures by incorporating felt or denim remnants. These elements add depth and interest to your creations, elevating simple designs into something unique and memorable. This approach not only enhances visual appeal but also strengthens the resulting piece, ensuring it stands the test of time. Analyze your fabric stash and identify pieces that can be married together for a stunning effect.
Engage in the practice of using fabric scraps for smaller accessories. Such items can range from bags to coasters, allowing you to minimize waste while creating functional items. Try to create a matching set by carefully selecting and coordinating fabric patterns and colors. This not only helps in utilizing leftover materials but also provides a cohesive look to your handmade collection.
Don’t hesitate to experiment with stitch techniques, such as improvisational piecing or free-motion sewing, to add character to your projects. This not only allows for individuality but also invites playfulness into your work. Each piece will shine as a result of your personal touch and innovative uses of materials.
Choosing the Right Fabrics from Old Clothing
Select garments made from high-quality, durable materials such as cotton, linen, denim, and wool. These fibers provide longevity and can easily withstand stitching and washing. Avoid fragile fabrics like silk or chiffon, as they may fray or tear during the crafting process.
Inspect items for size and condition. Larger pieces yield more fabric; look for clothing that is intact without significant wear, stains, or fading. Salvage pockets, hems, and seams to maximize your usable material.
Color compatibility plays a key role. Choose colors that complement each other or create a cohesive palette for your project. Sorting by hues can streamline the selection process.
| Fabric Type | Best Uses | Considerations |
|---|---|---|
| Cotton | Quilts, patchwork | Soft, easy to work with |
| Linen | Throws, lightweight covers | Wrinkles easily, but strong |
| Denim | Heavy quilts, bags | Sturdy, can be bulky |
| Wool | Warm throws, blankets | Can be scratchy, but excellent insulation |
Pay attention to patterns and textures. Mixing prints adds visual interest but ensure a balance to prevent clashes. Use solid fabrics to break up busy designs.
Finally, prepare the fabric properly. Pre-wash all materials to prevent shrinkage and remove any chemicals. Iron out wrinkles for easier cutting and sewing.
Techniques for Transforming Scraps into Quilt Blocks
Utilize the patchwork method by cutting scraps into uniform squares or triangles. This allows for easy assembly and a cohesive look. Aim for consistent dimensions, such as 2.5 or 5 inches, to simplify the piecing process.
Experiment with improvisational piecing by stitching together uneven sizes of fabric. This technique creates a unique, organic feel and encourages creativity without strict guidelines.
Try the log cabin style, which involves adding strips of varying widths around a central square. Use contrasting colors to enhance the design, creating visual interest while incorporating multiple textile pieces.
Implement hexagon templates for a honeycomb effect. Cut scraps into hexagons with a 1-inch side length, allowing for intricate patterns and a delightful texture.
Explore foundation paper piecing to achieve precision. Use lightweight paper as a base, stitching fabric onto patterns drawn on the paper. Tear away the paper after sewing to reveal intricate block designs.
Apply the crazy quilt technique by randomly stitching together various shapes and sizes of fabric scraps. This approach emphasizes decorative stitching and embellishments for an artistic expression.
Consider using leftover batting for stuffed blocks or 3D elements. This adds dimension and creates a playful aspect in your creation.
Incorporate reverse applique, where a top layer of fabric is stitched down and then cut away to reveal contrasting colors underneath, lending depth and complexity to the blocks.
Leverage color theory; group scraps by color families or complementary shades to create harmonious designs. This adds visual appeal and coherence to the quilt.
Constantly assess your layout before final assembly. Arrange the blocks on a flat surface to visualize the final outcome, ensuring balance and variety among the pieces.
Incorporating Natural Dyes from Kitchen Waste
Utilize avocado pits and skins to produce a soft pink hue. Simply simmer the waste in water for about an hour, strain the liquid, and immerse pre-washed fabric for a few hours, adjusting the time for desired intensity.
Onion skins yield rich golden tones. Collect yellow and red onion peels, boil them in water, and submerge your fabric to achieve varying shades of yellow, depending on the concentration and duration of exposure.
Cabbage leaves create beautiful blue or purple shades. Chop and boil savoy or red cabbage until the water turns vibrant. Soak fabrics for at least one hour, noting that the fabric’s final color may shift as it dries.
For a rustic brown, consider using coffee grounds. Brew a strong pot and mix the grounds with water, then soak the fabric to infuse it with earthy tones. Adjust coffee strength for lighter or darker outcomes.
Carrot tops produce a lovely green color. Boil the greens in water, strain, and dip the fabric, allowing for experimentation with immersion times to reach different shades.
Creating Unique Quilt Patterns with Upcycled Materials
Begin by gathering a variety of fabrics from old garments, bed linens, or tablecloths. Check for color schemes and textures that complement each other. Consider using:
- Contrasting colors to add depth.
- Different fabric textures for visual interest.
- Patterns that vary in scale to enhance complexity.
When selecting fabric pieces, look for unique prints or motifs that can serve as statements within the larger piece. Use these as focal points in your design. Following this, sketch out a layout. This can include:
- Geometric shapes to create a modern feel.
- Traditional blocks that can be refreshed with new fabric combinations.
- Asymmetrical designs for an eye-catching arrangement.
Experiment with different shapes, such as triangles, hexagons, or curves. These can create interesting movement within your work. When cutting pieces, ensure precision for accurate assembly. This will keep edges aligned and maintain the overall integrity of your design.
After assembling the quilt tops, consider embellishments. Hand-stitching or adding patches can add individuality. Try:
- Stitching around printed designs to highlight them.
- Incorporating appliqué techniques for additional texture.
- Using decorative stitching patterns for added flair.
Finally, select a sustainable batting material, such as cotton or recycled fibers. This choice not only contributes to the environment but also enhances the quilt’s warmth and comfort.
How to Assemble and Stitch Your Upcycled Quilt
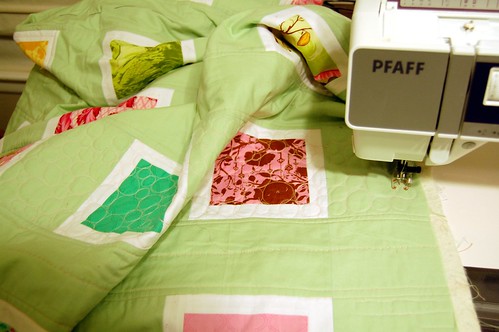
Begin with laying out your fabric squares in a pleasing arrangement. Use a design wall or floor space to visualize the final piece. Focus on color balance and patterns to create a cohesive look. Once satisfied, start pinning the squares together in rows, ensuring edges align accurately.
Stitch the squares within each row, using a quarter-inch seam allowance. Press seams open or to one side, depending on your preference. This will ease the joining of rows later on. After completing all rows, join them by aligning seams carefully. Pin and stitch the rows together, maintaining consistent seam allowances.
Preparing the Batting and Backing
Choose a suitable batting material that offers warmth without bulk. Lay the backing fabric right side down on a flat surface, followed by batting, then the quilt top right side up. Smooth out any wrinkles to ensure layers are flat.
Pin or baste the layers together to prevent shifting during stitching. Use safety pins or long stitches to secure the layers. Once assembled, proceed with quilting, which can be done through various methods such as straight lines, free motion, or stitch-in-the-ditch techniques.
Finishing Touches
After the quilting process, trim any excess batting and backing fabric. Create binding strips from leftover fabric. Attach the binding to the edges of the quilt, folding it over and stitching down to achieve a polished finish. Take your time with this step for a clean look.
Finally, give your creation a good wash to enhance softness and eliminate any remaining markings. Enjoy your one-of-a-kind blanket, showcasing your resourcefulness and craftsmanship.
Care Instructions for Maintaining Upcycled Quilts
Wash your quilt gently in cold water using a mild detergent. Avoid bleach to preserve the fabric’s integrity.
Air dry your quilt flat or hang it to prevent shrinkage and maintain shape. If using a dryer, select the lowest heat setting.
Store the quilt in a cool, dry place, away from direct sunlight to prevent discoloration. Use breathable fabric bags for protection.
Regularly check for loose threads and small tears. Repair promptly with hand stitching to prolong the life of the piece.
For larger stains, treat them immediately with a spot cleaner and test on an inconspicuous area first.
- Use a soft brush or cloth for dust removal.
- Avoid high-heat settings when ironing; use steam instead to remove wrinkles.
- Rotate the quilt periodically to ensure even wear and fading.
Keep pets away from the quilt to prevent wear and potential damage from claws or spills.
Consult with a professional cleaner for deep cleaning options if necessary, especially for delicate fabrics.
Q&A: Upcycled quilting
How can a quilter repurpose old quilts into a pillow or placemats using upcycled fabric in a special way?
A quilter can repurpose old quilts into a pillow or placemats by cutting out stable sections of the quilt made with strong seams and layering them with interfacing for added durability. This upcycling technique gives a second life to vintage quilts or scrappy quilts that may be too worn for display. It’s a special way to create new memories from an older quilt while preserving the craftsmanship and story behind the original quilt project.
What are some creative ideas for using thrifted or second-hand fabric from clothing items like flannel or button-down shirts to make quilts?
Creative ideas for using thrifted fabric include turning flannel shirts into a cozy log cabin quilt or combining button-down shirts into a patchwork quilt project. Quilters often upcycle fabric by cutting usable yardage from clothing items found in thrift stores and blending it with quilting fabric. This thrifty approach not only saves money but also allows for a nostalgic and eco-friendly way to make quilts filled with character and history.
How can repurposing old quilts or using upcycled fabric be an eco-friendly choice for a quilter’s next quilt?
Repurposing old quilts or using upcycled fabric from previous projects or thrifted clothing is an eco-friendly choice that reduces textile waste. A quilter can use the durable parts of a colored quilt or vest to make scrappy blocks or accent pieces for their next quilt. This way to repurpose materials supports sustainability while adding sentimental or vintage charm to the finished quilt.
Why do many quilters choose to upcycle fabric into smaller projects when there isn’t enough fabric left for a whole quilt?
When there isn’t enough fabric for a whole quilt, many quilters choose to upcycle fabric into smaller projects like pillows, placemats, or wall hangings. Even a single piece of fabric from an old quilt or a scrap of blue denim can be repurposed creatively. These small-scale projects offer a meaningful and practical way to repurpose old quilts while continuing the story of the fabric in a functional form.
How can quilters who have made many quilts use a tutorial to memorialize a loved one through a meaningful quilt project?
Quilters who have made many quilts can follow a tutorial to create a memory quilt that incorporates clothing or fabric from a loved one. This type of quilt allows them to use their experience in making a quilt while adding a personal and emotional connection to the project. Tutorials often include step-by-step guidance for working with non-traditional materials like t-shirts or button-down shirts, helping quilters memorialize someone in a beautiful and lasting way.
Why is making a quilt using a tutorial a thoughtful way to memorialize someone through fabric and design?
Making a quilt with a tutorial provides clear structure while allowing creative freedom to include meaningful fabrics, colors, or embroidery. For quilters seeking to memorialize someone, this process turns pieces of clothing or special fabric into a comforting and symbolic quilt. Tutorials help guide fabric preparation, layout, and finishing, making the project accessible even for those who may not have made many quilts before.