Ombre Quilt Tutorial: Step by Step Guide
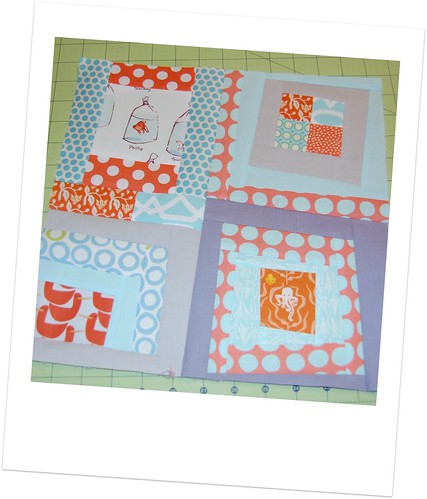
Begin with fabric selection–choose shades that transition smoothly from light to dark. Aim for at least five different tones to create a gradient effect. This choice will set the foundation for your project, making the visual impact striking.
Prepare your work area by laying out your materials. A cutting mat, rotary cutter, and ruler will be essential for achieving precise measurements. Cut each piece uniformly to ensure they sew together flawlessly. Accurate cuts are key to a polished look in the finished piece.
Assemble the pieces by arranging them in the desired gradient order. Stitch together in a consistent pattern, ensuring that seams line up seamlessly. Press the seams flat after each step to maintain a neat appearance and facilitate the piecing process.
Once the top layer is complete, it’s time to layer your backing fabric and batting. Ensure everything is smooth and taut to avoid puckering during stitching. Pin or baste the layers together to keep them secure while working on the quilting phase.
For the quilting method, consider using straight lines or following the contours of the design. This choice can enhance the overall aesthetic and bring out the nuances in the fabric’s coloration. After quilting, trim the excess batting and backing to finish the edges cleanly.
Finally, bind your creation using strips of fabric that echo the chosen colors. This step not only completes the look but also adds durability, making your piece ready for display or use. Enjoy the satisfaction of completing a stunning project that showcases your skill!
Choosing Your Fabric Colors for Ombre Effect
Select a palette that transitions smoothly from light to dark shades. Begin with a primary color and gather various tints and tones of that hue. For instance, if you choose blue, consider shades ranging from pale sky blue to deep navy.
Utilizing Color Tools
Leverage color wheels or online tools like Adobe Color or Coolors to identify complementary shades. These resources help visualize how colors interact and ensure a satisfying gradient. Aim for a harmonious blend that avoids abrupt jumps between shades.
Testing Against Light
Always examine selected fabrics in natural light to observe true color representation. Fabric colors may appear different under artificial lighting. Cut small swatches and arrange them in a gradient to judge how well they transition together.
Calculating Fabric Yardage for Your Quilt
To determine the necessary yardage for your project, first, decide on the finished dimensions of your creation. For a blanket, measure the desired width and length in inches. Multiply these two values to find the total area in square inches.
If your design consists of blocks, identify the size of each block and the total quantity needed. Calculate the area of a single block by multiplying its width by its height, then multiply that area by the total number of blocks to get the area required for the blocks.
Convert the areas calculated into square yards. Since there are 1296 square inches in one square yard, divide the total square inches by 1296. This gives you the fabric yardage needed for the top layer.
Don’t forget to account for backing fabric. Typically, the backing should be approximately the same size as the front. Make sure to calculate the yardage for backing in the same manner as the top layer.
Add extra yardage for seam allowances and any potential mistakes. A safe guideline is to include an additional 10% for unexpected cuts or alterations. For complicated designs or if working with directional prints, consider increasing this percentage.
When purchasing, always round up to the nearest whole yard to ensure you have sufficient fabric for your project. Verify the fabric width as well; standard widths are 44/45 inches or 58/60 inches, which impacts the total yardage required based on your dimensions.
Cutting Fabric Strips for Uniformity
For precise cutting, use a rotary cutter and a cutting mat. Measure and mark your fabric with a ruler to ensure strips are consistent in width. For best results, cut strips that are at least 2.5 inches wide, but this can vary based on the overall design you are creating.
Before cutting, press the fabric to eliminate any wrinkles. This will help achieve cleaner edges and more accurate dimensions. Align the fabric’s selvage edges to create a straight line as a guideline for your cuts.
When making multiple strips, stack several layers of fabric, ensuring they are neatly aligned. Cut through all layers at once to save time and maintain consistency across your strips.
For additional accuracy, use a fabric weight to hold the fabric in place while cutting. This helps prevent any shifting that could lead to uneven strips. Keep your rotary cutter sharp to achieve clean cuts without fraying the edges.
Mastering the Sewing Technique for Ombre Quilting
Begin with selecting high-quality cotton fabrics that seamlessly blend from light to dark shades. This transition is key for achieving the desired gradient effect. Make sure the colors complement each other and that the fabric is pre-washed to prevent shrinkage later.
When cutting your fabric, precision is crucial. Use a rotary cutter and a self-healing cutting mat to achieve straight edges. Ensure your strips are of uniform width–typically 2.5 inches works well for most patterns.
Set up your sewing machine with a ¼ inch foot, which aids in maintaining consistent seam allowances. Thread selection is equally important; a color that matches your lightest fabric will help conceal stitches in the seams.
Assemble the fabric strips in a sequence that reflects the gradual color change. Pin each piece together to prevent any shifting while sewing. For added accuracy, consider chain piecing–this method helps to save time and thread while maintaining an even feed through the machine.
Press the seams flat after each sewing session. Use a hot iron to flatten the seams, which helps maintain the fabric’s structure and improves the overall finish. Always press towards the darker fabric to minimize visibility of seam allowances.
For quilting, choose a walking foot to prevent any fabric bunching during the stitching process. This technique ensures even feeding of layers. Select a simple straight stitch pattern to emphasize the color gradient without drawing focus away from the main design.
For the binding, cut strips at a 45-degree angle for cleaner edges. Secure the binding to the front side first, then fold it over to the back and hand-stitch for a polished finish. This step enhances durability while completing the artistic look.
Final inspection should involve trimming any unnecessary threads and ensuring all layers are properly secured. Take a moment to admire the finished piece, as this diligence and attention to detail will showcase your skill in this artistic practice.
Quilting Options: Choosing the Right Backing and Batting
Select a sturdy cotton or cotton-blend fabric for the backing. Opt for a weight that complements the top layer’s fabric to ensure durability and comfort. A typical choice is a 68-100 thread count fabric, providing a soft feel while remaining strong.
For the filling material, consider high-loft batting for a fluffy texture that enhances warmth and drape. Options such as polyester or cotton can offer different levels of breathability and insulation. Polyester is lightweight and quick-drying, while natural cotton has superior breathability and softness.
Test the materials by creating a small sample sandwich before assembling the entire piece. This will help you gauge how the chosen backing and filling work together, as well as how they will impact the overall appearance and feel.
In terms of colors and patterns, coordinate the backing with the main fabric to create a cohesive look. A solid color backing often enhances the visual appeal, allowing the top design to be the focal point. For a more dynamic aesthetic, choose a patterned backing that complements but doesn’t distract from the front.
Finally, consider the intended use of the finished piece. For items that will undergo frequent washing, choose a durable backing and washable batting to maintain quality over time. For decorative pieces, aesthetics may take precedence, allowing for more variety in fabric choices.
Finishing Touches: Binding Your Ombre Quilt
For a polished edge, choose a binding fabric that complements your design. Cut strips measuring 2.5 inches wide across the fabric’s grain for optimal stretch and flexibility.
To begin attaching the binding, fold the strip in half lengthwise, wrong sides together, and press to create a crease. Start from the quilt’s corner, leaving a 12-inch tail for later finishing. Align the raw edge of the binding with the edge of the quilt and pin in place.
Using a quarter-inch seam allowance, sew the binding to the quilt top. Stop stitching approximately a quarter-inch from the corner and backstitch. Fold the binding up and across, forming a triangle, then bring it back down to create a perfect mitered corner. Pin and continue sewing along the next side.
Once you reach the starting point, leave a 12-inch tail, similar to where you began. Trim excess binding, ensuring both ends overlap by an inch. Join the two ends using a diagonal stitch to create a smooth connection.
After the binding is attached to the front, fold it to the back. Hand-stitch or machine-stitch along the folded edge for a clean finish. Make sure to catch the backing fabric for a secure hold. Inspect the corners to ensure they’re neatly mitered.
Finally, press the completed edge to enhance its appearance. This step ensures the binding lies flat and enhances the overall look of your project.
| Binding Process Steps | Tips |
|---|---|
| Cut binding strips | Use a rotary cutter for precision |
| Prepare binding | Press for a crisp fold |
| Attach to quilt | Pin for accuracy |
| Miter corners | Practice on scrap fabric |
| Finish back | Use matching thread for a seamless look |
| Press binding | Use a hot iron for best results |
Q&A: Ombre quilt tutorial
How can a quilter use fat quarter bundles to make an ombre puff quilt with a consistent color transition throughout the quilt?
A quilter can use fat quarter bundles in a carefully chosen ombré color palette to create a smooth transition throughout the quilt. By arranging the puff blocks on a design wall before assembling, the quilter can test the layout and adjust placement for the best effect. This method works especially well for puff quilts and baby quilts where the soft texture and color shift are key features.
What makes the ombre heart quilt block tutorial ideal for creating a throw size quilt with heart blocks and a pop of color?
The ombre heart quilt block tutorial is ideal for a throw size quilt because it breaks down the block construction using half square triangles (HSTs) and ombré fabrics, which naturally create a gradient effect. The tutorial often includes a video tutorial and affiliate links for purchasing fabrics to make the quilt, helping quilters achieve a vibrant, cohesive look with a strong pop of color in each heart.
How do quilters calculate how many squares or HSTs are needed to make a queen size quilt using the ombré quilt pattern to create uniform results?
To make a queen size quilt using an ombré quilt pattern, quilters calculate how many squares or HSTs are required by dividing the finished size of the quilt by the dimensions of each block. Factoring in seam allowances and layout style, they can determine the amount of fabric needed—often using a half yard of each fabric or jelly roll strips to cover the full quilt sandwich.
Why is the back of your quilt just as important when completing a finished quilt like the ombre puff quilt or ombre heart design?
The back of your quilt is important because it provides structural support and completes the visual presentation of a finished quilt. In ombre puff quilts or heart-based designs, quilters often choose coordinating backing fabric to enhance the ombré effect and ensure the quilt looks polished from both sides, especially if the quilt is to be displayed or shown at a quilt show.
How does creating an ombre effect with pink enhance the overall look of a quilt?
Creating an ombre effect with pink adds a visually appealing gradient that transitions from light to dark shades, bringing depth and dimension to the quilt. This technique is especially effective when paired with half-square triangles (HSTs), allowing the pink tones to blend smoothly and highlight the design.
What steps are involved to make HSTs for a free ombre quilt pattern?
To make HSTs for a free ombre quilt pattern, start by selecting pink fabrics in varying shades. Pair light and dark squares right sides together, draw a diagonal line, sew ¼ inch on both sides, then cut along the line. Press and trim each HST to the required size before arranging them by value to maintain the ombre flow.
How do you determine the number of squares needed to make this into a king-size quilt?
To make this into a king-size quilt, first decide on the finished block size (e.g., 6 inches). A typical king quilt is around 108×108 inches, requiring 18 blocks per side. Multiply 18×18 to get 324 total blocks. If each block consists of 4 HSTs, you’ll need 648 squares to make the required number of HSTs for the full layout.
What considerations are important when designing the back of the quilt to match the color of the year theme?
When designing the back of the quilt to align with the color of the year, use large panels or pieced sections that incorporate the chosen shade (e.g., a vibrant or muted pink). Ensure the backing fabric complements the front’s ombre palette and HST layout, creating a cohesive and reversible quilt that honors the color trend.