Create Your Perfect Quilt with Our Comprehensive Quilt Project Planner Guide
Establish a clear timeline for your crafting endeavors. Break down tasks into phases such as design, fabric selection, cutting, sewing, and finishing. Assign specific dates to each phase, allowing for flexibility while maintaining focus.
Utilize an inventory system to keep track of materials. Create a list or a digital document to catalog your fabrics, threads, and tools. Label containers clearly, enabling quick access and minimizing the time spent searching for supplies.
Prioritize your design ideas. Sketch out multiple concepts and select the most feasible ones based on your skill level and time constraints. Consider creating a vision board to visualize your inspiration and guide your decisions throughout the creation process.
Implement a workspace organization method that works for you. Store similar items together–for instance, keep all cutting tools in one area and sewing supplies in another. This organization technique reduces clutter and increases productivity.
Document your progress as you work. Maintain a journal or digital record that includes notes on techniques, challenges, and ideas for future projects. This reflection will enhance your skills and bring clarity to your approach for subsequent efforts.
Choosing the Right Fabric for Your Quilt Design
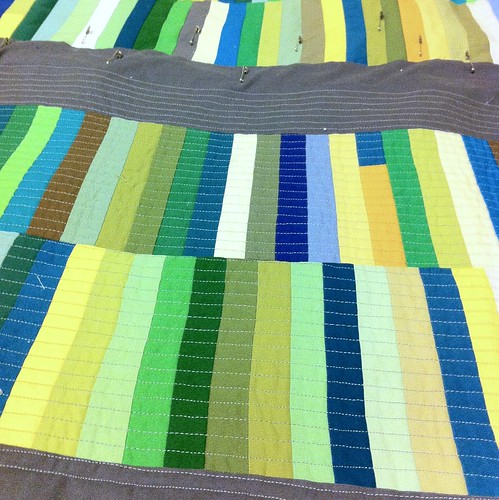
Select fabrics that complement each other in color and texture. Consider a mix of solids and prints to create depth. Fabrics with varied scales of patterns help prevent visual clutter while allowing for cohesive design.
Opt for cotton or cotton-blend materials for durability and ease of handling. Pre-wash your fabrics to preshrink and eliminate excess dye, ensuring your final product maintains its shape and color.
Pay attention to the weight of the fabric; lighter weights can be more challenging to sew, while medium weights provide a solid structure. Always test the fabric’s behavior by sewing a sample patch.
Incorporate a color palette that resonates with your vision. Utilize color wheels to find harmonious combinations, and keep in mind the emotional impact of colors.
Consider the purpose of the final piece; for functional items, opt for sturdy fabrics that withstand wear. For decorative purposes, you might choose softer, more luxurious materials.
Creating a Comprehensive Cutting List for Your Pieces
Begin by meticulously analyzing your design, identifying each unique shape and size required. Create a table to itemize fabric pieces, specifying dimensions and quantities. This approach helps clarify what is needed at a glance.
Group similar items together based on size, which simplifies the cutting process. Label each piece with a clear identifier, such as A1, A2, B1, and so forth, to prevent confusion during assembly.
Calculate total fabric yardage by factoring in seam allowances and potential wastage. Consider using a cutting rotary tool for accuracy and speed, ensuring all pieces are consistently shaped.
Keep track of fabric grain direction when outlining dimensions, as this can impact the final appearance and texture. Utilize sketches to visualize placement and plan cutting layouts efficiently.
Lastly, maintain your cutting list as a living document. Adjust it as you make design modifications to retain organization throughout the crafting process.
Setting Realistic Deadlines for Each Stage of Quilting
Break tasks into manageable segments. Assign timeframes based on the complexity of each phase. For instance, piecing fabric might require two weeks, while layering could take an additional week, depending on the quilt’s size.
Assessing Individual Skills
Consider your own abilities. If you’re more skilled at sewing than basting, allocate more time for the latter. Acknowledge personal limitations and adjust deadlines accordingly to reduce pressure.
Creating Buffer Time
Include extra days for unexpected challenges. Allow a buffer of at least 20% of the total time estimated for each segment. This helps accommodate interruptions and ensures a smoother workflow. For example, if you predict a week for finishing the binding, aim for a week and two days to account for unforeseen delays.
Document your timelines clearly. Use a calendar or a digital tool to track progress, ensuring deadlines are visible and easily adjustable as needed. This promotes accountability and motivates consistent advancement through each stage.
Regularly reassess deadlines as you progress. Adaptations may be necessary based on completed work and overall satisfaction with the process. Mesh creativity with practicality to achieve desired outcomes without undue stress.
Documenting Your Techniques and Patterns for Future Reference
Begin with a dedicated notebook or digital document to catalog every method and design you employ. Each entry should include the date, the project name, a detailed description of the technique, and any challenges faced. This creates a timeline and reference for future endeavors.
Create Visual References
Take clear photographs of your work at various stages. Label each image with the corresponding technique or pattern name, including measurements and fabric choices. This visual guide will be invaluable when revisiting ideas or troubleshooting similar projects.
Use a Consistent Format
Choose a uniform structure for documenting each project. Consider sections for notes, sketches, and material lists. This consistency will make it easier to locate specific information later. Regular updates and revisions will reflect your evolving skills and insights.
Utilizing Digital Tools for Better Project Management
Adopt specialized applications designed for task organization, such as Trello or Asana, which facilitate tracking multiple aspects of your endeavor through visual boards or lists.
- Utilize cloud storage solutions like Google Drive or Dropbox to ensure all materials and resources are accessible from anywhere, preventing disruptions due to lost files.
- Explore design software such as Adobe Illustrator or Canva for creating digital layouts that can serve as blueprints before committing to physical fabric.
- Invest in time management applications such as Todoist or Notion to prioritize tasks and set deadlines, keeping your workflow structured.
Employ budgeting tools like Mint or You Need a Budget to manage expenses associated with purchasing materials, ensuring financial planning remains on track.
- Leverage social media groups or forums specific to your craft to connect with community members, discuss techniques, and share resources.
- Incorporate digital calendars to schedule and track important dates, including project milestones and material delivery timelines.
- Experiment with project management software that offers mobile apps, allowing you to manage tasks on the go, keeping you on top of your commitments.
Keep a digital journal using apps like Day One to document your progress, challenges, and personal insights, which can be beneficial for future reference.
Integrate automated reminders within your tools to prompt you about deadlines and upcoming meetings, preventing important tasks from slipping through the cracks.
Establishing a Dedicated Workspace for Quilting Projects
Choose a well-lit area that offers ample space for cutting, sewing, and storing materials. Natural light helps reduce eye strain and enhances color accuracy.
Invest in a sturdy table or cutting mat to provide a flat surface for fabric manipulation. Ensure the height is comfortable to prevent strain during long sessions.
Organize tools and supplies in labeled bins or shelves. Having everything in its designated place streamlines access, saving time during the creative process.
Utilize vertical space by installing pegboards or hooks for hanging tools and fabrics. This keeps essential items visible and within reach, maximizing workspace efficiency.
Incorporate a comfortable chair that supports good posture. Long hours of engagement require proper seating to maintain focus and reduce fatigue.
Maintain a clutter-free environment by routinely cleaning and tidying up. A well-organized area boosts inspiration and keeps distractions at bay.
Consider soundproofing options if the space is in a noisy location. Background noise can disrupt concentration, so quieting the environment enhances overall productivity.
Create a personal touch with decor that motivates and inspires. Whether it’s a mood board or artwork, a personalized space can enhance creativity.
Q&A: Quilt project planner
How can a printable quilt planner help quilters organize multiple projects throughout the year?
A printable quilt planner is designed especially for quilters to track multiple projects throughout the year using planning pages such as project tracking, supply list, and construction notes. This helps manage time, meet due dates, and keep projects organized in a single binder or digital PDF format.
What features are included in a free printable quilt project planner for efficient quilt project planning?
A free printable quilt project planner typically includes project pages with areas for block layout, pattern info, swatches, and notes about sewing projects. This planner is designed to help quilters stay organized, track their progress, and streamline their quilting journey.
Why is the quilter’s project planner considered an essential tool for staying organized in a sewing space?
The quilter’s project planner provides structured planner pages that allow quilters to organize your quilting tasks, plan to quilt more effectively, and maintain a clean sewing space. It includes templates for project planning, deadlines, and references for quilt blocks and patchwork.
How does the back of the planner support ongoing project tracking for quilting reference?
The back of the planner often contains summary sheets and quilting reference pages, making it easier to revisit past projects and lessons learned. It also allows quilters to use a printable planner format for long-term tracking of patterns, fabric choices, and organize your projects consistently.
How can a quilter use a patchwork planner to manage their time more efficiently?
A patchwork planner allows a quilter to break down complex quilt projects into manageable tasks, helping them manage your time more efficiently by scheduling sewing sessions, tracking deadlines, and organizing fabric choices within clear planner printable layouts.
What makes the delightful planner designed especially for quilters a valuable tool for tracking progress?
The delightful planner is designed especially for quilters who want to track your progress through every step of a quilt project. It includes sections for block completion, notes, fabric swatches, and goal setting, ensuring projects stay on schedule and organized from start to finish.
Why should a quilter use a quilt journal alongside a planner printable?
Using a quilt journal with a planner printable helps a quilter document their creative process, record finished quilt patterns, log design ideas, and reflect on project outcomes. This practice supports artistic growth and provides a useful archive of free quilt inspirations.
What are the advantages of using a four-page printable organizer for quilt planning with a home printer?
A four pages printable organizer can be printed easily on a home printer and provides structured layouts for project lists, materials tracking, and quilt pattern notes. It enables a quilter to stay focused and aligned with their crafting goals while keeping everything in one accessible place, similar in style to a happy planner.