Complete Guide to Finishing Center Panel of Charlie Caftan
Embarking on a sewing project can be both an exhilarating and daunting experience. Mastering the art of garment creation involves understanding how to perfect each element of design, ensuring that the final piece not only looks exquisite but also fits flawlessly. This section explores the techniques and nuances involved in enhancing the upper part of a trendy outfit, focusing on achieving a polished look that showcases your skills.
Whether you are an experienced seamstress or a novice eager to learn, there are essential methods that will elevate your work to the next level. This exploration delves into fabric choices, stitching techniques, and the intricate details that contribute to a professional finish. By honing these competencies, you will be well on your way to producing garments that are truly outstanding and uniquely yours.
From selecting the right materials to implementing precise sewing strategies, the journey to perfecting this aspect of your design is both rewarding and informative. Embracing creativity while integrating practical skills will enable you to craft a piece that stands out in any wardrobe. Explore the possibilities and take your passion for sewing to new heights as you refine this pivotal element of garment construction.
Essential Tools for Finishing the Center Panel
Achieving a polished look requires the right equipment and materials. Having the necessary implements on hand can significantly enhance the quality of your work and streamline the entire crafting process.
Here are the key items to consider:
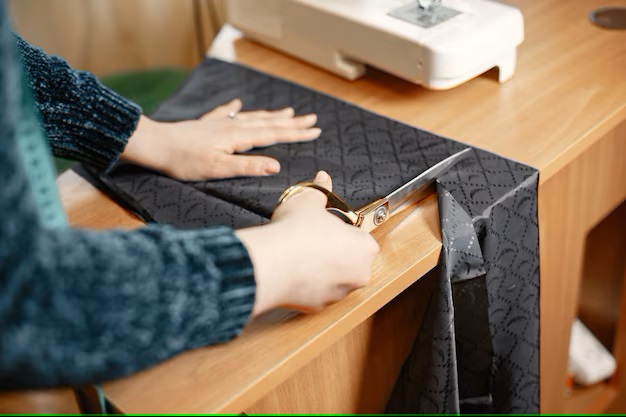
- Fabric Scissors: Sharp fabric scissors are crucial for precise cutting, ensuring clean edges that complement the overall design.
- Sewing Machine: A reliable sewing machine not only saves time but also provides consistent stitching for durable seams.
- Thread: Choose high-quality thread that matches your fabric to ensure a seamless appearance and prevent fraying.
- Iron: An iron is essential for pressing seams and giving the fabric a neat finish, eliminating wrinkles and enhancing the overall aesthetic.
- Pins and Clips: Use pins or fabric clips to secure pieces together accurately, minimizing shifting during the sewing process.
- Measuring Tape: For precise measurements, a tape measure is indispensable to achieve the right dimensions and proportions.
Additionally, consider having a few other tools at your disposal:
- Seam Ripper: This handy tool is vital for correcting mistakes without damaging the fabric.
- Marking Tools: Fabric markers or chalk can help with outlining cutting lines or sewing guides.
- Cutting Mat: A self-healing cutting mat protects your work surface and provides a designated area for cutting.
With these vital instruments on hand, you’ll set the foundation for a successful crafting experience, ultimately leading to a beautifully completed piece.
Step-by-Step Process for Seamless Edges
This section outlines a meticulous approach to achieving flawless borders in your fabric creations. Attention to detail in each stage ensures that the final appearance is polished and professional, elevating your project to new heights.
Preparation of the Fabric
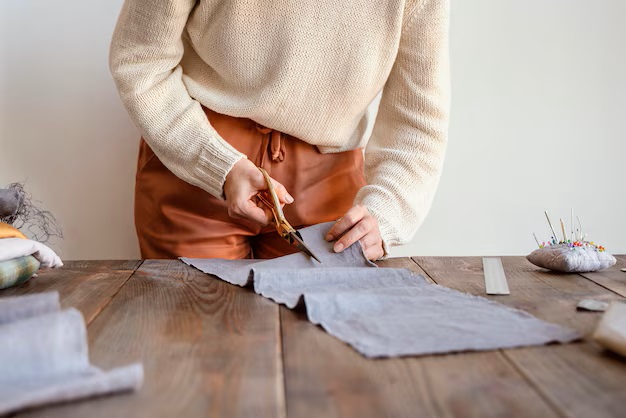
Begin by selecting your preferred material, ensuring it is properly pre-washed to prevent any shrinkage post-construction. Lay the fabric flat on a clean surface, smoothing any wrinkles. Measure the desired width for the edges, marking this measurement with tailor’s chalk or a fabric-safe pen to create a clear guideline for cutting.
Trimming and Finishing Techniques
Once the fabric is marked, carefully trim it according to your guidelines. Use sharp scissors or a rotary cutter for precision. After trimming, it’s important to secure the edges to prevent fraying. Consider employing techniques such as zigzag stitching or using a serger for a professional finish. Iron the edges to ensure they lay flat, which will create a neat appearance in the final product. As a finishing touch, you may opt for a decorative stitch or bias tape to enhance the aesthetic appeal.
Choosing the Right Fabric and Materials
Selecting the appropriate textiles and materials is crucial for achieving a stunning and comfortable result in any clothing project. The right choice enhances not only the aesthetic appeal but also the functionality and overall wearability of the garment. Understanding the characteristics of various fabrics will enable you to make informed decisions that align with your vision and requirements.
Considerations for Fabric Selection
When deciding on the ideal materials, consider factors such as weight, drape, and texture. Lightweight fabrics may be perfect for flowing designs, while heavier options might provide structure and support. Additionally, consider how the fabric feels against the skin, as comfort is key in any attire.
Types of Fabrics to Explore
There are numerous fabrics suitable for your endeavors, each offering unique benefits. Below is a table highlighting some common options along with their characteristics:
| Fabric Type | Characteristics |
|---|---|
| Cotton | Breathable, soft, and versatile; easy to sew and care for. |
| Linen | Lightweight and absorbent; ideal for warm weather but wrinkles easily. |
| Silk | Luxurious and smooth; drapes beautifully but requires special care. |
| Rayon | Soft and breathable; mimics the feel of silk but is more affordable. |
| Polyester | Durable and wrinkle-resistant; available in various textures and weights. |
By carefully evaluating these aspects, you can choose the right textiles that will elevate your creation and ensure it meets both style and comfort preferences.
Techniques for Adding Decorative Touches
Enhancing garments with artistic elements can elevate their aesthetic appeal and individuality. Various methods can be employed to introduce captivating details that reflect personal flair while harmonizing with the overall design. By integrating these techniques, you can transform a simple silhouette into a stunning masterpiece.
Embellishments and Textiles
Incorporating embellishments such as lace, beads, or sequins can dramatically change the look of a piece. These elements can be applied strategically along seams or as focal points to draw the eye. Furthermore, experimenting with different fabrics can add texture and visual interest, allowing for a richer tactile experience. Layering materials, such as combining sheer and opaque textiles, can create depth while enhancing the garment’s identity.
Embroidery and Appliqué
Utilizing embroidery and appliqué techniques offers an excellent opportunity for customization. Hand or machine embroidery can introduce intricate patterns that serve as a personal signature. Conversely, appliqué allows for the addition of striking shapes and motifs, which can be both playful and sophisticated. These artistic features can be tailored to reflect themes or moods, ensuring that each garment tells a unique story.
Common Mistakes to Avoid During Finishing
When working on the final touches of your garment, it’s crucial to be mindful of certain pitfalls that can compromise your efforts. Recognizing and steering clear of these common errors can ensure a polished and professional appearance. Below are some of the most frequently encountered issues that crafters face, along with tips on how to avoid them.
Overlooking Details
Failing to pay attention to small details can lead to significant setbacks. It’s important not to underestimate the impact of finishing touches.
Incorrect Measurements
Another prevalent mistake involves inaccuracies in sizing. Taking proper measurements ensures that your creation fits well and looks its best.
| Error | Description | How to Avoid |
|---|---|---|
| Skipping pressing | Leaving seams unpressed can result in a less professional look. | Always press seams as you go for a crisp finish. |
| Ignoring fabric properties | Using the wrong thread or adhesive for the fabric type can weaken the overall structure. | Know your materials and choose appropriate tools. |
| Neglecting seam allowances | Cutting seams too close can lead to fraying and weakening. | Leave adequate seam allowances for durability. |
| Forgetting closures | Not properly integrating buttons, zippers, or other fasteners can disrupt functionality. | Ensure each design element is well thought out before completing. |
Care Instructions for Your Finished Panel
Proper maintenance plays a crucial role in ensuring the longevity and appearance of your beautifully crafted textile piece. Following a few essential guidelines will help preserve its quality, keeping it vibrant and delightful for years to come.
Here are some recommended practices for looking after your creation:
| Care Method | Description |
|---|---|
| Washing | Hand wash in cold water with mild detergent. Avoid machine washing to prevent damage. |
| Drying | Lay flat to dry or hang in a shaded area away from direct sunlight to prevent fading. |
| Ironing | Iron on a low setting if necessary, placing a cloth between the iron and fabric to avoid burns. |
| Storage | Store in a cool, dry place. Avoid folding for long periods to prevent creases and stress on the fibers. |
| Stains | Treat stains promptly with a gentle stain remover, dabbing rather than rubbing to avoid fabric damage. |
Following these care instructions will help maintain the beauty of your textile work, allowing it to remain a cherished piece for many occasions to come.
Q&A: Finishing center panel charlie caftan
What materials do I need to finish the center panel of Charlie Caftan?
To finish the center panel of the Charlie Caftan, you will need a few essential materials. Firstly, choose your fabric based on the design you want; cotton or linen are popular choices. You’ll also need sewing tools such as scissors, pins, and a sewing machine. Don’t forget thread that matches your fabric, interfacing for added structure, and possibly a fabric marker for marking your measurements. If you plan to add embellishments like embroidery or appliqué, gather those materials as well. Make sure you have a measuring tape to ensure accurate cutting and sewing. Having these tools on hand will make the process much smoother.
Can you explain the steps to finish the center panel of the Charlie Caftan?
Certainly! Finishing the center panel of the Charlie Caftan involves several key steps. First, you’ll start by cutting your fabric according to the pattern dimensions. After cutting, it’s important to finish the edges to prevent fraying; you can use a zigzag stitch or serger for this. Next, if you’re using interfacing, apply it to the wrong side of the center panel for stability. Once that’s done, proceed with any decorative elements you wish to add, like embroidery. After embellishing, fold over and press the edges of the fabric to create a neat finish, pinning as you go. Finally, sew the edges down, making sure to keep your lines straight and even. After sewing, give the panel a final pressing for a polished look!
How do I choose the right fabric for the center panel of my Charlie Caftan?
Choosing the right fabric for the center panel of a Charlie Caftan is crucial for both aesthetics and comfort. First, consider the climate and the occasion; lightweight cotton or linen is comfortable for warm weather, while heavier fabrics like rayon can work well in cooler temperatures. Think about the drape of the fabric as well, since you want something that flows nicely without being too stiff. Pattern is also an important factor; a bold print can make a statement, while a solid color might be more versatile. Before making your final choice, consider how the fabric feels against your skin and how it will complement the overall design of your caftan.
What challenges might I encounter when finishing the center panel, and how can I overcome them?
When finishing the center panel of the Charlie Caftan, you may face a few challenges. One common issue is uneven seams, which can happen if you rush the sewing process. To overcome this, take your time and use measuring tools to maintain accuracy. Another challenge could be fraying edges; ensure you finish the edges before sewing. If you struggle with fabric slipping while you sew, consider using fabric clips instead of pins for a more secure hold. Additionally, if you’re adding embellishments and they don’t turn out as expected, remember that practice makes perfect! Don’t hesitate to practice your skills on scraps before working on your final piece.
How do you sew the inset center panel on the Closet Core Charlie Caftan?
To sew the inset center panel on the Closet Core Charlie Caftan, start by pressing the seam allowances around the perimeter of the panel piece. Pin the inset panel to the bodice at the center front, matching the stitch line. Sew carefully along the stitch line, making sure the inset lays flat without puckering. After sewing, press the seam allowances to ensure a smooth finish.
What fabric works best for sewing the Closet Core Charlie Caftan pattern?
For the Closet Core Charlie Caftan, fabrics like rayon challis, voile, crepe de chine, and batiste are ideal. These lightweight fabrics drape beautifully and are perfect for caftans, especially in warm weather. Voile offers breathability, while rayon challis provides a soft flow, making them great choices for the caftan’s loose silhouette.
How can I adjust the Charlie Caftan for someone 5’6″ when making View B?
To adjust the Closet Core Charlie Caftan View B for someone 5’6″, you may need to shorten the hem slightly. Measure the desired length and adjust the pattern accordingly, either by folding or cutting the length at the provided lengthen/shorten lines. You can also adjust the kimono sleeve length to suit the wearer’s proportions.
What steps are involved in sewing the neckline on the Closet Core Charlie Caftan?
Sewing the V neckline on the Closet Core Charlie Caftan begins by pinning the neckline facing to the bodice with right sides together. Sew along the neckline using a 1/4″ seam allowance, then clip the seam allowances around the curves and corners to reduce bulk. Press the seam allowances toward the facing, and topstitch for a clean, professional finish.
What is the function of the waist tie in the Closet Core Charlie Caftan?
The waist tie in the Closet Core Charlie Caftan helps cinch the waist, giving the otherwise loose garment some shape. You can choose between a dramatically wide waist tie or a more subtle one depending on your preferred look. If you want a flowy, relaxed fit, the waist tie can be omitted altogether.
How do you hem the Charlie Caftan for a professional finish?
To hem the Closet Core Charlie Caftan, start by pressing the hem allowances up by 1/4″ around the front and back hems. Fold the hem again to enclose the raw edge, then press. Sew the hem with a straight stitch, ensuring even tension to avoid puckering, especially when working with lightweight fabrics like chiffon or voile.
How do I sew the pleat on the Closet Core Patterns Charlie Caftan?
To sew the pleat on the Closet Core Patterns Charlie Caftan, start by folding the fabric at the marked pleat lines with wrong sides together. Press the pleat in place and sew a straight stitch along the top edge to secure it. The pleat adds volume to the gathered bodice and creates a flattering silhouette for the caftan.
What is the purpose of an interfaced panel in the Closet Core Charlie Caftan?
The interfaced panel in the Closet Core Charlie Caftan provides structure to areas like the neckline or bodice panel. By adding interfacing to the panel piece, it helps prevent the fabric from stretching or losing its shape over time, ensuring a clean, stable finish around the center front of the caftan.
How do I adjust the Closet Core Charlie Caftan for someone 5’6″?
To adjust the Closet Core Charlie Caftan for someone 5’6″, you can modify the length by shortening or lengthening the pattern at the lengthen/shorten lines. Check the yardage requirements for the longer or shorter version, and make sure the maxi or shorter version falls at a flattering point for the wearer.
Can I sew the Charlie Caftan using hand sewing techniques?
Yes, hand sewing techniques can be used to construct parts of the Closet Core Charlie Caftan, especially if you’re focusing on finer details or finishing seams like the interfaced panel or gathered bodice. Hand sewing may also be used for hems or to close the waistband or waist tie, but it will take more time compared to machine sewing.
How much yardage do I need for the Closet Core Charlie Caftan?
The yardage for the Closet Core Charlie Caftan depends on the version you’re making and the width of your fabric. Typically, you will need around 3 to 5 yards of fabric for the caftan, with fabrics like batiste and voile being popular choices for their lightweight and breathable qualities, perfect for a warm weather staple.
How should I sew the sides together along the caftan’s front bodice piece?
When sewing the sides together along the front bodice piece, pin along the side seams, ensuring the fabric is aligned and the pleat or gathered bodice remains smooth. Sew with right sides together, following the pattern’s seam allowance guidelines. Press the seams open or toward the back for a clean finish.
Is the Closet Core Charlie Caftan a warm weather staple?
Yes, the Closet Core Charlie Caftan is designed as a warm weather staple. The loose, flowing fit, combined with fabrics like batiste and voile, makes it a perfect garment for summer days, offering breathability and comfort. The optional waist tie allows you to adjust the fit for a more defined or relaxed silhouette.
What fabric works best for the wide kimono sleeve version of the Closet Core Charlie Caftan?
Fabrics like batiste, voile, chambray, or even Tencel work beautifully for the wide kimono sleeve version of the Closet Core Charlie Caftan. These lightweight fabrics create a soft drape, complementing the loose structure of the caftan while maintaining comfort and breathability for a romantic, Pacific Northwest-inspired dress.
How do I finish the 90-degree corners on the Closet Core Charlie Caftan?
To finish the 90-degree corners on the Closet Core Charlie Caftan, carefully clip the seam allowances at the corner without cutting into the stitch line. This helps reduce bulk and allows the corner to turn smoothly. After clipping, turn the fabric right side out and press the corner to achieve a clean, sharp edge.
Can I leave a comment or find more sewing tips on the Closet Case blog?
Yes, Closet Case Patterns, now known as Closet Core Patterns, has a blog with top posts on various sewing projects, including the Charlie Caftan. You can leave a comment on their blog posts, participate in sew-alongs like “Caftans and Cocktails,” and find free patterns or tutorials for extra guidance on your sewing journey.