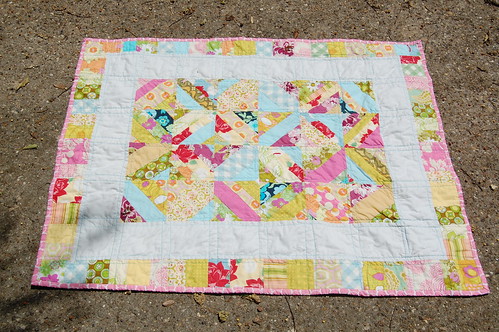
DIY Ironing Board Mobile Pressing Station for Efficient Home Organization
In the realm of home management, creating a streamlined environment is essential for maintaining order and functionality. An innovative approach to tackling the challenges of maintaining wrinkle-free garments can greatly enhance your daily routines. By devising a tailored setup that combines practicality and ease of use, you can transform the often tedious task of fabric care into a seamless experience.
This creative endeavor encourages individuals to think outside the box, incorporating elements that not only serve a specific purpose but also contribute to the overall aesthetic of your living space. Imagine a system that maximizes utility while being easily relocated, ensuring that you can keep your area tidy and well-arranged.
Embracing this initiative not only boosts productivity but also adds a touch of personalization to your chores. By investing time in crafting a specialized solution, you will foster a more inviting atmosphere that encourages routine maintenance while minimizing clutter.
Designing Your Own Ironing Board
Creating a unique flat surface for your pressing needs offers not only functionality but also the chance to express your personal style. Tailoring this essential item can enhance your workspace, making it more efficient and appealing. It’s an opportunity to customize dimensions, materials, and features that suit your preferences and available space.
When conceptualizing your pressing surface, consider the following key elements:
| Feature | Description | Benefits |
|---|---|---|
| Size | Determine the dimensions based on your usage and storage capabilities. | Ensures comfort and ease of use, fitting your personal space. |
| Material | Choose fabrics and surfaces that facilitate even heat distribution and durability. | Improves efficiency and prolongs life through better heat retention. |
| Height Adjustment | Incorporate adjustable legs to accommodate various users. | Enhances ergonomics, reducing strain during use. |
| Storage | Think about integrating shelves or compartments for tools and supplies. | Minimizes clutter, keeping essentials within reach. |
Ultimately, focusing on your intended use and personal taste will guide you in creating a personalized pressing solution that meets all your requirements while enhancing your work area.
Materials Needed for Your Project
Creating a functional and aesthetic setup requires careful selection of materials that will contribute to both the usability and design of your space. The following components are essential to ensure that your creation meets your specific needs and enhances your household efficiency.
| Material | Description |
|---|---|
| Plywood | Choose a sturdy piece of plywood to serve as the main surface. It is lightweight yet durable. |
| Fabric | Select a heat-resistant fabric for covering the main surface, ensuring it is both attractive and practical. |
| Padding | Use foam or batting to create a cushioned layer beneath the fabric for better results during your activities. |
| Legs | Look for adjustable legs to allow for easy height modifications, ensuring comfort during use. |
| Casters | Choosing wheels will provide mobility, allowing for convenient movement around your living space. |
| Fasteners | Gather screws or brackets to secure various components together securely. |
| Tools | Remember to have essential tools on hand, such as a drill, screwdriver, and measuring tape, to aid in the assembly process. |
Step-by-Step Assembly Instructions
This section provides a comprehensive guide to constructing your very own versatile pressing surface that enables a streamlined approach to garment care. By following the detailed steps outlined below, you’ll be able to create a functional piece that meets your needs and enhances your daily routines.
Step 1: Gather all the necessary materials including a suitable top surface, sturdy supports, and essential accessories such as clamps and padding. Ensure everything is in good condition and ready for use.
Step 2: Start by constructing the frame. Assemble the legs and cross supports, ensuring they have a solid and stable structure. Utilize screws or brackets as needed to secure the connections effectively.
Step 3: Attach the top surface securely to the frame. Make sure it is level and well-fixed to avoid any movement during use.
Step 4: Add padding to the top layer. This will create a cushioned area for your fabric, improving results and preventing damage.
Step 5: Install any additional features such as storage options or hangers. This will enhance functionality and keep your workspace tidy.
Step 6: Finally, conduct a thorough inspection of the entire assembly. Ensure everything is secure and make any necessary adjustments before utilizing your new setup.
Enhancing Space Efficiency in Your Home
Maximizing the utility of every square foot is essential for creating a harmonious living environment. By rethinking existing layouts and incorporating versatile tools, you can cultivate an atmosphere that is not only aesthetically pleasing but also functional. This approach allows for seamless transitions between activities and enhances overall comfort.
Creative Storage Solutions
Implementing innovative storage options can dramatically alter the perception of space within your living quarters. Utilizing vertical storage, such as shelves or cabinets that extend upwards, helps to free up floor space while maintaining accessibility. Consider multis functional furniture that can serve dual purposes; for instance, a bench that provides seating and storage beneath is an optimal choice.
Smart Arrangement of Essentials
Strategically placing items you use regularly in easily reachable spots can streamline your daily routines. Organizing tools and supplies within designated zones not only decreases clutter but also fosters a sense of order. By adopting minimalist principles, you can ensure that only necessary items occupy your space, contributing to a tranquil and inviting atmosphere.
Customizing Features for Personal Use
Enhancing your workspace with personalized elements can significantly elevate your efficiency and enjoyment during tasks. Tailoring specific functionalities not only meets your unique needs but also transforms an ordinary setup into a reflection of your style and preferences. Here are some ideas to consider when customizing your setup.
Incorporating Storage Solutions
Integrating storage options into your design can maximize convenience. Here are some suggestions:
- Drawer units for easy access to accessories.
- Hanging organizers for fabric or supplies.
- Built-in compartments for tools and materials.
Choosing the Right Surface
Selecting an appropriate surface can drastically impact your experience. Consider these options:
- Heat-resistant materials to withstand high temperatures.
- Textured surfaces for better grip on fabrics.
- Replaceable covers in various colors to match your decor.
By focusing on these areas, you can create a work area that is not only practical but also uniquely yours, leading to improved outcomes and satisfaction in your endeavors.
Tips for Maintaining Your Pressing Station
Keeping your pressing area in top condition is essential for achieving optimal results and prolonging the life of your equipment. Regular care and attention will ensure that you can enjoy smooth fabrics and efficient workflow. Here are some valuable practices to maintain your pressing area effectively.
Regular Cleaning
- Wipe down the surface after each use to remove any excess lint or residue.
- Use a damp cloth with mild detergent to cleanse stubborn stains.
- Check and clean the heating element periodically to prevent buildup.
Storage Solutions
- Keep your tools organized in designated drawers or containers to avoid clutter.
- Store heavy items on lower shelves to ensure stability and safety.
- Consider wall-mounted options for accessories to save space and improve accessibility.
With these simple yet effective maintenance tips, your pressing area will remain a reliable companion in your fabric care routine.
Q&A: Diy ironing board mobile pressing station
What materials do I need to create a DIY ironing board mobile pressing station?
To create a DIY ironing board mobile pressing station, you will need a few essential materials. Start with a sturdy base, which can be a small cart or a stable piece of furniture on wheels for mobility. You’ll need an ironing board that fits well on top of the base, two layers of fabric (a cotton cover and padding), and a heat-resistant board for the surface. Additionally, you’ll need basic tools such as a measuring tape, scissors, a staple gun, and some adhesive. Optional items to enhance your station could include storage bins for organizing supplies like spray starch and irons, as well as side hooks for hanging tools like fabric cutters.
How can I make my mobile ironing station more organized?
To enhance the organization of your mobile ironing station, consider implementing storage solutions that keep all your pressing essentials at hand yet neatly arranged. Add a pegboard to the side of your cart to hang your iron, spray starch, and other tools. Utilize small bins or baskets on different shelves to separate items like threads, measuring tools, and fabrics waiting to be pressed. You might also incorporate a fabric label maker to clearly mark the contents of each storage space. Other ideas include adding a magnetic strip to hold pins and scissors or even a small corkboard for notes and reminders regarding your sewing projects. Lastly, ensure that your most frequently used items are on the top shelf for easy access.
Is it necessary to have a mobile ironing station, or can I just use a regular ironing board?
While you can certainly use a regular ironing board, a mobile ironing station offers several advantages that can improve both efficiency and convenience. A mobile station allows you to easily transport your ironing gear around the house, adapting to your available space and ensuring you can iron wherever you have room. This is especially helpful for those who have limited room for a permanent pressing area or enjoy making clothes in different portions of their home. Additionally, a well-organized mobile station consolidates all your ironing supplies in one spot, reducing time spent looking for tools. If space management and efficiency are important to you, investing time in creating a mobile ironing station could greatly enhance your sewing projects.
What are some tips for using the mobile pressing station effectively?
To maximize the effectiveness of your mobile pressing station, start by ensuring that it is set up in a well-lit area to truly see the details of your sewing projects. Always keep your frequently used supplies, such as your iron and water spray bottle, within easy reach to minimize time spent searching for them. When planning your ironing sessions, organize fabrics by weight and texture; this will help you to press them in the most effective order. Additionally, don’t forget to regularly empty your storage bins, keeping only what you currently need, thus maintaining a clutter-free workspace. Lastly, consider incorporating a time-saving routine such as pressing fabric as you cut it, which can prevent the need for backtracking after sewing.
Can I customize the design of my mobile ironing station?
Absolutely! One of the most appealing aspects of creating a DIY mobile ironing station is the ability to customize it to meet your specific needs and style preferences. You can modify the dimensions based on the space you have available or add features such as additional shelving or drawers for more storage. The color and fabric choices for your ironing board cover can also reflect your personal style; choose patterns and colors that brighten your space and make the ironing experience more enjoyable. If you have particular tools or accessories you want to incorporate, such as a built-in fabric cutter or a place for hanging freshly pressed clothes, this is your opportunity to create a truly unique and functional piece. Remember to prioritize stability and accessibility as you customize your design!
What materials do I need to build a mobile pressing station for ironing at home?
To create a DIY mobile pressing station, you will need the following materials: a sturdy wooden board (for the ironing surface), foam padding or quilt batting (to provide cushioning), cotton fabric (to cover the ironing surface), a set of wheels or casters (for mobility), a table saw or circular saw (for cutting the wood), a staple gun (to attach the fabric to the board), and tools like screws and a drill for assembly. Additionally, you might want to include a storage component, such as shelves or hooks, to hold your ironing supplies conveniently. With these materials, you can build an efficient and portable ironing solution tailored to your space.
How does a mobile pressing station improve home organization compared to a traditional ironing board?
A mobile pressing station offers several advantages over a traditional ironing board in terms of home organization. Firstly, its mobility allows you to easily move it to different areas of your home where you have access to power outlets, making ironing more convenient and space-efficient. Secondly, a well-designed mobile station often includes additional storage for ironing supplies, such as fabric spray, starch, or additional hangers, keeping everything you need in one place. This reduces clutter and makes it easier to set up and put away your ironing tasks. Furthermore, a mobile pressing station can be tailored to fit your specific needs and preferences, allowing for better integration into your home’s design and maximizing functionality. Overall, this setup not only enhances efficiency but also contributes to a more organized living space.
How can you make a DIY pressing board for your sewing room using items from Ikea?
An easy DIY ironing board can be made using a TV tray or a Kallax shelf from Ikea. Simply wrap layers of cotton batting and wool around the tabletop ironing board surface, securing them with fabric to prevent slipping. Insul-Bright can be added underneath the top layer to help reflect heat. The thicker the layers of batting, the better the pressing results, as it helps prevent warping and makes the board more stable.
What makes a large ironing board or pressing table beneficial in the sewing room?
A big board ironing board or pressing table is beneficial because it offers more space to press larger pieces of fabric at once, reducing the need to constantly reposition. This is especially helpful for sewing retreats and large quilting projects. It also allows space underneath the board for storing batting and fabric, which keeps your sewing and pressing area organized. A large board sits on top of a regular ironing board and is easily removable when needed.
What tips should be followed when making a pressing board to keep it from slipping around?
When making a DIY pressing board, ensure the layers of cotton batting and fabric are wrapped tightly around the board and secured in place to prevent slipping. Using insul-bright or canvas on the back side of the board can provide added stability. Additionally, using a board bigger than your regular board will give you a more secure base. You can also trim excess fabric and batting to ensure everything stays in place.
How can a tabletop ironing board be customized to fit next to your sewing machine?
To customize a tabletop ironing board to fit next to your sewing machine, you can make one using a small ironing board or a tray that fits the space. Wrapping layers of batting and wool around the surface creates a smooth pressing area, while adding fabric trim or covering prevents it from shifting. This DIY pressing board can be especially useful during sewing retreats or when you need to press seams quickly without moving to a larger board.
What is the purpose of using wool in a pressing board?
Wool is used in pressing boards because it naturally absorbs and retains heat, allowing for faster and more efficient pressing. When used with cotton batting, wool creates a surface that helps press seams perfectly flat without needing to apply too much pressure. This is especially helpful when working with shirt sleeves, linen, or other delicate fabrics, as it ensures smooth results without scorching or distorting the material.
What type of batting and fabric work best for making a pressing board?
Cotton batting works best for making a pressing board, as it is heat resistant and provides a cushion for fabrics during pressing. Wool batting can also be layered for added heat retention. The fabric used to wrap the batting should be durable, like canvas or linen, to withstand high heat and frequent use. Insul-bright can be added underneath the batting for added heat reflection, making your pressing board even more efficient.
How does a big board ironing board compare to a regular board in terms of sewing and pressing efficiency?
A big board ironing board is significantly larger than a regular board, allowing you to press entire fabric panels, quilt tops, or garments like shirts without having to reposition them constantly. This improves sewing and pressing efficiency, especially during projects requiring large yardage. Additionally, a bigger board offers a stable workspace for hand sewing or trimming seams. You can find a post about different board setups and sewing room efficiency on forums like Reddit.
What are the benefits of adding a pressing board to your sewing machine setup?
Adding a pressing board next to your sewing machine allows you to press seams immediately after sewing, improving the accuracy and quality of your projects. A small ironing board or DIY pressing table can be made to fit perfectly in your sewing room, minimizing the need to move to a larger area for quick presses. It’s also space-efficient, especially when you don’t want a large ironing board in your workspace.
How can a tutorial help when discussing a hack for making a big pressing board?
A tutorial can walk you through each step of a board sewing discussion topic, such as how to make a big pressing board for your sewing room. This guide will cover essential steps like layering batting and canvas, cutting the material to the right size, and ensuring it’s bigger than your current ironing board. Many tutorials can be found online to help with this process, making it easier to create a board that works great for your needs.
What is the advantage of using a table top ironing board for new sewing projects?
A table top ironing board is ideal for new sewing projects because it’s compact and easily fits into any workspace. If you need to stand while working on projects, this type of board is convenient since it allows you to iron one section at a time without needing a full-size board. Rowenta and other brands offer options that are great for small spaces and can make pressing seams or hems more efficient.
Why should you check your inbox for DIY sewing projects?
After you subscribe to a sewing tutorial, it’s important to check your inbox for updates and instructions. Some tutorials may include patterns or hacks, like making a bigger board than your current one for ironing. Checking your inbox ensures you receive essential information such as top posts and tips on where to buy materials like batting and canvas. You might also receive personalized advice on assembling your project using supplies from Home Depot or other hardware stores.
How can you make a big pressing board that works great for your sewing room?
To make a big pressing board that works great, gather supplies like batting, canvas, and a sturdy base, such as a board from Home Depot. Wrapping the batting and fabric around the long side of the board provides a smooth surface for ironing. For better durability, the thicker the batting, the better. Together to make an even surface, this DIY project allows you to create a customized board suited to your sewing needs.
What are the advantages of using a DIY pressing board when following top posts on Reddit?
Reddit is anonymous, but following top posts on sewing-related subreddits can offer valuable insights into creating a DIY pressing board. Many users suggest tips like using batting and canvas to wrap around a board for a smoother ironing experience. Some recommend brands like Rowenta for irons, and you’ll find helpful advice on making your own setup work great. This platform helps sewists get a name for their projects and improve their techniques.