Complete Guide to Small Bust Adjustment Techniques for Perfect Fit
Achieving a flawless look often hinges on the meticulous tailoring of clothing to suit individual silhouettes. Understanding the nuances of fitting can significantly enhance your wardrobe, ensuring garments not only flatter but also provide comfort. With the right knowledge, anyone can navigate the world of clothing alterations and create outfits that enhance their unique proportions.
In this exploration, we will delve into various practices aimed at refining apparel. These approaches will equip you with the tools to transform your wardrobe, allowing each piece to align seamlessly with your personal style. Whether you’re a novice seamstress or just eager to learn more about enhancing your outfits, these insights are designed to inform and inspire.
From selecting the ideal fabrics to mastering subtle modifications, our discussion encompasses all the essential aspects of creating harmonious and stylish clothing. By employing these effective strategies, you’ll elevate not only your garments but also your overall confidence and poise.
Understanding Small Bust Adjustments
When it comes to creating beautifully tailored garments, considerations around volume can significantly impact the overall appearance and comfort of a piece. It is essential to acknowledge the nuances in shaping that ensure a flattering silhouette, especially for those with less pronounced curves. Grasping the intricacies involved in this process leads to more satisfying results in clothing design.
The Importance of Volume Manipulation
Effective volume manipulation plays a crucial role in enhancing the drape and fit of garments. By refining patterns to accommodate varying shapes, designers can achieve an aesthetically pleasing balance that enhances natural contours. Correctly managing this aspect can lead to garments that not only look good but also provide a sense of confidence and ease for the wearer.
Common Methods to Achieve the Desired Shape
Several strategies exist to address the unique needs of individuals with less volume. For instance, incorporating seams and darts can help in sculpting the fabric, ensuring it contours smoothly to the body. Additionally, adjusting the placement of seams or altering the cutting lines can vastly improve the overall shape, making the garment feel tailored and personalized. Understanding these essential methods is key to mastering the art of clothing construction.
Key Techniques for Better Fit
This section delves into essential methods that enhance the overall wearability of garments, ensuring they conform well to the individual’s physique. Mastering these approaches not only elevates comfort but also contributes to a polished appearance, enabling a more flattering silhouette.
Strategic Alterations
Implementing targeted modifications can significantly transform how clothing fits. By making precise changes at seams or darts, one can achieve a more tailored look that complements the body shape. Focusing on areas such as the side seams and shoulder lines allows for maximizing comfort while maintaining style.
Proficient Fabric Selection
Choosing the appropriate materials plays a crucial role in achieving a desirable shape. Fabrics with just the right amount of stretch can provide flexibility and support, creating a flattering drape that enhances the overall silhouette. Consideration of texture, weight, and elasticity can lead to garments that feel great and look exceptional.
Choosing the Right Bra Style
Finding the ideal undergarment can significantly enhance not only your comfort but also your overall appearance. Selecting the correct style plays a crucial role in achieving a harmonious silhouette and boosting confidence. With a variety of options available, understanding which styles complement your unique shape is essential.
Cups and Coverage: The type of cup can greatly influence how your clothing fits. Demi-cups offer a more relaxed look, while full-coverage designs provide support and are perfect for a polished finish. Consider trying different shapes to see what feels best.
Support Features: Various bras offer different levels of support. Underwire styles often provide lift, while wireless bras may deliver comfort. Consider your day-to-day activities when deciding which support features are necessary.
Strap Styles: Straps can vary widely, from traditional to racerback. Choosing the right style can affect both the way your bra sits and how it works under specific garments. Look for adjustable options that allow you to customize the fit to your liking.
Material Matters: The fabric of the bra affects not only the comfort level but also the overall look. Soft lace elements can add a touch of elegance, while breathable cotton is perfect for everyday wear. Think about the occasions for which you are shopping to find the best material.
By considering various factors such as coverage, support, strap type, and material, you can make an informed decision. This thoughtful approach will ensure you choose a silhouette that feels like a second skin while enhancing your natural shape.
Measuring for Accurate Size
Achieving the ideal silhouette begins with precise measurements. By understanding the significance of taking accurate dimensions, you can ensure your garments complement your unique form. This step is crucial in obtaining clothing that enhances your overall appearance and provides comfort.
To start the measuring process effectively, it is essential to gather the right tools and follow specific points for accuracy. Here are the necessary items:
- A soft measuring tape
- A mirror for verification
- Paper and pen for recording measurements
Follow these steps to obtain thorough measurements:
- Wear a well-fitting, supportive undergarment.
- Stand straight and relaxed in front of a mirror.
- Measure around the fullest part of your torso, keeping the tape parallel to the ground.
- Record the measurement, ensuring the tape is snug but not tight.
- For additional accuracy, measure the underbust area just below the bust line.
- Don’t forget to measure the waist and hips, as these dimensions impact overall sizing.
Once you have gathered the necessary dimensions, compare them to standard size charts. This practice helps identify the range that suits your shape best. Remember, precise measurements pave the way for garments that truly fit and flatter your body.
Common Alteration Methods Explained
When it comes to achieving a tailored look, understanding various modification strategies can make a significant difference. Different approaches cater to various garment issues, ensuring that pieces flatter the wearer while maintaining their intended design. Below is a breakdown of frequently employed alteration methods that serve to enhance garment fit and aesthetics.
| Alteration Method | Description | Best Suited For |
|---|---|---|
| Taking in | Reducing the width of a garment, typically around the sides or seams, to create a more fitted silhouette. | Loose shirts, dresses, and blouses |
| Letting out | Widening a garment by reopening seams to give more space, ideal for a more relaxed fit. | Items that are too snug, such as tailored jackets or pants |
| Hem alteration | Adjusting the length of a garment by either shortening or lengthening the bottom edge. | Pants, skirts, dresses, and sleeves |
| Altered shoulder seams | Modifying the shoulders of a garment to enhance fit and comfort, either by raising or lowering the seam. | Jackets, blazers, and tops |
| Replacing zippers | Exchanging a broken or poorly functioning zipper to restore functionality and improve appearance. | Any garment with zippers, such as dresses, skirts, and trousers |
Utilizing these methods can transform any garment, ensuring a flattering fit tailored to individual shapes and preferences. Understanding these strategies enables wearers to enhance their wardrobe effectively, promoting confidence and style.
Tips for DIY Adjustments
Making alterations to your garments can be a rewarding experience, allowing you to achieve a customized fit that enhances your overall look. With a few simple tools and techniques, you can transform off-the-rack clothing into pieces that complement your unique shape. This section offers practical advice to help you navigate the world of sewing modifications with confidence.
Essential Tools and Materials
Before starting any alterations, gather the necessary supplies to ensure a smooth process. Having the right tools on hand can make all the difference in achieving an ideal outcome.
| Tool | Purpose |
|---|---|
| Measuring Tape | Accurate measurements are crucial for successful modifications. |
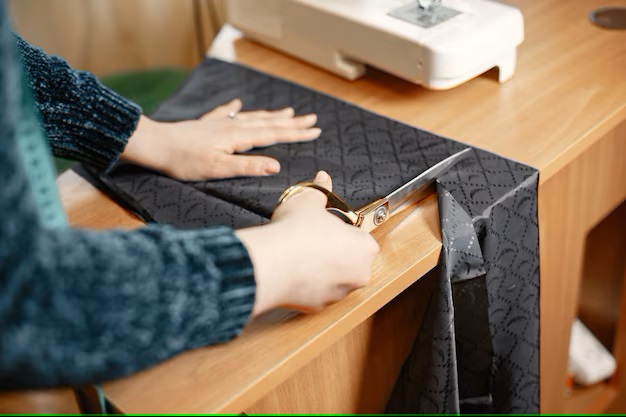
| Fabric Scissors | High-quality scissors ensure clean cuts for a professional finish. |
| Needles and Thread | Choose thread that matches your fabric to maintain a seamless appearance. |
| Seam Ripper | Helps to undo stitching mistakes or remove existing seams easily. |
| Tailor’s Chalk | Used for marking adjustments directly on the fabric before cutting. |
Techniques for Effective Alterations
Once you have your materials ready, consider the following strategies to achieve the best results with your tailoring endeavors:
- Start with minor tweaks to gain confidence before tackling larger changes.
- Always try on the garment after making preliminary adjustments to assess the fit.
- Securely pin your adjustments in place to visualize the final outcome before stitching.
- Take your time when sewing; rushing can lead to mistakes that are difficult to fix.
With patience and practice, your skillset will grow, enabling you to make successful modifications that flatter your silhouette beautifully.
Q&A: How to do a small bust adjustment
What are some common techniques for adjusting patterns for a small bust?
When adjusting patterns for a small bust, there are several techniques you can use. One of the most common methods is the “small bust adjustment” which involves shortening the front bodice piece to accommodate less fabric over the bust area. This can be done by pinching out excess fabric from the center front or using a combination of both horizontal and vertical darts to create a better shape. Additionally, you can consider adjusting the armholes and neckline, as these areas might need to be altered to maintain proportion and fit. Make sure to double-check the fit by making a muslin (test garment) before cutting your final fabric!
How do I know if I need to make a small bust adjustment?
To determine if you need a small bust adjustment, try on a fitted garment that you’ve made or purchased. Pay attention to how the bodice fits around your bust area. If you notice excess fabric pooling around the bust, gaping in the armholes, or the shoulder seams falling off, these are signs that a small bust adjustment is necessary. Additionally, if you find that a lot of patterns are too loose at the bust while the rest of the garment fits well, this indicates that you may need to adjust your patterns for a better fit. A fit test with a muslin can also help visualize where adjustments are required.
Can I alter ready-to-wear clothing for a better fit around my small bust?
Yes, you can alter ready-to-wear clothing to achieve a better fit for a small bust! A tailor can help with adjustments like taking in the side seams or adding darts to the bust area for a more tailored shape. If you’re comfortable with DIY alterations, consider making small vertical darts or tacking down excess fabric at the bust to smooth out the fit. Changing the position of the shoulder seams might also help achieve a better line. Keep in mind that alterations can vary in complexity, so it’s important to assess the garment and use the technique that best suits your skills and the fabric type.
What are the benefits of making small bust adjustments in sewing patterns?
The benefits of making small bust adjustments in sewing patterns are significant. Firstly, it allows for a more tailored and flattering fit, which not only enhances your figure but also boosts your confidence in wearing the garment. By addressing fit issues specific to a smaller bust, you can minimize gaping and excess fabric, leading to garments that look more professional and comfortable. Additionally, adjusting patterns ensures that the pattern’s proportionality is maintained, which is crucial for aesthetics. Ultimately, taking the time to make these adjustments can result in a wardrobe filled with pieces that fit perfectly and feel great to wear.
Are there any specific patterns or styles that work best for small bust adjustments?
Certain patterns and styles are more accommodating for small bust adjustments. Generally, styles with a more fitted bodice, like princess seams, work well because they allow for targeted adjustments that can enhance the shape of your figure. Additionally, darted bodices, wrap tops, and styles with adjustable elements (like ties or gathers) can effectively make alterations. When looking for patterns, opt for those that feature detailed construction methods such as darts or darts integrated into seams, as these provide more options for fit adjustments. Consequently, a little research into pattern choices can significantly ease the fitting process for small bust adjustments.
What are the most common adjustment techniques for achieving a perfect fit for small bust sizes?
When it comes to adjusting patterns for small bust sizes, several techniques can be applied to ensure a better fit. The most common methods include: 1. **Small Bust Adjustment (SBA)**: This involves shortening the bodice length and easing the fabric to remove excess material. It’s essential to make sure the darts or seams are properly repositioned. 2. **Dart Placement Adjustment**: If you’re using darts, their placement may need to be adjusted to fit the smaller bust correctly. This often includes moving the darts closer together or changing their angle. 3. **Princess Seams**: Utilizing princess seams instead of darts can be more flattering for small busts, allowing for more control over shaping. 4. **Fabric Choice**: Choosing the right fabric can also make a difference; fabrics with some stretch can create a better fit. It’s beneficial to combine these techniques based on the style of the garment to enhance both fit and comfort.
Can you recommend some resources or tools that help with small bust adjustment techniques?
Absolutely! There are several resources and tools that can assist you with mastering small bust adjustment techniques. Here are some recommendations: 1. **Sewing Books**: Look for books focused on fitting and alterations such as “Fit for Real People” by Palmer/Pletsch or “Sewing for the Small Bust” by Tessa Kiros. These often contain detailed instructions and illustrations for various adjustment techniques. 2. **Online Courses and Tutorials**: Websites like Craftsy or YouTube offer numerous tutorials that visually guide you through the SBA process and other fitting techniques. 3. **Pattern Making Software**: Tools like PatternMaker or Adobe Illustrator can help create custom patterns suited for small bust adjustments. 4. **Community Forums**: Joining sewing communities on platforms like Reddit or Facebook can also provide insight and personal experiences from other sewists, which can be invaluable as you refine your skills. Utilizing these resources can significantly improve your understanding and execution of fitting adjustments for small bust sizes.
What is a full bust adjustment (FBA), and when should I make it?
A full bust adjustment (FBA) is necessary when your bust measurement exceeds the size range of a given pattern. If you find that a pattern is loose in the bust or you need to accommodate a larger cup size, an FBA helps to add fabric to the bust area. This adjustment typically involves marking your bust point on the pattern, drawing a line from the bust apex to the side seam, and pivoting to create new dart legs.
How do I adjust a pattern piece for a smaller cup size?
To adjust a pattern piece for a smaller cup size, first determine the difference between your actual bust measurement and the standard measurement for the size you would like. If you are smaller than a B cup, you may need to do a small bust adjustment (SBA). This involves reducing the bust dart or eliminating it altogether, depending on how much smaller your bust is compared to the original pattern. Be sure to mark your new dart point and redraw the side seam and hem accordingly.
What is the process for marking and cutting a bust dart?
To mark and cut a bust dart, first identify your bust point on the pattern piece. Draw a line from the bust point to the dart point, leaving a small seam allowance. Use a small paper hinge at the dart point to pivot and open the dart. When you cut into the seam, ensure you do not cut all the way through, so the dart remains attached at the hinge. This allows for accurate fitting when sewing the dart.
How do I draw a line perpendicular to the grainline when making bust adjustments?
To draw a line perpendicular to the grainline, place a ruler along the grainline on your pattern piece. Use a right angle to mark a line that intersects at the bust point, ensuring that it is square to the grainline. This will help you maintain the pattern’s structural integrity while making adjustments, particularly for the dart and side seam.
How do I measure the actual bust and high bust for pattern adjustments?
To measure your actual bust, wrap a measuring tape around the fullest part of your bust while keeping it level. For the high bust, measure around the body just above the bust apex, under the arms. The difference between these measurements will inform you if you need a full bust adjustment (FBA) or a small bust adjustment (SBA) based on how patterns are drafted.
How do I accurately trace my pattern pieces for a full bust adjustment?
To accurately trace your pattern pieces for a full bust adjustment, start by laying the original pattern flat on a smooth work surface. Ensure the armscye and side seam are aligned properly. Trace around the front piece, making sure to include seam lines, bust points, and any markings for the waist dart. This will serve as the foundation for making the necessary adjustments, such as pivoting at the bust to accommodate your full bust measurement.
How do I determine if I need to make a smaller dart in my pattern?
To determine if you need to make a smaller dart, first check your actual bust measurement against the pattern size. If your bust is smaller than the pattern’s intended size—especially if you have a C cup or less—you may need to reduce the dart. Assess the fit by trying on a muslin version of your garment and noting any excess fabric in the bust area. Adjust the dart size and position accordingly, keeping the original bust point in mind.
What adjustments are necessary for a side dart in relation to a full bust?
When adjusting a side dart for a full bust, you’ll want to ensure that the dart aligns properly with your bust apex. If your bust is smaller than indicated in the pattern, you may need to make the dart smaller. Conversely, if you have a larger bust size, you might need to pivot at the bust to add more fullness to the dart. Make sure to adjust the front side seam to create a smooth line that transitions from the dart to the rest of the pattern.
How does my bra size influence the adjustments I need to make on my sewing patterns?
Your bra size plays a crucial role in determining the adjustments you’ll need to make on your sewing patterns. If you’re a C cup, for instance, your bust measurement will be larger than someone with a smaller cup size. This will likely necessitate a full bust adjustment (FBA) or possibly a small bust adjustment (SBA) if your measurements indicate a smaller size. Knowing your bra size can help guide you in understanding how patterns fit and which areas need adjustments to achieve the desired fit throughout your sewing journey.
What should I consider when determining if I need to do a small bust adjustment (SBA)?
When determining if you need to do a small bust adjustment (SBA), compare your high bust and full bust measurements. If your upper bust measurement is significantly smaller than your full bust measurement, it’s likely that you need a SBA. Additionally, assess how the pattern fits across your chest and if there is excess fabric in that area. If your bust measurement falls between sizes, such as size small and size 8, this adjustment will help achieve a better fit.
How do I adjust the dart when I need to remove fullness for a smaller bust?
To adjust the dart when you need to remove fullness for a smaller bust, start by marking your original bust point on the pattern. If your bust measurement falls into the extra small category, you may consider eliminating the dart altogether. Afterward, redraw the dart, keeping the new bust measurement in mind, and ensure that the new dart legs align properly. This will help you create a smoother fit, especially when the center of your body is taken into account.
What steps should I take to ensure my pattern fits correctly if my upper bust is significantly smaller than my full bust?
If your upper bust is significantly smaller than your full bust, you will need to make this adjustment in your pattern. First, measure your chest measurement and determine how much you need to remove to fit properly. You may need to shorten the back bodice to create a balanced look. After identifying the necessary changes, draw a line parallel to the center front and adjust the dart accordingly, whether that involves reducing its size or eliminating it entirely.
How can I achieve a balanced fit when adjusting a pattern for a smaller bust size?
To achieve a balanced fit when adjusting a pattern for a smaller bust size, begin by ensuring that your dart placement aligns correctly with your bust point. If your size is small and your measurements indicate that a smaller dart is required, you can also consider adjusting the armscye and side seams. Make sure to remove any excess fabric while keeping the overall shape of the garment intact. This will help maintain the proportions and allow the pattern to complement your figure throughout the sewing world.