Creative DIY Headboard Ideas for a Stylish Bedroom Under $15
If you’re on the hunt for a cost-effective solution to transform your bedroom, consider creating an eye-catching backdrop for your bed that won’t break the bank. With just a little creativity, it’s possible to achieve a stylish look for less than 15 units of currency. Focus on using materials that you may already have or can easily obtain without spending a fortune.
One clever approach is to utilize repurposed wooden pallets. These can often be found for free or at a very low cost. Simply sand them down and attach them to the wall behind your bed for a rustic vibe. Alternatively, fabric remnants from previous projects can be turned into a lovely upholstered panel. This method not only adds color and texture but can also be customized to fit your personal style.
Another option is to paint a large canvas or a piece of plywood in a bold color, turning it into a statement piece. This option allows complete freedom in terms of design, and you can easily switch it up whenever you feel like refreshing the space. With these simple and creative strategies, enhancing your sleeping area becomes an enjoyable and budget-friendly endeavor.
Using Pallets for a Rustic Headboard
Gather wooden pallets from local stores or online marketplaces. Ensure they are clean and free from harmful chemicals. Dismantle the pallets carefully using a pry bar to avoid damaging the wood.
Sand down each piece to smooth out rough edges. This enhances safety and improves the aesthetic. Arrange the planks to create your desired shape and size for the backrest. Consider different orientations–horizontal or vertical–for added character.
Connect the pieces using wood screws or a strong adhesive. Reinforce with a backing board for stability. Paint or stain the wood if desired, and allow it to dry completely before installation.
Mounting the structure on the wall gives a spacious feel. Alternatively, attach legs to create a freestanding version that can be moved around. Enhance the feel with cushions or fairy lights to add warmth.
Finish by securing it carefully to prevent wobbling. This approach not only maximizes your space but also introduces a charming, rustic element to your bedroom decor.
Transforming Old Doors into Stylish Headboards
Repurposing an old door provides a unique focal point for your sleeping quarters. Begin by sourcing a door from thrift stores, garage sales, or your own home. Look for doors that have interesting textures, patterns, or colors.
First, clean the door thoroughly to remove dust and dirt. If desired, lightly sand any rough edges or surfaces for a smooth finish. Apply a coat of paint or stain that complements your bedroom’s color scheme. For an added touch, consider using chalk paint for a matte finish or a wood stain to enhance natural grains.
Next, determine the door’s orientation. A horizontal layout can create a contemporary look, while a vertical arrangement can add a sense of height to the space. Secure the door to the wall using L-brackets or a French cleat system, making sure it is level and stable.
If additional comfort is desired, attach soft padding or fabric to the back of the door. Use staple guns to secure fabric tightly, ensuring a polished appearance. You can also add decorative elements like fairy lights or reclaimed wood to personalize the piece.
This project not only repurposes unused materials but also adds an element of creativity and design to the room, serving as a conversation starter for guests.
Creating a Fabric-Covered Headboard with Minimal Supplies
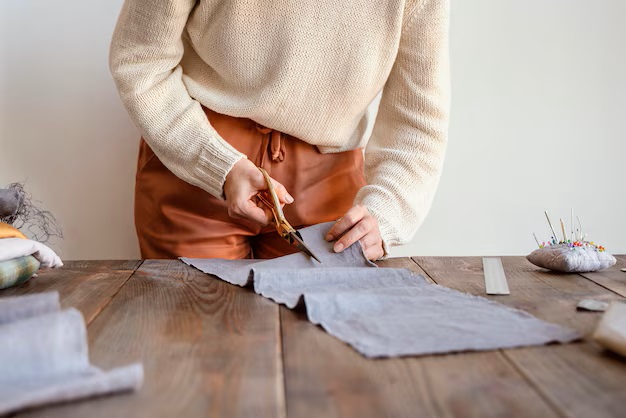
Use a piece of plywood cut to your desired size as the base for your project. A board measuring 2’x4′ works well for a queen-size bed. Purchase a yard or two of fabric that matches your decor, along with some foam padding or a thick blanket for cushioning. The fabric should preferably be durable, such as canvas or cotton blend.
Materials Needed
You will need: a piece of plywood, fabric, foam padding, a staple gun, staples, scissors, and a measuring tape. Ensure you have a pair of strong hands to help with the assembly.
Assembly Steps
Start by cutting the foam to fit the plywood, covering the entire surface. Secure the foam with your staple gun. Next, lay the fabric over the foam, ensuring it drapes evenly. Fold the excess material over the edges of the plywood and use the staple gun to attach it securely to the back, creating a clean finish. Trim any excess fabric for a polished appearance. Hang the finished product on the wall or attach it to the bed frame as per your preference.
Designing a Headboard from Upcycled Picture Frames
Gather several old picture frames in various sizes. Choose a color scheme that complements your bedroom. Clean the frames thoroughly before proceeding with assembly.
Materials Needed
| Material | Quantity |
|---|---|
| Picture Frames | 5-10 |
| Plywood or Cardboard (for backing) | 1 sheet |
| Wood Glue or Strong Adhesive | 1 tube |
| Paint or Stain (optional) | 1 can |
| Screws or Nails | As needed |
| Brackets (for mounting) | 2-4 |
Assembly Process
Begin by arranging the frames on the floor to visualize the layout. Mix larger and smaller frames to create visual interest. Use wood glue to attach frames to the plywood backing. If frames have glass, remove it to reduce weight.
Once the frames are attached, allow the glue to dry completely. Optionally, paint or stain the entire unit to create a unified look. After drying, securely attach brackets to the back for mounting. Finally, position the completed piece against the wall behind the bed.
Building a Simple Headboard with Plywood and Paint
Choose a piece of plywood measuring 48″x24″ for a streamlined construction. This size fits comfortably behind most beds while being easy to handle.
Select a paint color that complements your bedroom decor. A matte finish provides a modern look, while semi-gloss can add a subtle sheen for visual interest.
Follow these steps for your project:
- Sand the plywood surface with 120-grit sandpaper to ensure smoothness.
- Apply a coat of primer to create a uniform base for your paint.
- Once dry, paint the plywood with two coats of your chosen color, allowing adequate drying time between coats.
- Attach a wooden frame if desired for added stability; use simple 1×2 boards to create a border.
- Secure the headboard to the wall or bed frame using brackets or screws for stability.
Consider adding decorative elements such as stenciled designs or wall decals for a personalized touch. Choosing a lighter color can open up the room, while darker shades create a cozy atmosphere.
This straightforward approach yields a stylish accent that enhances your sleeping space while staying within budget limitations.
Crafting a Sectioned Headboard with Reclaimed Wood
For a rustic and stylish look, utilize reclaimed wood planks to create a sectioned design. Gather an assortment of wood pieces with varying widths and lengths to add visual interest. Cut these pieces to the desired height for your project, typically around 24-36 inches, making sure they complement the width of your mattress.
Materials Required
Collect the following materials:
- Reclaimed wood planks
- Wood screws or nails
- Drill or hammer
- Sandpaper
- Wood stain or paint (optional)
Construction Steps
1. Preparation: Sand each plank to remove rough edges and splinters. If desired, apply a coat of wood stain or paint for color.
2. Arranging: Lay out the planks on the floor in the preferred order. Mix colors and textures for a dynamic effect.
3. Assembly: Attach the planks together using wood screws or nails. Securely fix the sections by using a horizontal piece at the back as a support beam.
4. Mounting: Fasten the assembled sectioned structure to the wall or lean it against the bed frame, ensuring stability.
This project not only enhances your sleeping space but also promotes sustainability by utilizing reclaimed materials.
Q&A: DIY Headboard for Under $15
How do you make a diy upholstered headboard for a queen bed using a simple diy method without breaking the bank?
To make a diy upholstered headboard for a queen bed, cut a sheet of plywood to match the width of your bed. Use foam to make the padded surface, then cover it with upholstery fabric, making sure the fabric is pulled tight and stapled to the back of the headboard. This simple diy project is budget-friendly and creates a cozy, stylish look that enhances any bedroom makeover.
What materials are needed for a diy padded headboard tutorial that gives a chic, modern headboard look?
For a diy padded headboard tutorial, gather a sheet of plywood, foam, batting, and your chosen upholstery fabric. You’ll also need a staple gun, scissors, and a tape measure. To get a chic finish, make sure the fabric is smooth and the corners are neatly folded. This diy project is super easy to make and adds a soft, elegant touch to your bedroom design.
How can you create a cheap diy headboard using cardboard for a guest bedroom or a quick bedroom makeover?
To make a cheap diy headboard using cardboard, cut a large cardboard box into your desired headboard shape. Glue foam or batting onto the cardboard and cover it with fabric using hot glue. This diy headboard tutorial is ideal for temporary setups like a guest bedroom, and gives a padded headboard appearance without the cost of traditional materials.
What is a great way to build a headboard for a king size bed that has a farmhouse or wooden headboard style?
To build a headboard for a king size bed in a farmhouse style, use wood planks from a home improvement store and cut them to match the width of your bed. Assemble the planks into a frame, sand them smooth, and stain or paint as desired for a rustic finish. This diy wood headboard is a sturdy and stylish option that fits perfectly in modern farmhouse decor and diy headboards you can make at home.
How can you make a diy headboard for a queen size bed using an easy diy method that creates a finished headboard with a custom look?
To make a diy headboard for a queen size bed, start with a cut piece of plywood sized to match the bedframe. Use foam and batting to create padding, then cover it with 2 to 3 yards of fabric. Staple the fabric tightly to the back and use a step-by-step easy tutorial for guidance. This easy diy project results in a finished headboard that’s both stylish and comfortable.
What is the process to turn an old headboard into a dreamy diy tufted headboard that fits a king size headboard design?
Begin by removing any existing details from the old headboard and sanding it smooth. Add foam and mark a tufting grid before drilling holes for buttons. Cover the headboard with batting and your chosen fabric, then use upholstery thread and buttons to tuft through the holes. This dreamy diy update transforms a plain headboard into a tufted headboard suitable for a king size bed.
What materials are needed to make a padded headboard that can be attached to an IKEA bedframe as part of a unique diy headboard project?
To make a padded headboard for an IKEA bedframe, you’ll need a cut-to-size board, foam, batting, and fabric. Use 2–3 yards of fabric depending on the size headboard, and staple everything neatly to the back. Once finished, attach the headboard securely to the IKEA bedframe. This unique diy approach adds personality to any ikea diy bed setup.
How do you create a queen headboard using 15 using cardboard for a lightweight diy headboard project that looks like a fabric headboard?
Cut 15 using cardboard panels to form the shape of a queen headboard. Add thin foam and cover each piece with fabric, securing with hot glue. Arrange the pieces tightly together and mount them behind the bed. The result is a lightweight diy headboard that mimics the look of a fabric headboard and works perfectly for temporary or budget-friendly headboard diy projects.
How can you make a headboard that becomes a unique headboard feature in your bedroom and fits perfectly with a new bed?
To make a headboard that stands out, choose a design that complements the style of your new bed, such as a geometric wood pattern or an arched shape with bold fabric. Use step-by-step diys to guide the process and personalize it with finishes like a painted headboard or textured upholstery. A unique headboard adds character and can instantly transform the look of the room.
What are some creative design ideas to turn an old headboard into a new headboard that feels like the perfect headboard for a modern space?
Start by sanding and priming the old surface, then choose a fresh color to create a painted headboard with a modern feel. Add trim, upholstery, or even stenciled patterns for extra flair. This type of headboard turned from something outdated into something stylish shows how a little creativity can result in a headboard like the ones in designer showcases—custom, bold, and perfectly suited for a refreshed bedroom space.