Creating Beautiful Heathers Half Square Triangle Quilt Patterns for Your Next Project
Experiment with geometric compositions to create striking visual effects in your patchwork. Combining basic shapes like rectangles and parallelograms can lead to unique arrangements that draw the eye. Consider using contrasting colors or intricate prints to enhance the dynamic of the layout.
Incorporate unexpected hues to challenge traditional color pairings. Mixing warm tones with cool shades can create depth and interest. Aim for a balanced distribution to maintain harmony across the fabric pieces and allow each section to stand out.
Think about texture as a key element. Utilize a mix of materials–like cotton, linen, and flannel–to add dimension and invite tactile interaction. Quilting with varied weights provides visual diversity and can significantly alter the overall appearance of your finished piece.
Finally, consider utilizing negative space creatively. Leaving areas unstitched or using solid-color patches can enhance the design, allowing the colorful sections to shine even brighter. Play around with layout sketches before cutting into fabric to visualize the final product.
Selecting Fabrics for Heathers Half Square Triangle Quilt
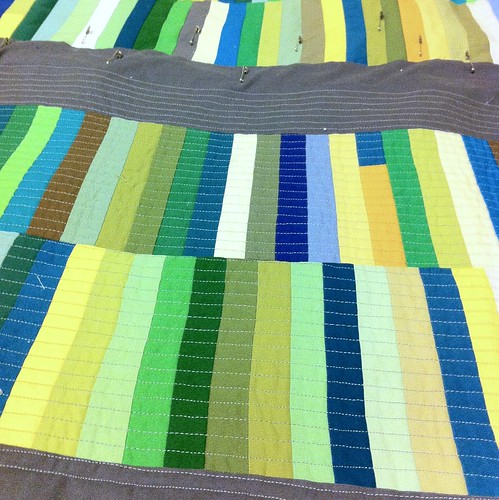
Choose a balanced mix of light, medium, and dark shades to create depth and contrast in the pattern. Opt for a dominant color that sets the tone and secondary shades that harmonize with it. Experiment with a combination of solid colors and prints to add interest; geometric patterns work effectively alongside florals or textures.
Fabric Types
Cotton is the preferred material for its durability and ease of handling. Consider using quilting cotton for structured blocks and lighter cotton blends for softer drapes. Avoid stretchy fabrics like knits, as they can distort the shape of the patches during sewing.
Utilize a color wheel to help visualize complementary and analogous colors. Test fabric combinations by laying them out side by side to see how they interact under different lighting conditions. This step is crucial in achieving a cohesive and visually appealing result.
Calculating Fabric Requirements for Your Quilt Size
To determine the amount of material needed, first decide the dimensions of your finished piece. Common sizes include baby (36” x 48”), throw (50” x 60”), twin (66” x 90”), full (84” x 96”), queen (90” x 108”), and king (108” x 108”). Once the size is established, use the following formulas.
Fabric for Patchwork Blocks
Each patch should ideally measure 5” x 5” before assembly. To figure out how many patches fit in your dimensions, divide the total area by the area of a single patch. For example, for a throw-sized creation: 50” x 60” equals 3000 square inches. Divide that by 25 square inches (5” x 5”) to get 120 patches needed. Adjust the number based on your design layout.
Backing and Batting Material
The backing should extend a few inches beyond the edges on all sides. For a throw, add at least 4” to both width and length, calculating 54” x 64” or 3 yards of fabric for backing. Batting typically follows the same dimensions as backing, allowing for those extra inches. Verify the widths of fabrics as most come in 42” or 44” for quilting options.
Step-by-Step Guide to Creating Half Square Triangles
Begin with two squares of contrasting fabric, each measuring 5 inches. Align them right sides together. Use a ruler to mark a diagonal line from one corner to the opposite corner on the top square.
Cutting and Sewing
Stitch a quarter inch from each side of the marked line. This creates two sewing lines. Cut along the marked line, separating the two sections. Press the seams open or to one side, depending on preference.
Trimming and Final Touches
Trim the blocks to a precise 4.5 inches. This ensures uniformity. Press again to flatten the pieces. Repeat the process for multiple pairs to build a collection of units for later assembly.
For best results, always measure fabric accurately and maintain consistent seam allowances for a polished finish.
Color Palette Ideas for Eye-Catching Designs
Selecting a striking color scheme can significantly enhance the allure of your project. Here are several palettes to consider:
- Bold and Bright:
- Cyan
- Magenta
- Sunshine Yellow
- Flame Orange
- Earthy Tones:
- Olive Green
- Burnt Sienna
- Mustard Yellow
- Terracotta
- Cool and Calm:
- Soft Blue
- Lavender
- Pale Grey
- Mint Green
- Monochromatic Shades:
- Deep Navy
- Medium Blue
- Light Blue
- Sky Blue
- High Contrast:
- Black
- White
- Crimson Red
- Golden Yellow
Experimenting with these combinations can lead to stunning visuals that draw attention and create interest. Consider your fabrics as part of a narrative–how the colors interact can convey emotions and set the mood.
- Choose a dominant color, then pair it with two accent hues to create balance.
- Utilize neutrals to ensure vibrant colors do not overwhelm the overall composition.
- Test combinations using swatches to observe how they complement one another in various lighting.
Incorporating Borders and Sashing in Your Quilt
Adding sashing can significantly enhance the visual appeal of your project. Choose a fabric color that complements the core blocks without overshadowing them. A neutral shade often works well, providing balance without distraction. For a bolder statement, select a contrasting fabric to add defined lines and divisions between blocks.
When considering borders, opt for a fabric that ties the entire piece together. A wide outer border can create a frame effect, encapsulating the main elements beautifully. Ensure that the border fabric coordinates with both the sashing and the blocks to maintain cohesion throughout. Experiment with different widths; wider borders can give a more substantial feel, whereas narrower choices lend a delicate touch.
To achieve a well-finished edge, pay attention to the seam allowances when attaching sashing and borders. The right seam width is crucial for aligning the overall dimensions and ensuring that all elements fit together seamlessly. Press seams flat before adding borders to reduce bulk and create a clean appearance.
Consider adding decorative elements to your sashing or borders, such as piping or contrasting stitch lines. This subtle enhancement can elevate the design and provide unique finishing details that draw the eye.
In summary, focus on color coordination, fabric choice, and proper techniques when incorporating sashing and borders to create a harmonious and visually appealing final product.
Displaying and Caring for Your Finished Quilt
To showcase your completed textile masterpiece, consider using a quilt rack or hanging it on a wall with appropriate mounting hardware. This not only allows for display but also helps in preserving the fabric and colors. Ensure that the environment is well-ventilated and away from direct sunlight to prevent fading.
Maintenance Tips
Regularly check for dust accumulation and gently shake or use a soft brush to remove it. If necessary, spot clean any stains with a mild detergent and a damp cloth. Avoid submerging your work in water, as this can cause shrinkage or fabric damage.
Caring During Storage
When not in use, fold your textile carefully and store it in a breathable cotton bag or acid-free tissue paper to prevent creasing. Avoid using plastic as it can trap moisture and lead to mildew. Keep your piece in a cool, dry space to maintain its integrity over time.
| Care Task | Frequency |
|---|---|
| Dust Removal | Monthly |
| Spot Cleaning | As needed |
| Full Cleaning | Once a year |
| Storage Check | Every 6 months |
Q&A: Heathers half square triangle quilt
How does Heather Ross incorporate half-square triangle quilt blocks into her quilting designs, and why are HSTs considered favourite block components by many quilters?
Heather Ross often uses half-square triangle quilt blocks in her whimsical and colorful quilting designs, creating playful layouts that highlight her distinctive fabrics. HSTs are considered favourite block components by many quilters because they are versatile, easy to combine into beautiful patterns, and adaptable to all levels of sewing projects. Whether used in baby quilts, scrap quilts, or full-size quilt tops, half-square triangles offer endless design possibilities and allow quilters to showcase fabric prints creatively.
Why is a rotary cutter and mat essential when making half square triangles, and how does it improve accuracy when working with small triangles?
A rotary cutter and mat are essential tools when making half square triangles because they allow for precise, clean cuts through multiple layers of fabric. When paired with a quilting ruler or a square up ruler, these tools help ensure that small triangles and finished HSTs are accurate in size. Cutting accurately is crucial for assembling a quilt top where all pieces align perfectly, and it reduces the need for excessive trimming or adjustments during piecing.
What are the basic steps and quilting techniques for making HSTs using the method of marking a line from corner to corner on paired squares?
The basic method for making HSTs starts by placing two fabric squares right sides together, drawing a line from corner to corner with a fabric-safe marking tool, and sewing a quarter-inch seam allowance on both sides of the line. After stitching, the quilter uses a rotary cutter to cut along the drawn line, separating the fabric into two half-square triangles. This method for making HSTs is popular among quilters because it is simple, efficient, and produces consistent results for building an entire quilt.
How can using Essex linen as a fabric choice enhance the texture and appearance of a half-square triangle quilt or baby quilt inspired by Heather’s designs?
Using Essex linen in a half-square triangle quilt or baby quilt adds a beautiful, textured quality that complements Heather’s bright, soft prints. Essex linen, with its slight texture and weight, gives quilts a rich, tactile feel and helps create visual depth in HST layouts. Quilters love combining Essex linen with cotton fabrics when making half square triangle patterns because the contrast enhances the overall quilt top, making it more dynamic and suitable for hand stitching or machine quilting projects.
What are some common ways to make half-square triangles, and how does using a square ruler help ensure the triangles together form precise quilt blocks?
Some common ways to make half-square triangles include the two-at-a-time method, four-at-a-time method, and strip piecing techniques. In each method of making HSTs, starting with accurate cutting and sewing is essential. Using a square ruler allows quilters to trim the finished pairs of triangles so they are perfectly sized, ensuring that the triangles together form precise, even quilt blocks. Accurate trimming helps maintain the integrity of the quilt top and keeps seams aligned across the entire project.
Why is it helpful to start with a half yard of fabric and use a consistent method of making half-square triangles when working on the first quilt I ever attempted?
Starting with a half yard of fabric gives enough material to practice multiple ways to make half-square triangles without the pressure of using expensive or limited fabric. For the first quilt I ever attempted, sticking to a consistent method of making HSTs helped me understand the importance of accuracy and repetition. Carefully piecing and trimming the pairs of triangles with a square ruler made it easier to sew the triangles together neatly and prepare them for assembly with the backing fabric to complete the quilt.