Create Stunning Baby Quilt Patterns for Your Little One’s Nursery
For those seeking to craft delightful coverings, consider a simple squares layout as an excellent starting point. This method allows for creativity in color selection and arrangement, appealing to different tastes while remaining straightforward for newcomers.
Intermediate sewing enthusiasts might enjoy trying out a format that combines triangles and squares. This approach introduces more complex shapes, resulting in striking geometric visuals. Choose a color palette that complements your theme to elevate the final result.
Advanced creators can experiment with intricate motifs or mixed-media techniques. Incorporating fabrics with diverse textures not only adds dimension but also engages the senses. Layering techniques such as appliqué or embroidery can beautifully personalize the blanket, making it a standout piece.
No matter your proficiency, embracing these distinct approaches guarantees an enjoyable crafting experience. Each idea invites exploration, ensuring that the process remains as fulfilling as the end product.
Choosing the Right Fabric for Baby Quilts
Opt for natural fibers such as cotton, which are breathable and soft against sensitive skin. Look for quilting cotton with a thread count of at least 200 for durability and comfort.
Considerations for Fabric Types
Blended fabrics can offer stretch and strength, while organic options ensure pesticide-free materials. Flannel provides extra warmth, ideal for cooler climates, while muslin is lightweight and excellent for warmer conditions.
Color and Print Selection
Choose non-toxic dyes, avoiding bright colors that may fade over time. Soft pastels and nature-inspired themes are calming, while bold patterns can stimulate visual interest. Balance between fun designs and a soothing palette.
Always prewash fabrics to prevent shrinkage and color bleeding, ensuring the final product maintains its integrity after use. Take into account ease of cleaning; machine washable fabrics are preferable for practicality.
Ultimately, select materials that align with both aesthetic preferences and functional requirements to ensure the completed project is safe, appealing, and durable.
Beginner-Friendly Quilt Patterns with Step-by-Step Instructions
Choose a simple square layout for your first project. Cut fabric squares measuring 6 inches each. Use a rotary cutter for accuracy. Arrange the squares in a grid (3×3 or 4×4) to create a visually appealing design.
Step 1: Cutting the Fabric
Select 3 different fabrics for variety. Cut your chosen fabric into squares. Ensure you have an equal number of each type. For example, if using three fabrics in a 3×3 grid, cut 9 squares total–3 of each fabric. Fabric A: 3 squares, Fabric B: 3 squares, Fabric C: 3 squares.
Step 2: Assembling the Top
Lay out the cut squares on a flat surface according to your selected design. Once satisfied with the arrangement, sew squares in rows. Start with the first two squares, placing them right sides together. Sew along one edge using a 1/4 inch seam allowance. Press the seams open to reduce bulk. Continue joining squares until the row is complete, then repeat this for remaining rows. Finally, sew the rows together. Press seams again.
Intermediate Techniques to Add Depth to Your Quilt Design
Incorporating three-dimensional elements can significantly enhance the visual appeal of your textile creation. Consider using folded fabric techniques, such as origami-style folds, which create texture and shadows. This approach can add an intricate touch to your project without complicating the overall assembly.
Layering Fabrics
Experiment with layering different fabric types to produce depth. Use sheer fabrics on top of solid ones to create an illusion of transparency. This technique is especially effective with color gradients, offering a sense of movement across the surface.
Contrast and Color Blocking
Strategically place contrasting colors next to each other to draw the eye and create depth. Color blocking can simplify the design while adding complexity. Pair bold shades with softer tones or play with complementary colors to establish a dynamic look that catches attention.
Advanced Quilting Methods for Unique Baby Quilt Styles
Consider incorporating techniques like free motion stitching to add intricate designs. This approach allows for personalized touches, transforming standard elements into standout pieces. Begin by lowering the feed dogs on your machine and practicing on scrap fabric to gain confidence.
Utilize foundation paper piecing to create complex shapes and achieve precise angles. This technique involves sewing fabric to a paper template, ensuring accuracy that is hard to achieve with traditional methods. Once familiar, try designing your own templates for distinct themes.
Try using appliqué to introduce texture and dimension. Iron-on fusible web can simplify this process. Cut shapes from fabric, adhere them using the fusible web, and finish with a decorative stitch for added stability.
Experiment with improvisational piecing to introduce randomness into your work. This method encourages spontaneity, allowing you to arrange pieces without predetermined plans. Taking risks with color and size can lead to unique compositions.
Incorporate a combination of different stitching techniques, such as straight-line quilting and echo stitching, to add depth. These methods create contrast between patterned pieces, enhancing visual interest while maintaining a cohesive look.
| Technique | Description | Benefits |
|---|---|---|
| Free Motion Stitching | Intuitive stitching allowing for creative designs | Customizable, personalizes your creation |
| Foundation Paper Piecing | Precise sewing against a paper template | Great for intricate shapes and patterns |
| Appliqué | Attaching fabric shapes onto a base | Adds texture and detail |
| Improvisational Piecing | Random assembly without set patterns | Encourages creativity and exploration |
| Varied Stitching Techniques | Combining different stitching styles | Creates depth and visual interest |
Research and practice these methods to cultivate distinctive designs and build your portfolio. Consider engaging in quilting circles to exchange ideas and techniques, fostering community and collaboration in your crafting journey.
Incorporating Personal Touches into Your Quilting Projects
Use fabric scraps from significant life events, such as a favorite outfit or a memorable trip. These elements create a narrative that adds depth and meaning to your projects.
Customized Embellishments
Add unique embellishments like hand-stitched initials, dates, or small motifs that resonate with the recipients. This creates a sense of ownership and connection that mass-produced items lack.
Color Choices and Themes
Select colors and themes that reflect the personality or interests of those who will use the piece. Consider their favorite colors, hobbies, or even family heritage. Tie in these aspects to foster a deep emotional response.
Incorporate meaningful quotes or messages into your designs by using fabric markers or pre-printed panels. Choose words that inspire or convey love, which can serve as a daily reminder of your sentiments.
Experiment with Layouts
Try out unconventional layouts to personalize the overall design. Incorporate asymmetry or alternate block sizes, making each piece distinct and one-of-a-kind.
Utilize photographs
Incorporate photos on fabric as a memorable touch. Print images onto fabric sheets and sew them into your project, creating a snapshot of unforgettable moments.
Tips for Finishing and Caring for Your Baby Quilts
Press seams thoroughly before assembly to ensure flatness and accuracy. This step enhances the final appearance and helps aligns fabric pieces seamlessly.
Use a quality batting to provide warmth while maintaining softness. Cotton or bamboo batting is a popular choice for its breathable properties.
For binding, opt for a fabric that contrasts with the main design to make a striking border. Cut binding strips at 2.5 inches wide for a durable edge, and use a bias cut for curves.
Check stitching closely; ensure all lines are secure to prevent unraveling. Regularly inspect for loose threads and knots, trimming as necessary to maintain neatness.
Wash with gentle detergent in cold water to prevent shrinking. Air dry or tumble dry on low heat to retain shape and fabric integrity.
- Store quilts in a cool, dry place away from direct sunlight to avoid fading.
- Avoid using fabric softeners that may alter the texture of the fibers.
- Consider using a breathable storage bag to protect against dust and pests.
For repairs, use a needle suitable for thick fabrics to mend any torn sections without damaging surrounding materials.
- Rotate quilts regularly during use to ensure even wear.
- Promptly address any stains using cold water and gentle soap.
By following these guidelines, your cherished projects will endure and maintain their charm for years to come.
Q&A: Baby quilt pattern
How can a beginner use a free pattern and charm pack to make a simple patchwork quilt for a baby shower gift?
A beginner can follow a quilt tutorial that includes a free pattern designed specifically for charm squares to create a simple patchwork quilt. Charm packs contain pre-cut 5-inch squares, making layout and assembly easier for those new to quilting. These free baby quilt patterns typically guide the quilter through making a quilt top quickly and accurately, resulting in a beautiful quilt that’s perfect as a baby shower gift.
What makes a fat quarter bundle ideal for making a baby quilt using an easy baby quilt tutorial?
Fat quarter bundles offer a wide variety of coordinating fabrics, which are ideal for following an easy baby quilt tutorial. The pre-cut size is perfect for creating quilt blocks, especially in simple patchwork quilts or modern baby quilt patterns. Using a fat quarter reduces cutting time and helps quilters focus on piecing and assembling the quilt top, making the process beginner friendly.
How can jelly roll strips and a log cabin layout help a quilter make a baby quilt project quickly?
Jelly roll strips, which are 2.5-inch pre-cut fabric strips, work perfectly in log cabin designs because they reduce cutting time and streamline the layout process. A quilter can use a quick baby quilt tutorial to piece the strips around a central square in a spiral pattern. This approach is ideal for creating a crib quilt or baby blanket in a short time, with visually appealing results.
Why are free baby quilt patterns from sites like Missouri Star Quilt and Fat Quarter Shop popular among new quilters?
Free baby quilt patterns from Missouri Star Quilt and Fat Quarter Shop are popular because they provide clear, step-by-step instructions, printable diagrams, and beginner-friendly techniques. Many of these tutorials feature charm packs, fat quarters, or jelly rolls and guide users through making a quilt using pre-cut fabrics. They’re perfect for creating a quick baby quilt or modern baby quilt with minimal experience.
What makes a simple baby quilt a great option for someone making their first quilt using precut fabric?
A simple baby quilt is a perfect choice for a first quilt because it typically involves basic techniques, such as sewing squares or half-square triangles, and is small in size, making the project less overwhelming. Using precut fabric like charm packs or jelly rolls simplifies the cutting process and speeds up assembly. The result is a finished quilt that’s both practical and rewarding for a beginner.
How can half-square triangles be used in a favorite baby quilt pattern to create visual interest in an easy quilt?
Half-square triangles are versatile blocks that can be arranged in various ways to add dynamic patterns to an easy quilt. In a favorite baby quilt pattern like a star baby design, these triangles form sharp points and interesting shapes. Their simplicity allows even new quilters to make the quilt look intricate while using basic piecing techniques with precut fabric.
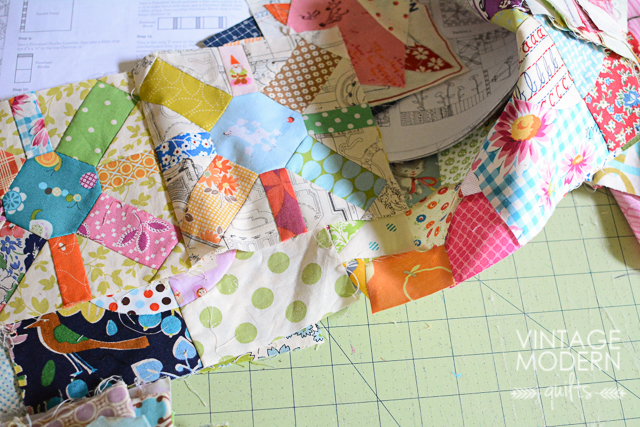
Why is a scrappy approach ideal when you want to make the quilt feel playful and unique?
A scrappy quilt uses fabric leftovers or a variety of prints, giving the quilt a lively and personalized look. When you make this quilt using a scrappy method, you embrace creativity and avoid the need for matching fabric collections. The result is a colorful and unique finished quilt that’s especially charming for a simple baby quilt or easy quilt project.
What are the advantages of using a free quilt pattern when planning the size quilt for a beginner-friendly project?
Using a free quilt pattern helps beginners focus on learning the basics without worrying about design or measurements. These patterns usually include guidance on choosing the right size quilt for the project, whether it’s a crib-size simple quilt or a throw-size finished quilt. They also offer layout diagrams and instructions that build confidence while making the quilt step-by-step.