How to Create Your Own DIY Sewing Cutting Table for Ultimate Crafting Convenience
In the world of art and handiwork, having a dedicated space to express creativity is essential. An organized area not only enhances the enjoyment of the process but also boosts productivity. A thoughtfully constructed platform tailored to specific needs can transform a chaotic workspace into a haven of inspiration and efficiency.
Many enthusiasts find that the right setup allows for seamless transitions between various tasks, making the entire experience more enjoyable. It encourages experimentation and helps keep materials neatly stored, ensuring everything is within easy reach. By customizing the dimensions and features of this essential workspace, individuals empower themselves to dive into their projects with confidence.
Venturing into the assembly of a bespoke workstation can be both an exciting and rewarding journey. As you explore the possibilities, consider factors such as functionality, aesthetics, and personal preferences. Embracing this adventure will not only yield a practical solution but also a unique statement piece that reflects individuality and passion.
Essential Materials for Your Cutting Table
When embarking on the journey of assembling a functional workspace, selecting the right components is crucial for achieving efficiency and comfort. A well-thought-out design not only enhances productivity but also ensures that tasks are completed with ease. Various elements contribute to the overall effectiveness of this setup, allowing for a seamless crafting experience.
First and foremost, a sturdy surface is vital, providing ample support and durability for various projects. Opt for materials that resist wear and tear while offering the right amount of grip to keep items secure. Additionally, consider incorporating modular storage solutions to keep tools and supplies organized, facilitating quick access and streamlined workflow.
Another important aspect includes proper lighting. Bright illumination minimizes shadows and highlights details, making intricate tasks simpler. Furthermore, ergonomic considerations should not be overlooked; adjustable height options can help accommodate different working styles and promote comfort during extended periods.
Lastly, ensure the inclusion of measuring tools and cutting mats. These accessories enhance precision and protect the underlying surface, ultimately contributing to a more enjoyable and efficient crafting process. Thoughtfully chosen materials can transform an ordinary workspace into an inspiring environment tailored to your creative endeavors.
Step-by-Step Assembly Instructions
This section provides a detailed guide to constructing an efficient workspace that caters to your needs. By following these carefully outlined steps, you will successfully bring your crafting area to life, ensuring both functionality and comfort throughout your creative projects.
Gathering Materials
Before diving into the assembly process, it is essential to gather all necessary components. Among these are a sturdy base, a spacious surface, and appropriate storage solutions. Equip yourself with tools such as a screwdriver, measuring tape, and level to ensure accuracy in your work.
Assembly Process
Begin by laying out the frame of the structure on a flat, even surface. Secure the legs to the base using the screws; ensure everything is tightly fitted. Once the frame is stable, attach the top surface, confirming it is level and secure. Finally, incorporate any storage elements, such as shelves or bins, that enhance organization and accessibility, allowing for a streamlined crafting experience.
Choosing the Right Location for Setup
Selecting an appropriate spot is crucial for enhancing your creative process and ensuring a pleasant experience while working on projects. The area should foster productivity and comfort, allowing you to focus on your artistic endeavors without distractions. Consider factors such as accessibility, lighting, and space availability when determining the ideal environment for your crafting station.
Proper lighting plays a significant role in any creative process. Natural light is preferable, as it provides an uplifting atmosphere and can help reduce eye strain. However, if the sunlight is not sufficient, invest in quality task lighting to illuminate your workspace effectively. Furthermore, ensure that your selected location allows easy movement and access to tools and materials.
| Factor | Considerations |
|---|---|
| Natural Light | Look for a spot with windows to enhance visibility; consider the time of day for optimal sun exposure. |
| Convenience | Choose a place that is near other supplies or equipment, facilitating a smooth workflow. |
| Space | Ensure ample room for movement and additional materials or projects without cluttering your area. |
| Noise Level | Opt for a quieter environment to maintain focus and minimize distractions while working. |
Ultimately, creating an inspiring and functional workspace will greatly enhance your overall enjoyment and efficiency during crafting activities. Take your time to find the perfect location that meets all your needs, and transform it into a haven for your creative pursuits.
Incorporating Storage Solutions with Design
Integrating practical storage options within a creative workspace enhances both functionality and aesthetics. The balance between organization and visual appeal is crucial, allowing for a seamless flow of ideas and materials. Thoughtfully designed solutions can transform cluttered areas into inspirational zones, encouraging productivity and enjoyment.
Utilizing vertical space is a fantastic method to maximize storage without sacrificing floor area. Shelving units, pegboards, and wall-mounted organizers not only keep essential tools within reach but also provide opportunities for artistic display. Games of color and arrangement can turn utilitarian items into eye-catching decor, enhancing the overall ambiance of the space.
In addition, incorporating multi-functional furniture can significantly increase utility. Tables with built-in drawers or storage compartments allow for easy access to supplies while maintaining a clean surface. Placing baskets or bins under a workspace promotes a tidy environment while ensuring that everything has its designated spot, making it simpler to find needed materials.
A consideration of material and color schemes is also essential when blending storage with design. Opting for harmonious colors and textures throughout the workspace can create a unified look, making it more inviting. Choosing sustainable materials not only adds an eco-friendly aspect but can also enhance the overall style of the area.
Ultimately, the fusion of storage solutions and design principles contributes to a workspace that inspires creativity and functionality. By thoughtfully incorporating elements that serve both purposes, one can cultivate an environment that supports artistic endeavors and efficient organization.
Tools You Need for Accurate Measurements
Precision is essential in any crafting project. Having the right instruments ensures that each component fits together perfectly and enhances the overall quality of your creations. Below are key tools that will help you achieve exact measurements with ease.
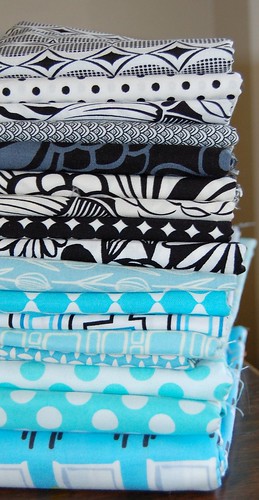
- Measuring Tape: A flexible tape allows you to measure curves and irregular shapes effortlessly.
- Ruler: A straight edge is vital for linear measurements and will keep your lines sharp and precise.
- Clear Acrylic Ruler: Transparency allows you to see the fabric beneath, ensuring accurate alignment.
- Fabric Scissors: Quality scissors are necessary for making clean cuts, which directly relates to measurement accuracy.
- Cutting Mat: A dedicated cutting surface prevents shifting and ensures that measurements remain consistent.
- Quilters Square: An invaluable tool for ensuring right angles and precise square cuts.
- Graph Paper: Useful for planning layouts and visualizing dimensions before starting on your project.
Arming yourself with these essential measuring devices will set the foundation for successful projects, allowing for greater creativity and less frustration.
Enhancing Your Table with Creative Features
Incorporating innovative elements into your workspace can transform the way you approach your projects. By thinking outside the box, you can introduce functionality and style that cater to your personal preferences and workflow. This can result in a more organized and inspiring environment, ultimately boosting productivity and creativity.
Smart Storage Solutions
Adding clever storage options allows for easy access to tools and materials, reducing clutter and increasing efficiency. Consider integrating the following ideas:
| Feature | Description |
|---|---|
| Pegboard Wall | A pegboard can hang above the workspace to hold various tools, making them visible and easy to reach. |
| Drawer Units | Incorporate under-table drawers or cart drawers to store supplies neatly out of sight. |
| Rolling Carts | A mobile cart can offer flexibility and accessibility while providing additional surface area for larger projects. |
Workspace Accessories
Enhance functionality through the addition of accessories that streamline tasks and elevate the aesthetic appeal. Consider these features:
| Accessory | Functionality |
|---|---|
| Clip-On Lighting | Good lighting is essential; clip-on lamps can illuminate your area exactly where it’s needed. |
| Rotating Cutting Mat | A rotating mat allows for easy access to all sides of your project without having to constantly reposition items. |
| Magnetic Strip | Attach a magnetic strip to hold scissors, pins, or other metal tools, keeping them readily available. |
Q&A: Sewing cutting table diy
What materials do I need to build my own sewing cutting table?
To create your own sewing cutting table, you will need a sturdy table or table legs, a large sheet of plywood or MDF for the tabletop, adjustable height legs if you want a customizable height, a cutting mat, and tools such as screws, a drill, and a saw. Additional materials like paint or laminate can be used for aesthetics, while storage bins or shelves can add functionality to keep your crafting space organized.
What are the ideal dimensions for a sewing cutting table?
The ideal dimensions for a sewing cutting table can vary based on your available space and personal needs. Generally, a height of about 30-36 inches is comfortable for most people while standing. As for the surface area, a table that’s at least 60 inches long and 36 inches wide provides ample space for cutting large fabric pieces. You can adjust these dimensions based on your workspace and the specific types of projects you typically work on.
How can I ensure my cutting table is level and stable?
To keep your cutting table level and stable, start by ensuring that the base is robust and properly constructed. When assembling, use a level tool to check each leg or side. If you are using adjustable legs, make sure they are all set to the same height. For additional stability, consider adding cross-bracing or securing the table against a wall, if possible. This will help prevent any wobbling while cutting or sewing, which is essential for precision work.
Can I incorporate storage options into my cutting table design?
Absolutely! Incorporating storage into your DIY sewing cutting table is a great way to maximize efficiency. You can add shelves beneath the tabletop for fabric storage, small cabinets for sewing supplies, or even pegboards on the sides for hanging tools. Consider using rolling carts underneath for easy access or drawer units that fit within the table frame. This blended approach keeps everything organized and within reach, enhancing your crafting experience.
Are there any safety tips I should keep in mind when building my cutting table?
Yes, ensuring safety while building your cutting table is crucial. Always wear safety goggles and a dust mask when cutting materials to protect yourself from debris. Use clamps to secure your wood while drilling or cutting to prevent movement that may lead to injuries. If using power tools, read the manufacturer’s instructions thoroughly and maintain a tidy workspace to minimize accidents. Finally, ensure that all edges are smoothed to prevent injuries from sharp corners or rough surfaces.
How do you make a DIY cutting table using IKEA Kallax units?
To make a DIY cutting table, you can place four IKEA Kallax cubes as the base and secure a large table top, like a hollow core door or piece of plywood, on top. This setup provides storage space in the cubbies and a great work surface for cutting fabric.
What is the benefit of using IKEA Kallax units in a DIY cutting table?
The benefit of using IKEA Kallax units in a DIY cutting table is the built-in storage they offer. The cubbies provide ample space to store bolts of fabric, sewing tools, and other crafting supplies, keeping your sewing space organized.
How do you choose the right height for your DIY cutting table?
Choose a table height that matches your standing height, which is typically around kitchen counter height (36 inches). This allows for a comfortable cutting and crafting experience without bending over too much.
How can you use the DIY cutting table for both cutting fabric and ironing?
You can use the top of the DIY cutting table for cutting fabric and then place an ironing board or heat-resistant mat on one side for pressing seams during your sewing projects, making it a multifunctional sewing station.
How do you incorporate storage for sewing machines in a DIY cutting table?
Incorporate storage for sewing machines by placing them inside the Kallax cubbies beneath the table. You can also store sewing machines in nearby drawers or on shelves in your sewing room.
Where can you find free patterns and tutorials for DIY sewing projects?
You can find free patterns and tutorials for DIY sewing projects on blogs, Pinterest boards, and in sewing newsletters. Many creators also share their content on world on YouTube, so you can follow along with video tutorials.
What are some DIY cutting table ideas for a sewing studio?
There are plenty of DIY cutting table ideas that can transform your sewing studio. One popular idea is to use four Kallax cubes as a base, then place a large melamine top on the cubes for extra storage underneath. This gives you enough space to fit fabric underneath and store sewing patterns. Additionally, you can add self-healing mats on top of the table for sewing and cutting projects. I’ve used this setup myself, and it’s great for working at a comfortable height. Lowe’s is a good place to find affordable building supplies like melamine and other materials for the project.
How do I set up a crafting table for sewing and cutting?
To set up a crafting table for sewing and cutting, start by selecting a sturdy surface at the right working height. A self-healing rotary cutter mat on top of the table will help protect the surface when cutting fabric. The table’s surface should be large enough to spread out fabric and pattern pieces. I recommend placing fabric instead of heavier materials like melamine on top if you need flexibility. Building your own sewing table with IKEA stuff, such as Kallax cubes for storage and a wide tabletop, is a budget-friendly option that works well in a sewing area.
What are the benefits of building your own sewing table for a sewing studio?
Building your own sewing table allows you to customize the design to suit your specific needs. A DIY cutting table can include features like drawers or shelves for interfacing, fabric yardage, and sewing patterns. Since I posted my tutorial, I’ve used my custom table to organize all of my sewing supplies, from shears to dress forms. It’s also designed to fit perfectly in my sewing area and has plenty of room underneath for storing additional tools. The great table design ensures that you have enough space for both sewing and cutting, which is crucial for larger projects like dressmaking.
How can I use a table tutorial to build a room table for sewing projects?
A table tutorial can guide you through the steps to build a functional room table for sewing projects. To start, choose a tabletop that’s wide enough to fit your fabric and sewing tools. If you’re using IKEA’s Hemnes series or similar furniture, you can easily sand and spruce up the top to the cubes for additional storage. A 4′ wide table looks perfect for most sewing needs. I’ll share tips on how to build a table that’s tall enough for cutting and pinning fabric while keeping your sewing desk clutter-free.
What’s the best way to organize a new sewing desk for small spaces?
When setting up a new sewing desk in a small space, it’s important to use vertical storage. For example, placing storage cubes or shelves on top to the cubes underneath your desk can help keep tools, fabric, and accessories organized. Make sure to leave enough space for pinning fabric on the desk while sewing as you can pin directly to the tabletop. I’m also a fan of using shortie storage bins to store smaller items like thread and needles. The table looks tidy, and you’ll have easy access to all your supplies when you start sewing.
What should I consider when setting up a sewing room table for multiple projects?
When setting up a sewing room table, it’s important to have enough space for multiple projects. Consider a design that allows for fabric cutting, pinning, and sewing all in one spot. I’ll share a design process where you can build your table using IKEA furniture like Hemnes and combine it with storage cubes for added space. Also, don’t forget to leave enough room to fit fabric and tools on the surface. This will ensure you have a table that’s functional for sewing, pinning, and organizing all your supplies.
How can I earn a small commission through affiliate links for sewing products?
To earn a small commission through affiliate links, you’ll need to join affiliate programs offered by sewing retailers or platforms like Amazon. By sharing links to products such as sewing desks, fabric, or tools, you can earn commissions when people purchase through your links. I’m also using affiliate links for sewing supplies, and it’s a great way to monetize your content. Just make sure to include a privacy policy on your website to disclose your use of affiliate links. When you upload original content like sewing tutorials, always mention that you may receive a small commission if people buy the recommended products.
What’s the best way to start sewing with a custom-built table?
To start sewing with a custom-built table, first ensure that it’s the right height for comfortable work. A 4′ table gives you enough space to fit fabric, tools, and a sewing machine. After assembling your table, sand the surface to make it smooth for pinning and cutting fabric. I’ll share some ideas for a new custom table that combines functionality with storage. It’s getting easier to find affordable building materials like cubes and tabletops from stores like IKEA. Once your table is ready, you can daydream about your next sewing project and organize your supplies for a smooth workflow.
How can I organize my inbox and redo my email setup to make it more efficient?
To organize your inbox and redo your email setup, start by decluttering any old or irrelevant emails. Use filters and folders to automatically sort incoming messages based on categories like work, personal, and newsletters. Prioritize important emails by starring or flagging them, and unsubscribe from any unnecessary mailing lists. Once your inbox is clean, it will be easier to stay on top of new emails and respond promptly. It’s also helpful to set specific times during the day to check your inbox, preventing overload and making your email management more efficient 🙂.