Learn to Quilt: Quilting
This post is part of my Learn to Quilt series. You can find all related posts {here}.
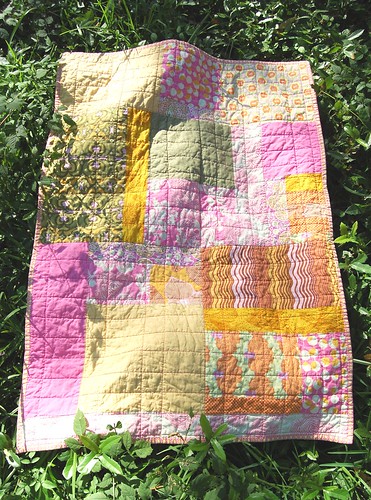
Quilting is the step where your pieced quilt top turns from fabric into a textile. It really is transformed by the quilting. Quilting adds texture and dimension. It can take a plain or simple quilt and elevate it to a work of art. Sometimes you will want to quilting to stand out and add a layer of pattern to the patchwork and sometimes you’ll want it to fade away and let your piecing be the star.
Today we’ll go over the various methods of quilting.
TIED QUILTS
Tying quilts is how most beginners seem to start out and the method has kind of a bad name. Most tied quilts I’ve seen tend to be loose, floppy, wrinkled, and are….well, sorta sad looking. The method involves pulling short lengths of yarn through your quilt sandwich at various intervals and tying them in knots. You leave about 2 inches of yarn showing above the knot.
The Purl Bee has a stylish tied quilt {here} and they share a thorough tutorial. I think the key to pulling off a tied quilt is simple piecing and a limited color palette. Try to aim for homespun charm and you just might pull of something boutique-worthy.
HAND QUILTING
For hand quilting, you are going to want to thread baste your quilt sandwich. You’ll need a quilting hoop or a Q-Snap frame. The Amish have the market cornered on amazing hand quilting and they have pretty specific standards:
They use needles called “sharps” or “betweens” which are both about 1 1/2 inches long (and pretty thin). The Amish gold standard is 10 stitches per inch. Hand quilting takes practice so start with a small project like a mini or a pillow.
For a different look, try hand quilting with Perle cotton. It’s much heavier than regular quilting thread and makes the stitches stand out. My color pop pillow was hand quilted with Finca Perle cotton,
Tips for hand quilting:
- Master the quilter’s knot
- To start quilting, hide your knot at the edge of the quilt in between the layers or bury it in the quilt sandwich. To bury a knot, insert the needle in the quilt top only and pull through (just the needle. Then take a stitch through all three layers. As you’re pulling the thread through the fabric, gently pull the knot through the quilt top so it’s buried between the layers. Do this every time you end and start a new length of thread.
QUILT-AS-YOU-GO
Quilt-as-you-go (QAYG) methods mean you get to skip basting! I just posted about a Crafty class I took about QAYG patchwork bags. That class demonstrates the basic method. Once you make a set of QAYG blocks, there are several methods for joining them to make a completed quilt.
The beautiful and impressive Cathedral Windows blocks are QAYG and you can piece/quilt them by hand or machine, Here’s a little Cathedral Windows sampler I made several years ago:
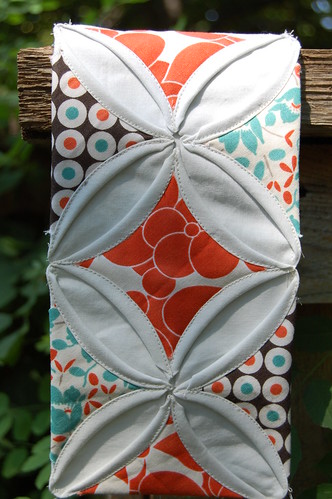
(I am teaching this class at Urban Spools.)
Rag quilts are another QAYG method.

(see my rag quilt tutorial here)
MACHINE QUILTING
Machine quilting is the method you are most likely to tackle so we’ll spend the most time on this topic today. You can quilt on any machine but there are a couple of feet that make it simpler: a walking foot for straight-line quilting and a darning foot for free motion quilting, Both of these feet are machine specific so check your manual for the right one.
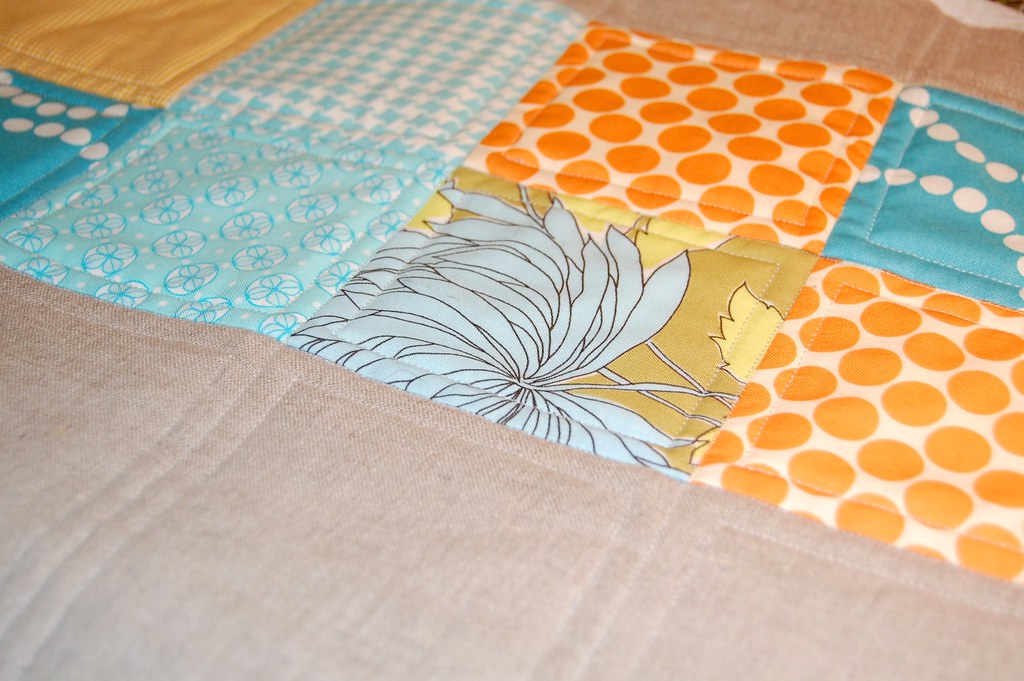
Straight-Line Quilting
You’ll need a well-basted quilt for straight-line quilting. When I know the plan is straight-line quilting. I’m more deliberate with the placement and direction of my safety pins while basting. Think about how you’ll move the quilt under the needle and where your stitches will go. It’s nice if you can plan your quilting to fall between the rows of safety pins.
Here is your basic walking foot:
It’s wider than a standard foot and it basically acts as a second set of feed dogs, helping move the fabric along. It’s great for quilting but you’ll also use it when sewing through heavy fabrics or multiple layers so it’s a good investment.
Tips for straight-line quilting:
- Mark your quilt top before basting – use masking tape as a guide or use traditional marking like Pounce Pad with chalk. I’ve had issues with chalk not washing out so read online reviews before you start marking.
- Start from one edge of the quilt and go down the middle. Alternate quilting on each side of your first line, using your hands to spread out any fullness.
- Straight-line quilting is much less forgiving of fullness in your quilt top so piece accurately.
- For your first quilt, quilt only in one direction. Lumps are more obvious when you go both ways.
- Start with a widely spaced design and fill in if desired. It’s easier to add quilting than to start with a close design and never finish because you get bored or burned out.
Free-Motion Quilting
Lower your feed dogs and put on a darning foot cause it’s time to free motion! The design possibilities of free motion quilting are endless. Leah Day has a huge amount of info and tutorials for free motion quilting on a domestic machine (versus a long arm). I recommend you start with her website, exploring the basics. There are a couple tools that I recommend for free motion quilting: Machingers gloves and a Supreme Slider . The gloves help you grip the quilt and really will make a difference in tension in your shoulders. The Machingers brand is the third one I’ve tried and it’s the best for grippiness and keeping your hands from getting too hot.
There is absolutely no substitution for the Supreme Slider. It helps your quilt glide over the sewing surface, making your stitches more even and your curves curvier. It’s not large, but when you are doing free motion, you only to to work in about a 10-inch square area at a time.
Free motion quilting tips:
- Move your quilt slowly while your needle is moving fast. Slow needles get caught and rip your fabric or break. Too fast movements can have the same result and your stitches will look jerky and uneven. Having a machine with speed control is extremely helpful.
- Use a stitch regulator. My Bernina has one and it’s an incredibly pricey add-on that isn’t available on most machines but if you’re in the market, look for that feature,
- Practice on small quilt sandwiches. A lot. People always say that they hate wasting fabric to practice quilting – so don’t waste it! Turn your practice sandwiches into a quilt using some of the joining methods I linked to above. Donate it if you don’t like seeing your newbie quilting because someone out there will appreciate it. Even if its a blind dog in the shelter.